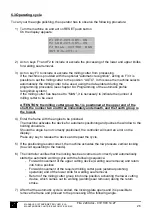
1) Act on key
↑
to move the milling cutters holding shaft upwards.
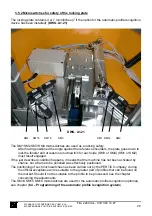
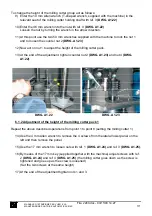
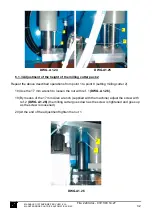
2) Open the left lateral door and, by means of the 10 mm Allen wrench and of the 46 mm
wrench remove the nut 2
(DWG. A1.31)
(unscrew by turning the key in the direction
indicated by the arrow)
3) Tighten the levers 3
(DWG. A1.32)
, the other lever is on the opposite side.
4) Loosen knobs 4 and 5
(DWG. A1.32)
, two of which are on the opposite side.
5) Remove the rear carter.
6) Close the side door and act on key
↓
to move the milling cutter holding shaft downwards.
7) Replace the milling cutter packs and mount the rear carter again.
8) Loosen levers 3 to let the upper plate go down.
9) Tighten knobs 4 and 5.
10) Act on key Start, the controller displays:
POSIT.1 MIL.CUT.N. 1
POSIT.2 MIL.CUT.N. 2
POSIT.3 MIL.CUT.N. 3
POSIT.4 MIL.CUT.N. 4
Should it be necessary to install the milling cutter No. 5 on position 1, you just have to
bring the cursor onto the first line and press key 5.
The controller memorises that the milling cutter is installed on position 1 and considers it
when the milling cutter has to be used.
11) Act on key ESC to save the entered data and go back to the previous menu.
DWG. A1.31
MANUALE D’ISTRUZIONE PER L’USO E LA
MANUTENZIONE PULITRICE AUTOMATICA CM4S
40
File: 2240.doc - 03/11/03 14:27

