25
STEP 1 :
Evaluate the three ash auger screws condition by using a light (see image 10 on page 24). There is a
possibility that the sugar released by burning corn or wheat adheres to the ash screws, causing improper ash
removal.
STEP 2 :
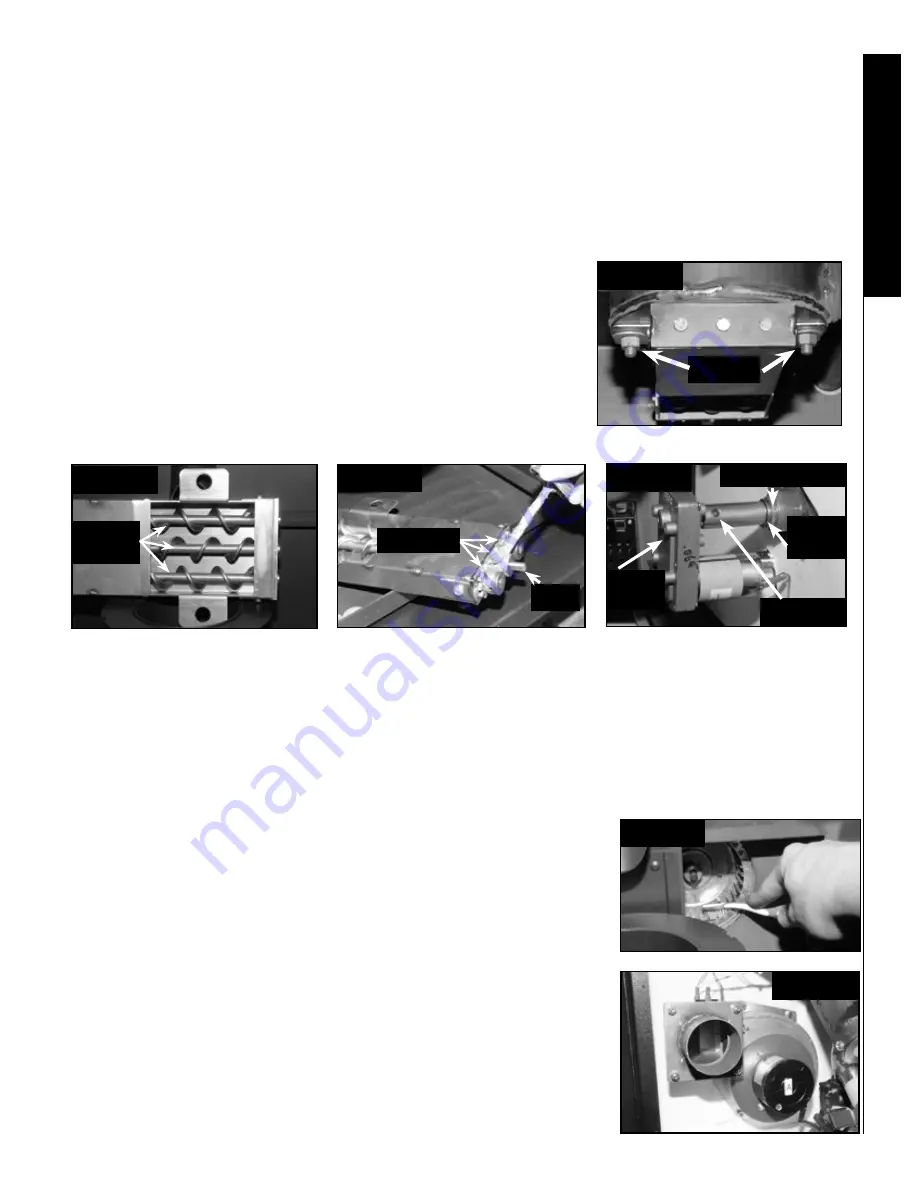
To clean the ash box: unscrew the 2 nuts under the burner using a 9/16” or 14 mm key or socket (see
image 13). Use a container with hot water that can receive the ash box. Soak the ash box for half hour (see image
14) and peel the sticky deposits by using a flat screwdriver. Soak again if necessary.
STEP 3 :
Lubricate the three sprockets with high temperature grease
before re-installing (see image 15).
Note: when installing the ash box, push completely to the unit rear and
then go forward 1 / 8 “ or 3 mm before completely tightening the nuts.
M3- Ash removal system maintenance
Image 13
Image 14
Image 15
You can clean the flywheel directly from the front of the stove, by accessing
the clean out door on the right side behind the burn-pot (see image 6 on page
23). Use long bristle brush to clean each space between the wings (see im-
age 17).
Note: Cleaning the wheel increases the pressure indicated on the gauge and
reduce or eliminate any vibration caused by the accumulation of ash.
To remove the combustion fan: Disconnect all A connectors (see image 32 on
page 31) and unscrew (7/16“ or 11mm ) the four bolts and nuts to separate
the adapter to the pipe (see image 1 on page 8) and remove the 4 nuts on the
wall to remove the fan (refer the image 18). Replace the existing joint (part
number * RA-10-560) before you reinstall the fan.
M4- Combustion fan maintenance
Image 17
Image 18
Image 16
Shaft
Ash
screws
Sprockets
Nuts
Copper sleeve
Ash
motor
Hex nuts
Snap
ring
Image 16
Maintenance Guide
Soot and flyash formation and need for removal:
The combustion products will contain small particles of fly
ash. The fly ash will collect in the exhaust venting system and restrict the flue gases flow. Incomplete combustion,
such as occurs during startup, shutdown or incorrect operation of the unit will lead to some soot formation may
collect in the exhaust venting system.
The exhaust venting system should be inspected at least once every
year to determine if cleaning is necessary.
Note:
If the mechanism jams, replace the 3 sprockets with part #RA-10-
655. Use a 1/8 or 3mm to unlock the screws on each sprockets
.
Leave a
slim gap between sprockets and bracket.


