5-1
3981-A2-GN31-20
November 1996
AAC Installation and Configuration
AAC Installation
5-1
. . . . . . . . . . . . . . . . . . . . . . . . . . . . . . . . . . . . . . . . . . . . . . . . . . . . . . . . . . . . . . . . . . . .
Mount the AAC Chassis
5-2
. . . . . . . . . . . . . . . . . . . . . . . . . . . . . . . . . . . . . . . . . . . . . . . . . . . . . . . . . . .
Install the Power Supply
5-2
. . . . . . . . . . . . . . . . . . . . . . . . . . . . . . . . . . . . . . . . . . . . . . . . . . . . . . . . . . .
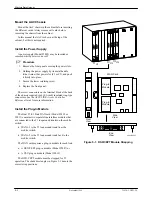
Install the Plug-In Module
5-2
. . . . . . . . . . . . . . . . . . . . . . . . . . . . . . . . . . . . . . . . . . . . . . . . . . . . . . . . . .
Install WAN Card
5-3
. . . . . . . . . . . . . . . . . . . . . . . . . . . . . . . . . . . . . . . . . . . . . . . . . . . . . . . . . . . . . . . .
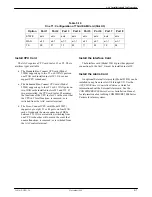
Install the E&M Card
5-3
. . . . . . . . . . . . . . . . . . . . . . . . . . . . . . . . . . . . . . . . . . . . . . . . . . . . . . . . . . . . .
Install CPU Card
5-7
. . . . . . . . . . . . . . . . . . . . . . . . . . . . . . . . . . . . . . . . . . . . . . . . . . . . . . . . . . . . . . . . .
Install the Interface Card
5-7
. . . . . . . . . . . . . . . . . . . . . . . . . . . . . . . . . . . . . . . . . . . . . . . . . . . . . . . . . . .
Install the Alarm Card
5-7
. . . . . . . . . . . . . . . . . . . . . . . . . . . . . . . . . . . . . . . . . . . . . . . . . . . . . . . . . . . . .
Mount the 50-Pin to RJ48C Adapter
5-8
. . . . . . . . . . . . . . . . . . . . . . . . . . . . . . . . . . . . . . . . . . . . . . . . . .
Connect the E&M Cards to the NIMs
5-9
. . . . . . . . . . . . . . . . . . . . . . . . . . . . . . . . . . . . . . . . . . . . . . . . .
Connect the Adapter to the Interface Card
5-10
. . . . . . . . . . . . . . . . . . . . . . . . . . . . . . . . . . . . . . . . . . . . .
Connect the Control Terminal to the Interface Card
5-10
. . . . . . . . . . . . . . . . . . . . . . . . . . . . . . . . . . . . . .
Connect the Adapter to the Mobile Switch
5-10
. . . . . . . . . . . . . . . . . . . . . . . . . . . . . . . . . . . . . . . . . . . . .
AAC Installation
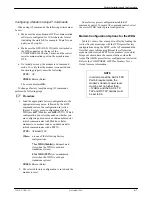
Install the AAC and its components using the
procedures described in the ACCULINK Access
Controller Reference Guide. Note the following additions
to those procedures.
1. Prior to installing the 4-wire E&M cards in the
AAC, set these cards for E&M Type V signaling
using the procedure in the ACCULINK Access
Controller Reference Guide.
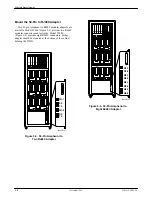
2. Install the six E&M cards in user slots U1 through
U6. Do not populate slots U7 and U8.
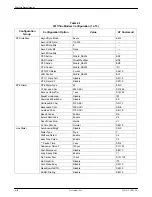
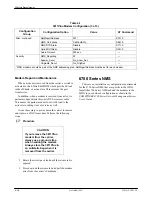
3. Configure the cards as shown in this chapter.
Configure the AAC using a VT100-compatible
terminal attached to the TERM port on the AAC,
following the instructions in the ACCULINK Access
Controller Reference Guide.
Experienced installers may wish to follow this
checklist.
Checklist
-
Mount the AAC chassis in the cabinet.
-
Install the – 48 Vdc power supply.
-
Install the DSX/CEPT or CSU plug-in module.
-
Install the WAN card.
-
Install the 4-Wire E&M cards.
-
Install the CPU card.
-
Install the Interface card.
-
Install the Alarm card (if any).
-
Mount the 50-pin Amphenol to RJ48C adapter.
-
Connect the E&M cards to the NIMs.
-
Connect the Interface card to the adapter.
-
Connect the Interface card to the control terminal.
-
Connect the adapter to the switch.
5


