– 55 –
Chapter 5 Basic Operations — Wipe
- SQ: 41, 42, 43, 44, 45, 51, 52, 53, 54
f
These can be set only when the target pattern is selected in the background.
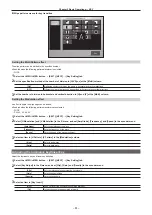
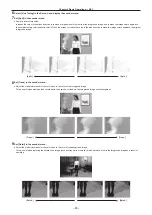
Either operate the fader lever or press the <AUTO> button to check the wipe operation.
Example) When [X] is set to [
−
50], and [Y] is set to [
−
50]
The next screen (or key) appears from the bottom left, and wipes in towards the center of the screen.
Setting the wipe direction switching mode
1
Select the <OPR> button
→
[OTHER SETTINGS]
→
[Transition] tab.
2
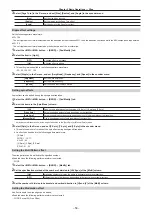
Select the items in [N/R Recall] in the [BKGD WIPE] column.
[Off]
The wipe direction ([Normal]/[Reverse]) is maintained for each background wipe preset.
[Normal]
When you change the background transition type ([MIX]/[WIPE]) or the background wipe preset, the wipe direction
switches to [Normal].
Setting trimming, aspect ratio
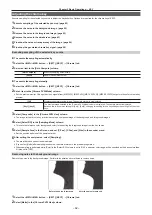
Set the behavior for the trimming and aspect ratio. This is applied to the background transition.
1
Select the <ME1>/<ME2> button
→
[BKGD]
→
[Border/Trim] tab.
2
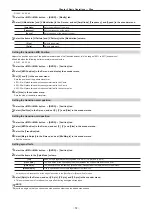
Set the items in the [Trim Mode] column.
f
Set the trimming for the pattern waveforms of SQ and 3D.
f
This is enabled when the following pattern waveforms are selected.
- SQ: 41, 51 - 54
[Off]
Does not perform trimming.
[4:3 Smooth]
Performs trimming in the 4:3 aspect ratio, and smoothly executes transition to the 16:9 video.
[Manual]
Trimming occurs at the trimming position set in [Trim] in the R menu.
3
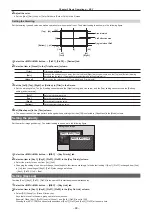
Select [Trim] in the R menu, and set the trimming positions with [Left], [Top], [Right], and [Bottom] in the encoder menu.
f
The trimming position is set as follows according to the setting of the [Pair] item in the [Trim] column.
- [OFF]: The amount of trimming is set individually for [Left], [Right], [Top], and [Bottom].
- [ON]: The amount of trimming is set as a pair for [Left] and [Right], [Top] and [Bottom], so the amount changes to be the same. (Symmetrical
vertically or horizontally)
f
The parameters can also be changed with the Positioner.
Set the behavior with [Positioner] in the encoder menu. [Positioner] switches between [L/T] and [R/B] each time you select it.
- [L/T]: [Left] and [Top] are changed.
- [R/B]: [Right] and [Bottom] are changed.
4
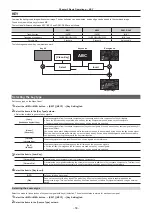
Select [Wipe Aspect] in the R menu, and set [WipeAspect] in the encoder menu.
f
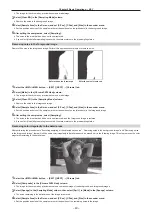
Adjust the aspect ratio of the wipe pattern.
f
The following pattern waveforms are changed.
- WIPE: 11 - 15
- SQ: 42 - 45
f
SQ41 and 51 to 54 are not applicable. The aspect ratio is adjusted with [Left], [Top], [Right], or [Bottom].
5
Select an item in [Smooth] in the [Trim] column.
[OFF]
The aspect ratio for set wipe pattern will be constant regardless of the transition.
For SQ waveform, it may become discontinuous at the edge of transition.
[ON]
The aspect ratio is changed from the aspect ratio of the preset wipe pattern to the standard ratio in accordance with the
transition.
f
Modifies the next pattern waveforms.
- WIPE: 11 - 15
- SQ: 42 - 45
f
SQ: 41, 51 to 54 and 3D: 107 are also applicable.
Setting the turn page effect
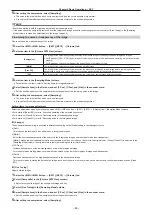
Set the parameters for the Page Turn effect.
f
Modify the following pattern waveforms.
- 3D: 99, 100, 101, 102
1
Select the <ME1>/<ME2> button
→
[BKGD]
→
[Pos/Modify] tab.
2
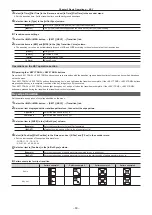
Select the item in [Light].
[OFF]
Does not add the lighting effect.
[ON]
Adds the lighting effect.
f
This setting is also applied to the following pattern waveforms.
- 3D: 109, 110
Содержание Live Production Suite Series
Страница 5: ...Please read this chapter and check the accessories before use Chapter 1 Overview ...
Страница 11: ...This chapter describes installation and connection Chapter 2 Installation and Connection ...
Страница 33: ...This chapter describes basic operations and matters to be performed prior to use Chapter 4 Preparations ...
Страница 50: ...This chapter describes menu operations Chapter 5 Basic Operations ...
Страница 107: ...This chapter describes the input output signal settings Chapter 6 Input Output Signal Settings ...
Страница 112: ... 112 Chapter 6 Input Output Signal Settings Setting MultiView displays f f Set the marker size ...
Страница 113: ...This chapter describes the configuration of operations Chapter 7 Configuring Operations ...
Страница 122: ...This chapter describes how to operate system menus Chapter 8 System Menu ...
Страница 136: ...This chapter describes plug in functions Chapter 9 External Interfaces ...
Страница 138: ...This chapter describes the dimensions and specifications of this product Chapter 10 Specifications ...
Страница 139: ... 139 Chapter 10 Specifications Dimensions Dimensions Dimensions of the Gateway Unit AV LSG10 Unit mm inch ...
Страница 140: ... 140 Chapter 10 Specifications Dimensions Dimensions of the XPT Unit AV LSX10 Unit mm inch ...
Страница 141: ... 141 Chapter 10 Specifications Dimensions Dimensions of the ME Unit AV LSM10 Unit mm inch ...
Страница 142: ... 142 Chapter 10 Specifications Dimensions Dimensions of the System Manager Unit AV LSS10 Unit mm inch ...
Страница 153: ...This chapter describes the setting menu table and terms Chapter 11 Appendix ...
Страница 176: ...Web Site https www panasonic com Panasonic Corporation 2020 ...

