


Form No. OVS16M_LC-0719
11
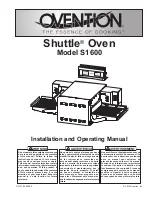
OPERATION
Programming Menu Items
Use the following procedures to edit, create, or delete menu
items and categories. These procedures require access to
password-protected screens and should be performed by
authorized personnel only.
NOTE: The USB port allows the uploading of pre-programmed
menu items from an external USB drive. Refer to the
“Uploading from a USB Drive” procedure in this section
for details.
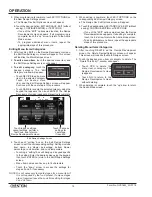
1. From the Main Recipes screen, touch the “up” arrow.
• A password keypad will appear on the touchscreen.
2. Input the password “12345”, and touch ENTER.
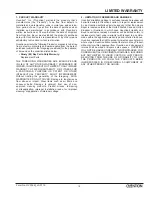
• The Admin Mode screen will appear on the touchscreen.
Temps
Recipes
Back
USB
Logs
Maint
ADMIN MODE
500˚ F
Touch to return to
Main Recipes screen.
Touch to access
Recipe Development
screen.
Touch to access
Edit Setpoint Data screen.
Touch to access
Maintenance Mode
screen.
Touch to access
USB Functions
screen.
Touch to access
Logs Detail
screen.
Admin Mode Screen
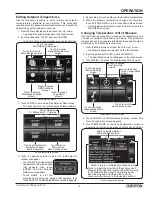
3. Touch RECIPES to access the Recipe Development
screen.
Touch to return to Admin Mode screen.
Touch to edit
an existing menu
item/category.
Touch to create
a new menu item/
category.
Touch to delete
a menu item/
category.
Recipe Development Screen
4. Touch NEW, EDIT, or DELETE on the Recipe Development
screen, depending on the desired function. Then, refer to
the appropriate procedure in this section.
Creating New Menu Items/Categories
1. After touching NEW on the Recipe Development screen,
the New Recipe/Category screen will appear. This screen
will look like the Main Recipes Screen.
2. Touch an empty box. The “Select Type” window will appear.
If no empty boxes are available, touch the “down” arrow to
scroll to the next screen.
3. Touch RECIPE to create a new
menu item or CATEGORY to
create a new category.
•
For new menu items,
the
New Recipe Settings Screen
will appear.
•
For new categories,
a keypad appears. Type the name
of the new category, then touch ENTER. The Recipe
Development screen reappears. To add menu items to
the new category:
a. Touch NEW on the Recipe Development screen.
b. Touch the new category that is now available on the
New Recipe/Category screen.
c. Touch an empty box in the new category and continue
with the next step in this procedure.
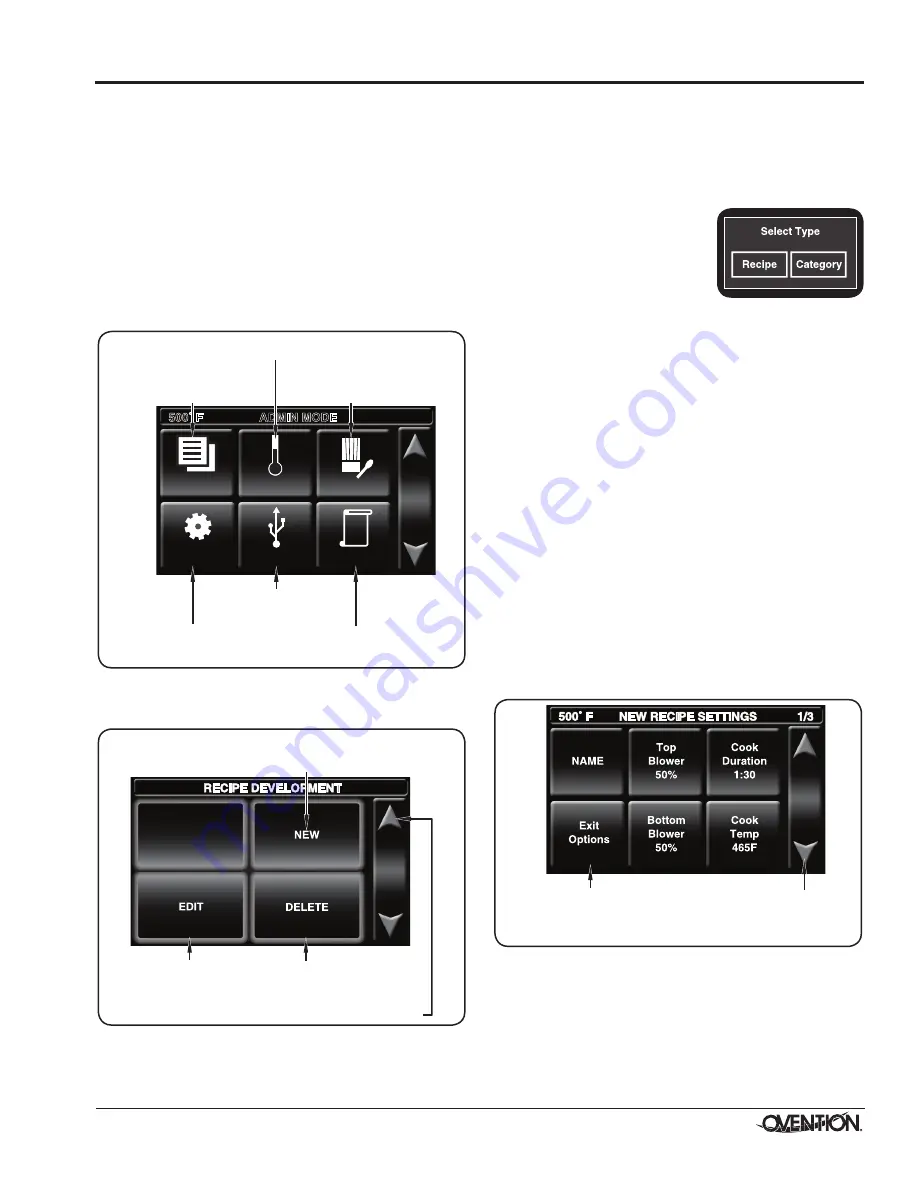
4. Touch each “setting” box on the New Recipe Settings
screen to edit the corresponding setting. Settings include
item name, top blower percentage, bottom blower
percentage, cook duration, and cook temperature.
• Touching a “setting” box will bring up a keypad specific
to the setting. Enter the desired value using the keypad,
then touch ENTER to return to the New Recipe Settings
screen.
• Menu item names can have up to 16 characters.
• Touch the “down” arrow to access the settings for stages
2 and 3. Each menu item can be programmed to have
up to three stages, depending on the food product.
Stages are programmed with unique settings to create
a customized cooking sequence for the menu item.
Touch to save settings,
cancel settings, perform a
Test Cook, and return to
Recipe Development screen.
Touch to access
settings for
next stage,
if required.
New Recipe Settings Screen
NOTE: It is not necessary to create stages for a menu item if
it is not required by the food product. If unique stages
are not required, leave the cook time setting for stages
2 and 3 at zero.
continued...