3.5.2 Chamber pressure settings
The chamber pressure settings is set on the display unit. When the baling starts, the elevator will run at its
higher set speed. When the chamber pressure surpasses the elevator slow threshold, the speed is reduced
in order to allow a higher bale density. The bale is done when set maximum chamber pressure is reached.
The plastic tying unit will then start.
Parameters that may be set on the display unit are:
Chamber max pressure: 100 - 280 bar
Elevator slow threshold: 30 - 100% of set pressure
Example:
Material: Wood chips
Set chamber pressure: 180 bar
Chamber slow threshold: 75 %
When the chamber pressure sensor registers a pressure of 135 bar (75 % of 180 bar) , the elevator speed
is reduced. The elevator will maintain the low speed until a chamber pressure of 180 bar is reached. Then
the plastic tying starts automatically.
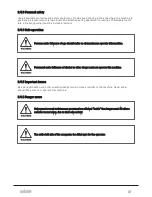
IMPORTANT: The chamber pressure must never exceed 280 bar!
3.6 PLASTIC TYING UNIT
3.6.1 Principle of operation
Laying net or film on the bale in the chamber is done by the plastic tying unit on the top of the machine.
When set maximum chamber pressure is reached, a set amount of net/film is fed into the chamber by the
feed rollers in the plastic tying unit. When the “tail” is long enough, it is grabbed by the bale and pulled. The
feed rollers stop and open, so that the net/film spreads on the bale. The feed rollers allow the net/film to
spread over the whole width of the bale. The brake engages and puts tension on the net/film. The bale is
now laid with a predefined number of layers of net/film. Afterwards, the feed rollers close again and the
net/film is cut by the knife. Finally, the chamber door opens and the bale is transported to the wrapper by
the sub conveyor. The chamber closes again and the baling resumes while the wrapper starts.
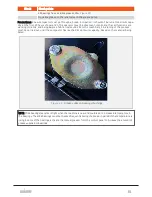
When loading the system with a new roller of net/film, shut down the machine and thread the net/film as
shown on the illustration below. In order to ease the handling of the net/film, the brake should be released.
The brake automatically disengages when opening the rollers. If this for some reason doesn't happen, this
may be done from the display unit (
section 6.1.6 "Manual controls"
) or the remote control (
) on the platform.
3 SETTINGS AND HYDRAULIC ADJUSTMENTS
27
Содержание Dens-X Compactor
Страница 14: ...1 6 DECLARATION OF CONFORMITY 1 GENERAL 14...
Страница 102: ...8 6 4 Gearbox and gears for hydraulic motors Gear oil Renolin unisyn CLP 220N 8 LUBRICATION 102...
Страница 103: ...8 7 MANUAL LUBRICATION CHARTS 8 7 1 The compactor 8 LUBRICATION 103...
Страница 104: ...8 7 2 Feed hopper F25 8 LUBRICATION 104...
Страница 105: ...8 7 3 Flexible drawbar 8 LUBRICATION 105...
Страница 109: ...10 1 MAIN POWER SUPPLY E STOP SWITCHES AND ELECTRICAL CABINET 10 ELECTRICS 109...
Страница 110: ...10 2 ELECTRICAL CABINET POWER SUPPLY RAIL 10 ELECTRICS 110...
Страница 111: ...10 3 SENSORS AND MANUAL CONTROLS 10 ELECTRICS 111...
Страница 112: ...10 4 VALVES FAN MOTORS AND PUMPS 10 ELECTRICS 112...
Страница 124: ...10 9 SENSOR OVERVIEW 10 ELECTRICS 124...
Страница 128: ...11 1 1 Complete diagram 11 HYDRAULICS 128...
Страница 129: ...11 1 2 Wrapping table chamber and elevator control 11 HYDRAULICS 129...
Страница 130: ...11 1 3 Plastic tying unit sub conveyor and feed hopper 11 HYDRAULICS 130...
Страница 131: ...11 1 4 Additional feed hopper control for F25 and chamber drive 11 HYDRAULICS 131...
Страница 133: ...11 2 VALVE OVERVIEW 11 2 1 Valve chart for Dens X 11 HYDRAULICS 133...
Страница 137: ...12 6 3 Dimensional sketch F25 operating mode 12 SPECIFICATIONS 137...
Страница 138: ...12 6 4 Dimensional sketch F25 transport mode 12 SPECIFICATIONS 138...
Страница 142: ...M Maintenance 13 69 71 INDEX 142...

