


Chapter 3
Servicing Customer-Replaceable Devices
3-7
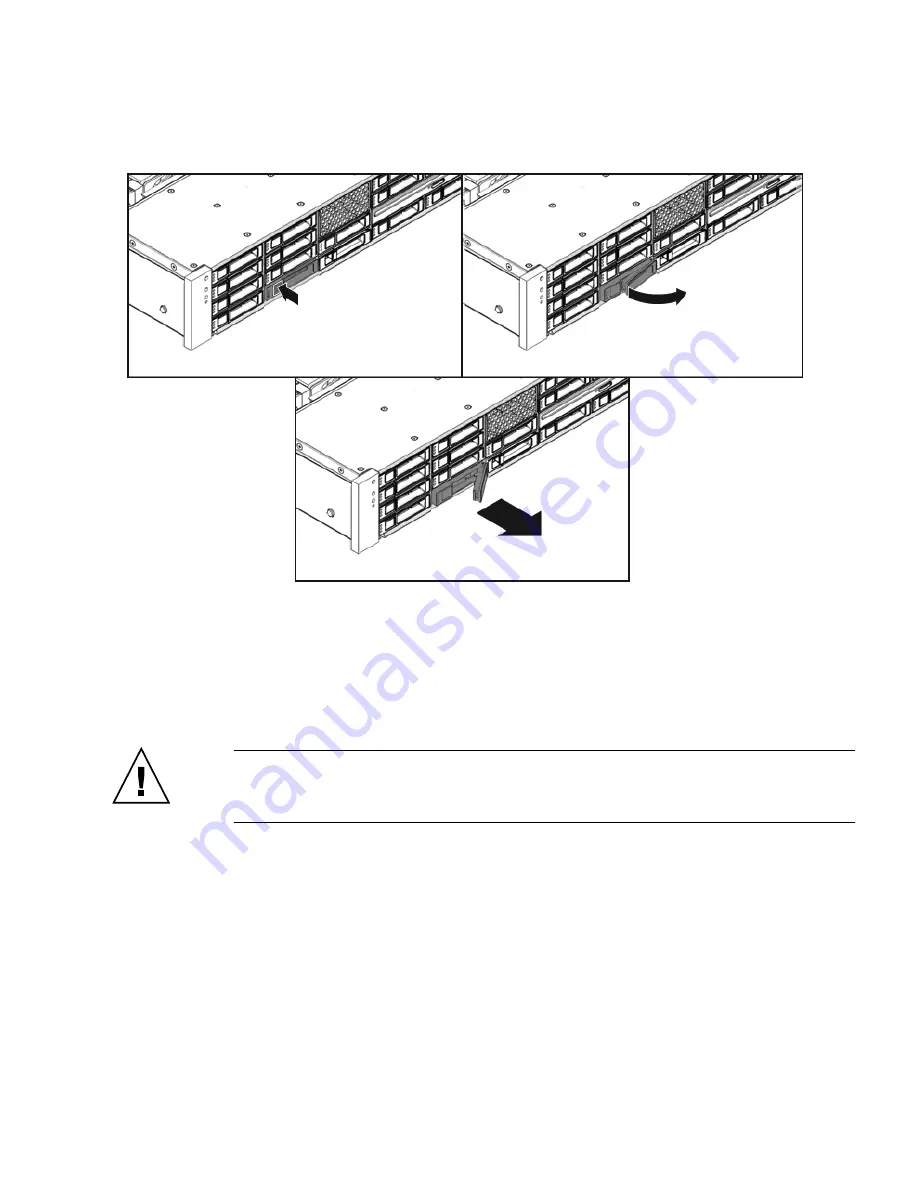
FIGURE 3-3
Locating the Drive Release Button and Latch
3.2.5
Installing a Hard Drive or SSD
Installing a drive into the Sun Fire X4240 is a two-step process. You must first install
a drive into the drive slot, and then configure that drive to the server.
Caution –
Before inserting a replacement drive, wait 15 seconds, and verify that
your monitoring or administration application has detected the missing or failed
drive.
To install a drive into a Sun Fire X4240:
1. If necessary, remove the drive fillers from the chassis.
The Sun Fire X4240 might have as many as eight drive fillers covering unoccupied
drive slots.
Содержание Sun Fire X4240
Страница 1: ...Sun Fire X4240 Server Service Manual Part No 820 3835 14 September 2010 Revision A ...
Страница 9: ...Contents ix Index Index 1 ...
Страница 10: ...x Sun Fire X4240 Server Service Manual September 2010 ...
Страница 39: ...Chapter 2 Preparing to Service the System 2 13 FIGURE 2 6 Removing the Top Cover ...
Страница 40: ...2 14 Sun Fire X4240 Server Service Manual September 2010 ...
Страница 62: ...3 22 Sun Fire X4240 Server Service Manual September 2010 FIGURE 3 15 Installing the DVD USB Module ...
Страница 76: ...4 14 Sun Fire X4240 Server Service Manual September 2010 FIGURE 4 7 Installing the Air Duct ...
Страница 83: ...Chapter 4 Servicing Motherboard Components 4 21 FIGURE 4 11 Removing a PCIe Card ...
Страница 139: ...Chapter 5 Servicing Infrastructure Boards and Components 5 29 FIGURE 5 17 Installing a PDB Cable ...
Страница 140: ...5 30 Sun Fire X4240 Server Service Manual September 2010 ...
Страница 190: ...Index 4 Sun Fire X4240 Server Service Manual September 2010 T Top Fan LED 3 11 3 14 U USB ports 1 2 X XOption CPU 4 41 ...


