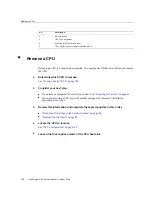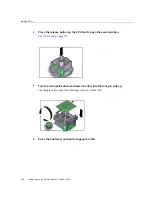
Remove a CPU
Alternate between the screws in an X pattern, turning each 1 revolution, until they are fully
removed.
6.
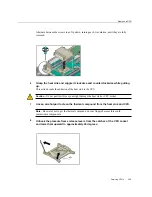
Grasp the heat sink and wiggle it clockwise and counterclockwise while pulling
up.
This action breaks the adhesion of the heat sink to the CPU.
Caution -
Do not pull forcibly as you might damage the heat sink or CPU socket.
7.
Use an alcohol pad to clean the thermal compound from the heat sink and CPU.
Note -
Be careful not to get the thermal compound on your fingers because this could
contaminate components.
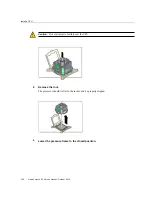
8.
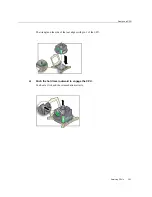
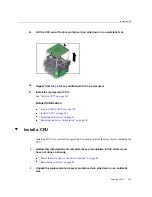
Unhook the pressure frame release levers from the catches of the CPU socket
and raise them upward to approximately 35 degrees.
Servicing CPUs
199
Содержание netra X5-2
Страница 1: ...Netra Server X5 2 Service Manual Part No E53601 03 October 2016 ...
Страница 2: ......
Страница 12: ...12 Netra Server X5 2 Service Manual October 2016 ...
Страница 20: ...20 Netra Server X5 2 Service Manual October 2016 ...
Страница 59: ...Using the Server Fault Remind Button Detecting and Managing Faults 59 ...
Страница 60: ...60 Netra Server X5 2 Service Manual October 2016 ...
Страница 123: ...Remove a Power Supply 4 Press the release tab to the left and pull on the handle Servicing Power Supplies 123 ...
Страница 128: ...128 Netra Server X5 2 Service Manual October 2016 ...
Страница 144: ...144 Netra Server X5 2 Service Manual October 2016 ...
Страница 148: ...148 Netra Server X5 2 Service Manual October 2016 ...
Страница 154: ...154 Netra Server X5 2 Service Manual October 2016 ...
Страница 180: ...180 Netra Server X5 2 Service Manual October 2016 ...
Страница 210: ...210 Netra Server X5 2 Service Manual October 2016 ...
Страница 226: ...226 Netra Server X5 2 Service Manual October 2016 ...
Страница 266: ...266 Netra Server X5 2 Service Manual October 2016 ...
Страница 274: ...274 Netra Server X5 2 Service Manual October 2016 ...

