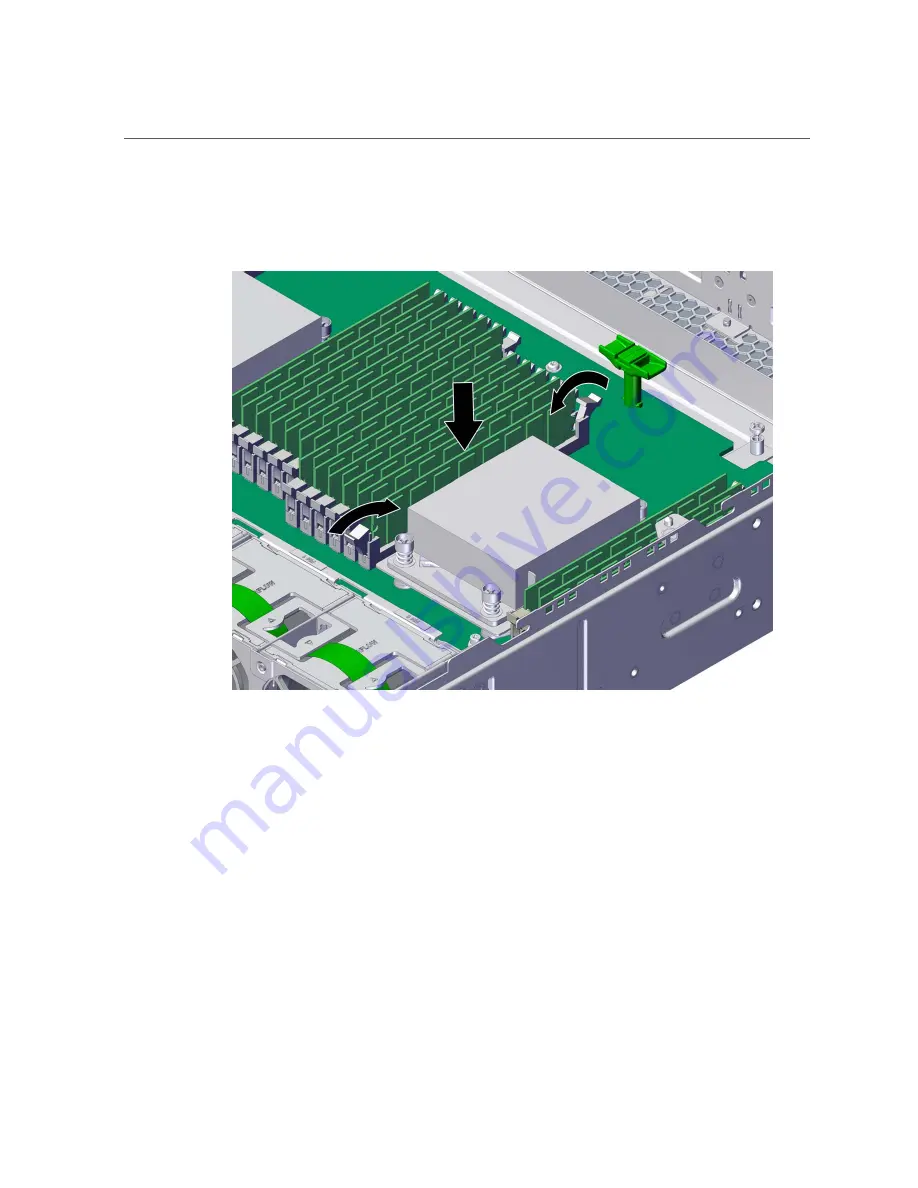
Install a DIMM
5.
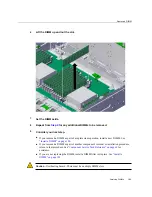
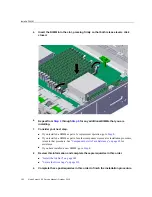
Insert the DIMM into the slot, pressing firmly so that both release levers click
closed.
6.
Repeat from
for any additional DIMMs that you are
installing.
7.
Consider your next step.
■
If you installed a DIMM as part of a replacement operation, go to
■
If you installed a DIMM as part of another component's removal or installation procedure,
return to that procedure. See
“Component Service Task Reference” on page 65
for
assistance.
■
If you have installed a new DIMM, go to
.
8.
Review this information and complete these prerequisites in this order.
■
“Install the Air Duct” on page 249
■
“Secure the Drive Cage” on page 253
9.
Complete these postrequisites in this order to finish the installation procedure.
192
Netra Server X5-2 Service Manual • October 2016
Содержание netra X5-2
Страница 1: ...Netra Server X5 2 Service Manual Part No E53601 03 October 2016 ...
Страница 2: ......
Страница 12: ...12 Netra Server X5 2 Service Manual October 2016 ...
Страница 20: ...20 Netra Server X5 2 Service Manual October 2016 ...
Страница 59: ...Using the Server Fault Remind Button Detecting and Managing Faults 59 ...
Страница 60: ...60 Netra Server X5 2 Service Manual October 2016 ...
Страница 123: ...Remove a Power Supply 4 Press the release tab to the left and pull on the handle Servicing Power Supplies 123 ...
Страница 128: ...128 Netra Server X5 2 Service Manual October 2016 ...
Страница 144: ...144 Netra Server X5 2 Service Manual October 2016 ...
Страница 148: ...148 Netra Server X5 2 Service Manual October 2016 ...
Страница 154: ...154 Netra Server X5 2 Service Manual October 2016 ...
Страница 180: ...180 Netra Server X5 2 Service Manual October 2016 ...
Страница 210: ...210 Netra Server X5 2 Service Manual October 2016 ...
Страница 226: ...226 Netra Server X5 2 Service Manual October 2016 ...
Страница 266: ...266 Netra Server X5 2 Service Manual October 2016 ...
Страница 274: ...274 Netra Server X5 2 Service Manual October 2016 ...


