3-6
Section
Creating and Editing Master Parameters
71
When there is no device information displayed in the device list window, no
Slaves will be displayed in the registered Slave display area. To allocate memory
for remote I/O, all of the Slaves must be registered as described in step 1.
Note It won’t be possible to allocate I/O memory to a Slave for remote I/O communica-
tions unless the Slave is registered here using the Master parameter wizard.
The width of the columns in the registered Slave display area can be adjusted
just like the width of the columns in the device list display area. (The width of the
first column can be changed too.)
1, 2, 3...
1. Register Slaves as needed.
There are two ways to register Slaves: using registered Slave information
and inputting data into the Slave settings input area.
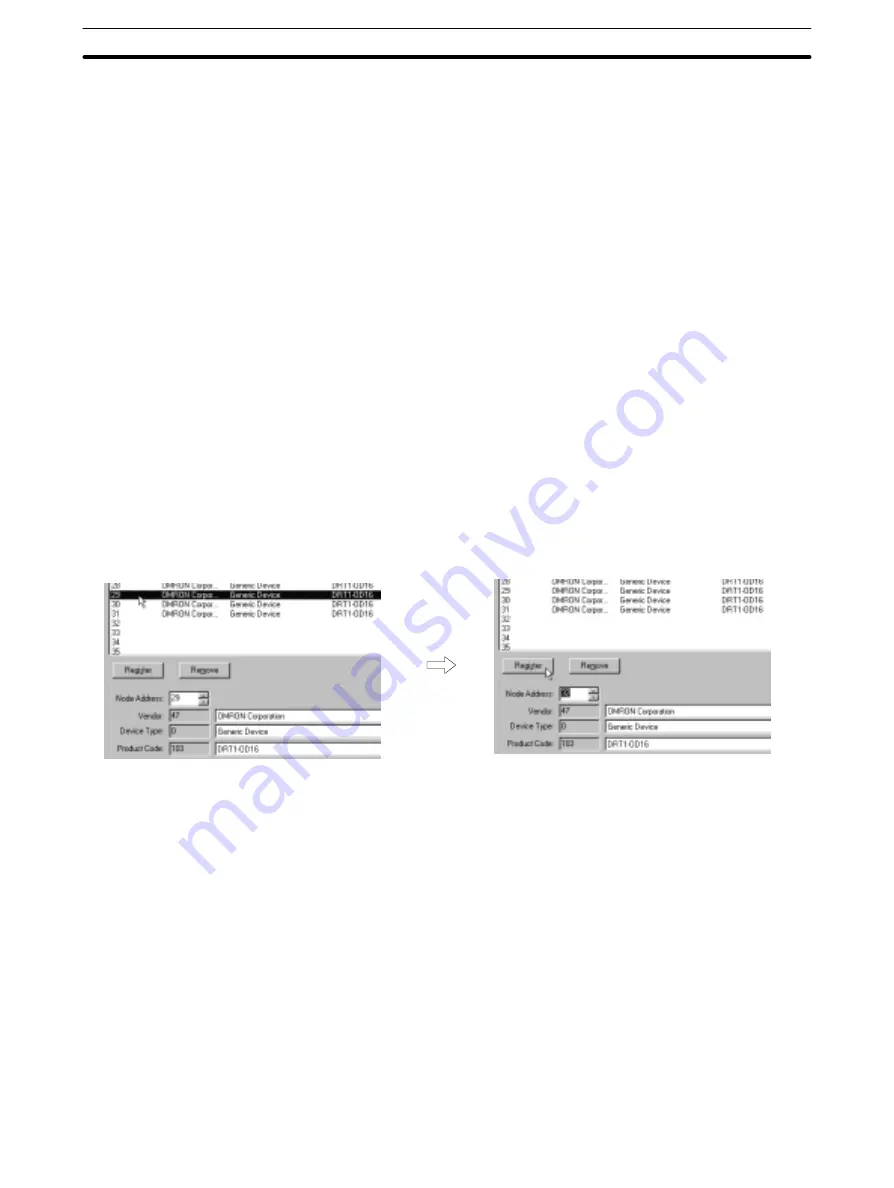
a) Registration Method 1: Using registered Slave information
This method is the fastest way to register the Slaves. It can also be used
for similar devices, such as two different models of a device made by the
same manufacturer.
i) Find another Slave in the registered Slave display area that is the
same model as the Slave to be registered. Click on that Slave’s node
address.
That Slave’s information will be displayed in the Slave setting input
area.
ii) Replace the node address with the new Slave’s node address.
(Don’t change any other settings.)
iii) Click on “Register” to register the node with the specified node
address. (If a node address registered to another node has been spe-
cified, the other node’s information will be overwritten.)
Select the node address of a registered Slave
that is the same model as the new Slave.
Change just the node address and click on “Register.”
b) Registration Method 2: Inputting Data
Use the following method to register a Slave when the Slave’s vendor
code, device type, product code, output size, and input size are known in
advance. (Data can’t be input into rows that are displayed in gray.)
i) Input the node address of the Slave in the “Node Address” input area.
ii) Select the manufacturer of the Slave in the right column of “Vendor”
input area. The corresponding vendor code will appear automatically
in the left column of the “Vendor” input area.
If the manufacturer isn’t listed, select “Other Vendor” in the right col-
umn and input the manufacturer’s vendor code manually. (A Slave
can’t be registered with a vendor code of 0.)
iii) Select the device type in the right column of “Device Type” input area.
The corresponding code will appear automatically in the left column
of the “Device Type” input area.
If the desired device type isn’t listed, select “Other Device” in the right
column and input the device type code manually.
Without using Device
List Data (Offline Only)


