- 91 -
3. Basic Operations
The QWERTY keyboard set by default can be switched to the AZERTY keyboard. To switch to the AZERTY keyboard,
select [Manage Unit] > [Keyboard Layout] > [AZERTY] on the touch panel.
• Entering Characters
1
Press the touch panel.
2
When the entry is complete, press [OK] or [Next].
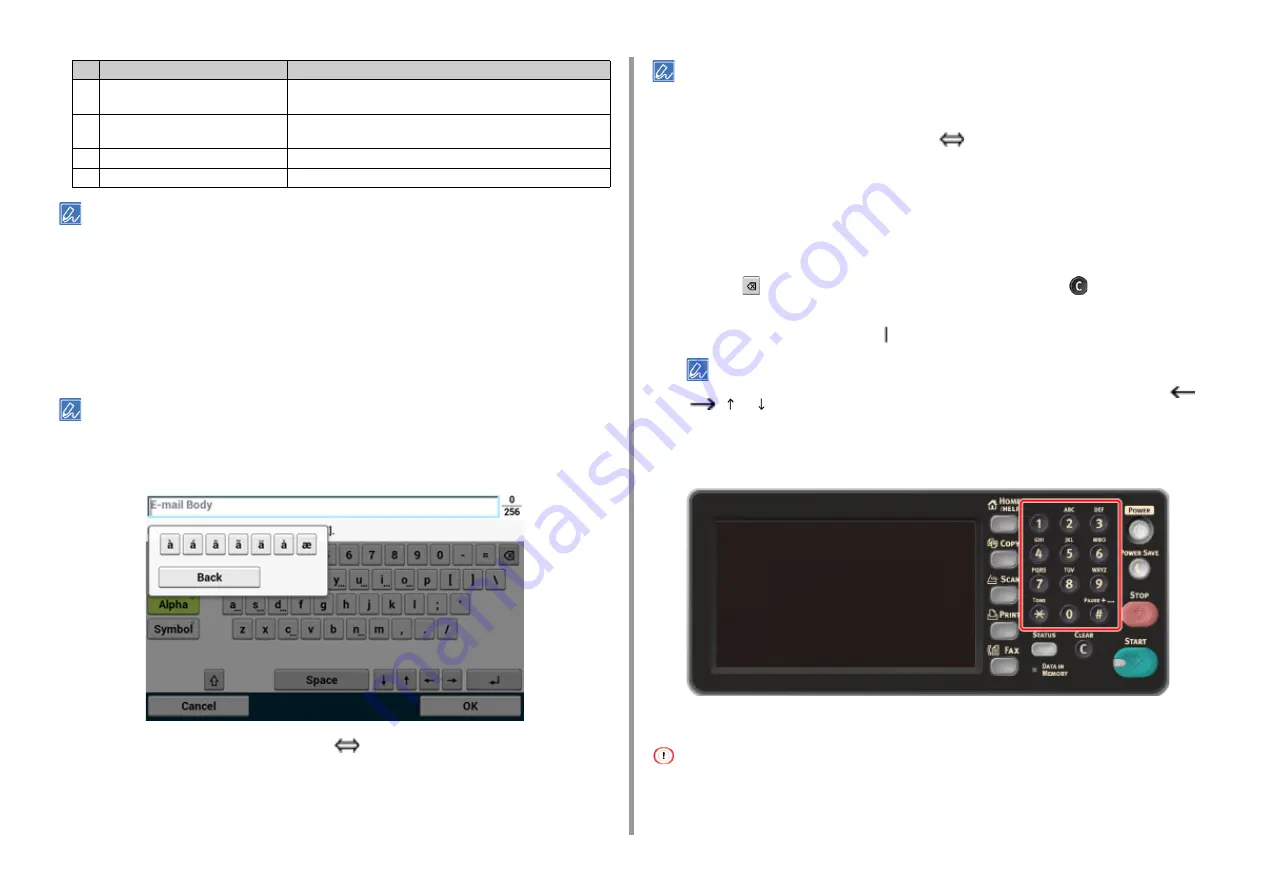
To enter a diacritical mark, press and hold a character button with [...] shown. When a diacritical mark appears, press
the character you want to enter.
The screen below shows an image when holding down the "a" button.
• Switching the Entry Mode (Numbers
Alphabetic Characters)
1
Press [Alpha] or [Symbol].
[RU] may be shown in case of Russian, and [EL] in case of Greek. In case of other languages, only [Alpha] and
[Symbol] may be shown.
• Switching the Entry Mode (Uppercase
Lowercase)
1
Press the button to switch between the uppercase and lowercase characters.
• Deleting an Entered Character
1
Use the
(back space) button on the touch panel or the
(CLEAR) button
on the operator panel.
The character before the cursor ( ) is deleted.
To delete an entered character, move the cursor to the right of the character. To move the cursor, press [
],
[
], [ ], or [ ].
Entering with the Numeric Keypad
You can enter the numbers labeled on each key.
It is impossible to enter the alphabet.
Please enter the alphabet from the touch panel.
5
Return button
Puts a line break. This button appears when entering body text of an
E-mail.
6
Left button/right button/up button/down
button
Moves the cursor left, right, up, or down.
7
Capital Lock
Switches between the uppercase and lowercase characters.
8
Entry mode button
Switches the entry mode (types of characters) for entering text.
Item
Description
Содержание MC573
Страница 1: ...MC573 ES5473 MFP User s Manual...
Страница 17: ...17 2 Setting Up Side view when the additional tray unit is installed...
Страница 22: ...22 2 Setting Up 13 Hold the handle B to close the scanner unit...
Страница 35: ...35 2 Setting Up 1 Plug the power cord into the power connector 2 Plug the power cord into the outlet...
Страница 41: ...41 2 Setting Up 7 Replace the paper cassette into the machine Push the paper cassette until it stops...
Страница 78: ...78 2 Setting Up 10 Click Complete 11 Click Next If the following dialog box is displayed click Yes...
Страница 107: ...4 Copy Copying Cancelling Copying Specifying the Number of Copies Descriptions of Screens for Copy...
Страница 131: ...131 6 Print 5 Change the settings in each tab to suit your needs 6 Click OK 7 Click Print on the Print screen...
Страница 143: ...143 6 Print Supply Levels Panel Item Description 1 Consumables Displays the remaining amount of consumables...
Страница 145: ...7 Fax Basic Operations of Fax Functions Setting for Receptions Names and Functions of Screen Items for Fax...
Страница 148: ...148 7 Fax A fax that is being sent is displayed on the top of the list 5 Press Yes on a confirmation screen...
Страница 225: ...46472402EE Rev3...


