- 81 -
2. Setting Up
8
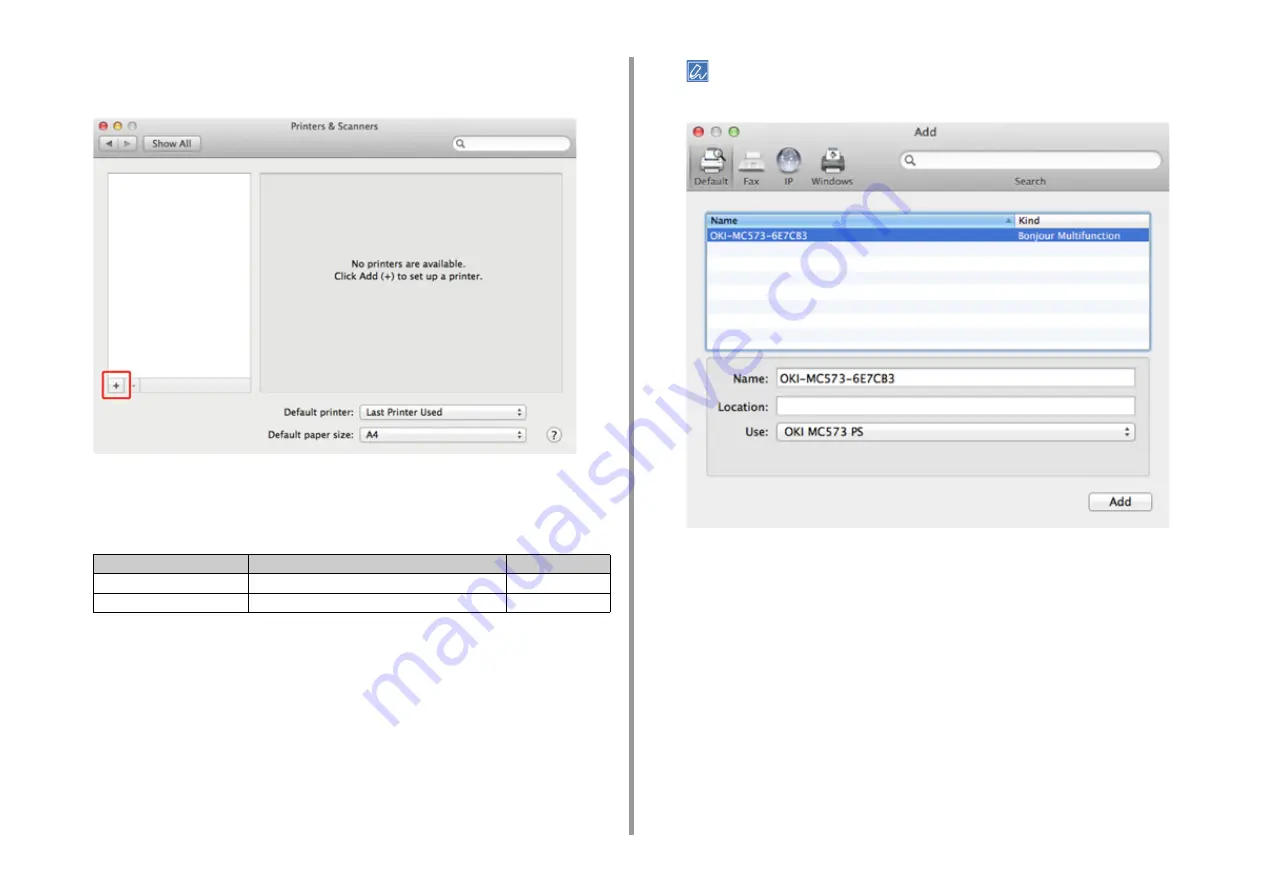
Click [+].
Select [Add Printer or Scanner...] when the menu is displayed.
9
Click [Default].
10
Select the machine , and then make sure that [OKI MC573 PS] is displayed for
[Use].
To change the name, enter a new name into [Name:].
11
Click [Add].
12
If [Installable options] is displayed, click [Continue].
Types of Names
Displayed in the Connection
Methods List
Network
OKI-MC573 (last 6 digits of MAC address)
Bonjour
USB
OKI DATA CORP MC573
USB
Содержание MC573
Страница 1: ...MC573 ES5473 MFP User s Manual...
Страница 17: ...17 2 Setting Up Side view when the additional tray unit is installed...
Страница 22: ...22 2 Setting Up 13 Hold the handle B to close the scanner unit...
Страница 35: ...35 2 Setting Up 1 Plug the power cord into the power connector 2 Plug the power cord into the outlet...
Страница 41: ...41 2 Setting Up 7 Replace the paper cassette into the machine Push the paper cassette until it stops...
Страница 78: ...78 2 Setting Up 10 Click Complete 11 Click Next If the following dialog box is displayed click Yes...
Страница 107: ...4 Copy Copying Cancelling Copying Specifying the Number of Copies Descriptions of Screens for Copy...
Страница 131: ...131 6 Print 5 Change the settings in each tab to suit your needs 6 Click OK 7 Click Print on the Print screen...
Страница 143: ...143 6 Print Supply Levels Panel Item Description 1 Consumables Displays the remaining amount of consumables...
Страница 145: ...7 Fax Basic Operations of Fax Functions Setting for Receptions Names and Functions of Screen Items for Fax...
Страница 148: ...148 7 Fax A fax that is being sent is displayed on the top of the list 5 Press Yes on a confirmation screen...
Страница 225: ...46472402EE Rev3...


