Replacing Consumables
•
65
2.
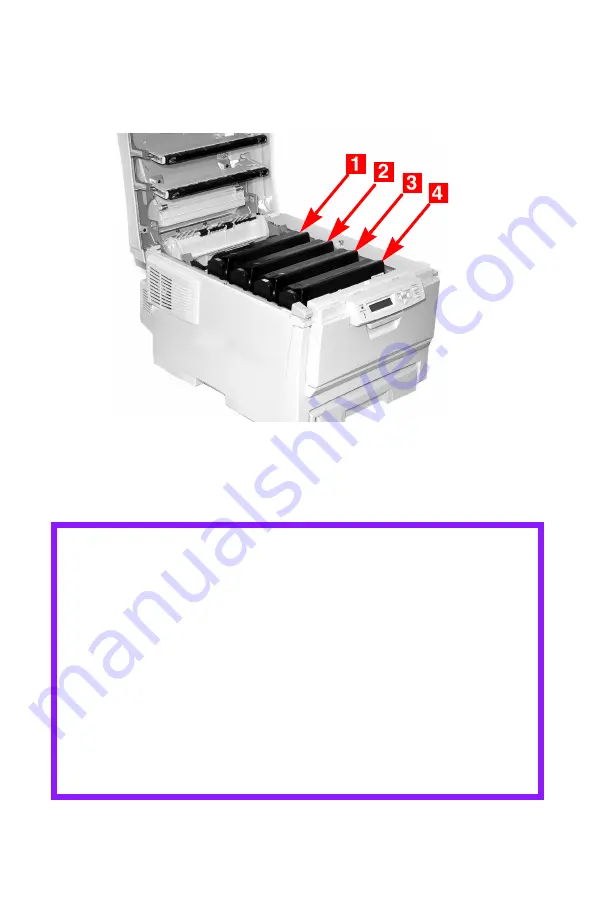
Note the positions of the four image drums: Cyan (
1
), Magenta
(
2
), Yellow (
3
), Black (
4
).
It is essential that they go back in the
correct order!
3.
Lift each of the image drum units out of the printer and place
them on a
flat
surface in a safe place away from direct sources of
heat and light.
CAUTION!
The green surface at the base of each image drum is very
delicate and light sensitive.
• Do not touch the green surface.
• Never expose the drum to direct sunlight or to very
bright room lighting.
• Do not expose it to normal room light for more than
5 minutes.
• If the image drum must be out of the printer for longer
than 5 minutes, place the image drum inside a black
plastic bag or carefully place it in a drawer or cabinet to
keep it away from light.
Содержание C5150n
Страница 1: ......
Страница 51: ...Replacing Consumables 51 6 Remove the adhesive tape from the underside of the cartridge ...
Страница 61: ...Replacing Consumables 61 11 If present remove the silica gel pack 12 Place the image drum in the printer ...
Страница 62: ...Replacing Consumables 62 13 Remove the orange drum seal 14 Install the toner cartridge in the image drum ...
Страница 69: ...Replacing Consumables 69 11 Close and latch the top cover ...
Страница 74: ...Replacing Consumables 74 8 Close and latch the top cover ...
Страница 78: ...Clearing Paper Jams 78 5 Close the rear exit 6 Close the top cover ...
Страница 86: ...Clearing Paper Jams 86 3 Close the front cover ...
Страница 88: ...Clearing Paper Jams 88 2 Remove any jammed sheets ...
Страница 90: ...Clearing Paper Jams 90 3 Pull the duplexer lid to unlock it 4 Open the lid and remove the jammed sheet ...
Страница 93: ...Clearing Paper Jams 93 2 Open the front cover 3 Remove any jammed sheets 4 Close the front cover ...
Страница 95: ...Clearing Paper Jams 95 2 Remove any jammed sheets 3 Close the front cover ...
Страница 163: ...Windows Utility Programs 163 Additional Information For help using the LPR Utility click on HELP in the program ...


