Windows: Using the Printer Driver
•
128
4.
In the
dialog box, select your printer, then:
a.
Windows 98/Me/NT4.0: click
Properties
.
b.
Windows XP: click
Preferences
.
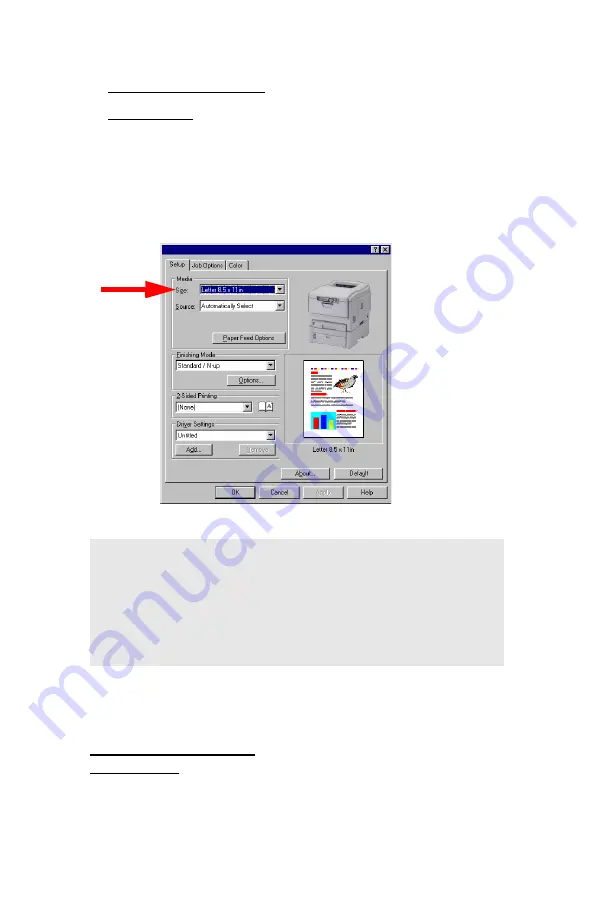
5.
On the
Setup
tab, under
Media
, select
User Defined Size
from
the bottom of the
Size
drop-down list, or select a custom size you
have already defined (see “Creating and Saving Custom Page
Sizes” on page 129). Define the custom size in the dialog box
which appears, then click
OK
.
6.
Select the tray you will be using in the
Source
drop-down list
under
Media
, then click
OK
.
7.
Windows 98/Me/NT4.0: click
OK
.
Windows XP: click
.
NOTE
You may see a
Warning
dialog box indicating a
conflict. If you do, click
OK
and the driver will
automatically make the needed changes to correct for
the conflict.
Содержание C5150n
Страница 1: ......
Страница 51: ...Replacing Consumables 51 6 Remove the adhesive tape from the underside of the cartridge ...
Страница 61: ...Replacing Consumables 61 11 If present remove the silica gel pack 12 Place the image drum in the printer ...
Страница 62: ...Replacing Consumables 62 13 Remove the orange drum seal 14 Install the toner cartridge in the image drum ...
Страница 69: ...Replacing Consumables 69 11 Close and latch the top cover ...
Страница 74: ...Replacing Consumables 74 8 Close and latch the top cover ...
Страница 78: ...Clearing Paper Jams 78 5 Close the rear exit 6 Close the top cover ...
Страница 86: ...Clearing Paper Jams 86 3 Close the front cover ...
Страница 88: ...Clearing Paper Jams 88 2 Remove any jammed sheets ...
Страница 90: ...Clearing Paper Jams 90 3 Pull the duplexer lid to unlock it 4 Open the lid and remove the jammed sheet ...
Страница 93: ...Clearing Paper Jams 93 2 Open the front cover 3 Remove any jammed sheets 4 Close the front cover ...
Страница 95: ...Clearing Paper Jams 95 2 Remove any jammed sheets 3 Close the front cover ...
Страница 163: ...Windows Utility Programs 163 Additional Information For help using the LPR Utility click on HELP in the program ...


