Consolidating Data from NetWare Servers
43
no
vd
ocx
(e
n)
6 Ap
ril 20
07
To open the last project you worked on, click
Open Last Project
>
OK
. Then skip to
Section 6.4, “Model Your Consolidation Project,” on page 43
.
The Server Consolidation Utility uses a project (
.mdb
) file to record your intended actions.
The actions are recorded so you can execute them now or save the project file and execute the
actions later.
7
Type a project filename in the field provided.
The filename can be up to 64 characters long and can include any character except \ * ? < > | "
/. The project name also serves as the project's folder name, so you might want to keep it short.
The project folder stores the log files and other files associated with the project.
8
(Conditional) If you want to store the project file in a location other than the default location
provided, click Browse and navigate to the desired location, and then click
OK
.
9
Click
Next
to continue to the next screen.
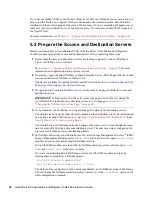
6.3 Select a Source and Destination Tree
After you create a project file, you need to select your source and destination trees. To do this, you
must be logged in to the trees that you will be working in.
1
Select the source and destination eDirectory
TM
(NDS
®
) tree from the drop-down list provided
or click
Login
to browse to a tree that is not in the drop-down list.
Only trees that you are currently logged in to are available on the drop-down list.
1a
(Conditional) In the Novell Login dialog box, click
Trees
.
1b
Browse to each desired tree and log in with the correct username and password.
If you do not know the tree name, in the Server field of the Login dialog box, type the IP
address or DNS name of the server that you will be consolidating to or from.
IMPORTANT:
If you are performing a consolidation to an Nterprise
TM
Branch Office
TM
appliance, the Admin user’s context is always appusers.
1c
Click
OK
.
2
Click
Next
.
3
Click
Create
to finish creating the project file.
6.4 Model Your Consolidation Project
The Project Window (see
Figure 6-1
) is where you select which volumes and directories to copy and
which Printer objects to move. The Project Window is divided into two panes that each show the
trees that you are working in.
Содержание Server Consolidation and Migration Toolkit 1.2
Страница 4: ...novdocx en 6 April 2007...
Страница 10: ...10 Novell Server Consolidation and Migration Toolkit Administration Guide novdocx en 6 April 2007...
Страница 12: ...12 Novell Server Consolidation and Migration Toolkit Administration Guide novdocx en 6 April 2007...
Страница 26: ...26 Novell Server Consolidation and Migration Toolkit Administration Guide novdocx en 6 April 2007...
Страница 30: ...30 Novell Server Consolidation and Migration Toolkit Administration Guide novdocx en 6 April 2007...
Страница 34: ...34 Novell Server Consolidation and Migration Toolkit Administration Guide novdocx en 6 April 2007...
Страница 64: ...64 Novell Server Consolidation and Migration Toolkit Administration Guide novdocx en 6 April 2007...
Страница 74: ...74 Novell Server Consolidation and Migration Toolkit Administration Guide novdocx en 6 April 2007...
Страница 92: ...92 Novell Server Consolidation and Migration Toolkit Administration Guide novdocx en 6 April 2007...
Страница 110: ...110 Novell Server Consolidation and Migration Toolkit Administration Guide novdocx en 6 April 2007...
Страница 120: ...120 Novell Server Consolidation and Migration Toolkit Administration Guide novdocx en 6 April 2007...
Страница 126: ...126 Novell Server Consolidation and Migration Toolkit Administration Guide novdocx en 6 April 2007...
Страница 128: ...128 Novell Server Consolidation and Migration Toolkit Administration Guide novdocx en 6 April 2007...


