106
Novell Server Consolidation and Migration Toolkit Administration Guide
no
vd
ocx
(e
n)
6 Ap
ril 20
07
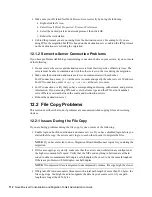
Migration Wizard automatically modifies the following items in the destination server’s
autoexec.ncf
file:
The file server name is changed to the name of the source server.
The time zone is changed to the one stored in the source server’s
autoexec.ncf
file.
The server ID is changed to the IPX
TM
internal net value or server ID stored in the
source server’s
autoexec.ncf
file.
The default time server type is changed to the value stored in the source server’s
autoexec.ncf
file.
The bindery context is changed to the bindery context stored in source server’s
autoexec.ncf
file
IMPORTANT:
During the migration, the source server’s Timesync information is not
automatically migrated.
10b
Click
Next
again.
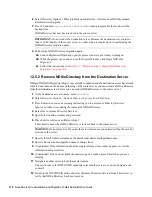
This step backs up eDirectory and copies the eDirectory backup files to the destination
server and to
sys:system\nuw30\ndsbu
on the source server.
10c
Down the source server by clicking
Next
.
The Source Server Status dialog box displays.
10d
Verify that the source server is down by selecting
Yes
.
10e
Click
Next
again.
This step removes eDirectory from the destination server and deletes the client
connection.
10f
Click
Next
again.
This step upgrades eDirectory on the destination server if necessary, restores eDirectory
on the destination server, and prepares to reboot the destination server.
10g
Reboot the destination server by clicking
Next
.
10h
When you are ready to proceed, select
Yes
>
Finish
.
11
Check the former destination server and verify that it has restarted and taken on the name of the
source server.
The server console prompt should display the source server's name.
12
Exit the Migration Wizard.
The project file is automatically saved.
13
Reboot your workstation and log in to the former destination server.
This clears old connections from the workstation and establishes a clean connection to the
former destination server.
If you can’t log in, refer to
Section 12.1.1, “Workstation-to-Server Connection Problems,” on
page 111
.
14
Restart the Migration Wizard utility.
15
Read the About screen, then click
OK
.
16
Select
Open Last Project
>
OK
.
The utility verifies that the first three steps of the project file are complete.
Содержание Server Consolidation and Migration Toolkit 1.2
Страница 4: ...novdocx en 6 April 2007...
Страница 10: ...10 Novell Server Consolidation and Migration Toolkit Administration Guide novdocx en 6 April 2007...
Страница 12: ...12 Novell Server Consolidation and Migration Toolkit Administration Guide novdocx en 6 April 2007...
Страница 26: ...26 Novell Server Consolidation and Migration Toolkit Administration Guide novdocx en 6 April 2007...
Страница 30: ...30 Novell Server Consolidation and Migration Toolkit Administration Guide novdocx en 6 April 2007...
Страница 34: ...34 Novell Server Consolidation and Migration Toolkit Administration Guide novdocx en 6 April 2007...
Страница 64: ...64 Novell Server Consolidation and Migration Toolkit Administration Guide novdocx en 6 April 2007...
Страница 74: ...74 Novell Server Consolidation and Migration Toolkit Administration Guide novdocx en 6 April 2007...
Страница 92: ...92 Novell Server Consolidation and Migration Toolkit Administration Guide novdocx en 6 April 2007...
Страница 110: ...110 Novell Server Consolidation and Migration Toolkit Administration Guide novdocx en 6 April 2007...
Страница 120: ...120 Novell Server Consolidation and Migration Toolkit Administration Guide novdocx en 6 April 2007...
Страница 126: ...126 Novell Server Consolidation and Migration Toolkit Administration Guide novdocx en 6 April 2007...
Страница 128: ...128 Novell Server Consolidation and Migration Toolkit Administration Guide novdocx en 6 April 2007...


