LLE14BRDA001A/E
7 - 59
6) Holding the stick by its handle, lightly touch the compound covered pad surface to the
rotating polishing wheel. The pad is gradually worn away.
Dress the wheel until the white surface of the pad wears away. Be careful not to let the
pad wear away all the way to the stick.
7) Apply the compound to the other side of the pad in the same manner as in Steps 5 and
6, and dress the polishing wheel again.
8) Press
to start the cooling water and wash the wheel.
With the water running, hold the stick by its handle and lightly touch the pad to the
polishing wheel to wash away any compound from the surface of the wheel.
9) Press
. The cooling water and wheel come to a stop.
10) After confirming that the wheel has stopped, remove moisture from the surface of the
polishing wheel by patting with a soft, dry cloth. Do not scrub the wheel roughly with the
cloth. Cloth fibers may remain, interfering with polishing.
11) When the surface of the polishing wheel dries, confirm that the compound is completely
washed away.
When the dried polishing wheel has a shine on its surface, the compound has been
washed away. Check the entire wheel. If the surface partly has no shine, the compound
remains. Press
to start the cooling water and wash the compound away.
<Safety beveling wheel>
* When safety beveling glass lenses frequently, dress the safety beveling wheel as well.
1) Press
. The safety beveling wheel
ASSY. comes out and the cooling water
runs.
2) Wet the dressing stick for finishing wheel
well with running water.
3) Press
to stop the cooling water.
4)
Lightly touch the dressing stick to the
wheel surfaces for safety beveling .
5) Release the dressing stick from the safety
beveling wheel.
6) Press
to start the cooling water and
wash the wheel surface away.
7) Press
. The safety beveling wheel is
stored.
Safety beveling
wheel
Dressing stick
Содержание Le 1000
Страница 1: ...PATTERNLESS EDGER Model SERVICE MANUAL June 2008 Pages in total 152 LLE14BRDA001A E...
Страница 8: ...This page is intentionally left blank LLE14BRDA001A E 1 2...
Страница 10: ...This page is intentionally left blank LLE14BRDA001A E 2 2...
Страница 19: ...LLE14BRDA001A E 3 9 3 3 Model Configuration...
Страница 22: ...LLE14BRDA001A E 3 12 5 4 01 000000 9CVGT RTGUUWTG CZ M2C EU area only...
Страница 28: ...LLE14BRDA001A 3 18...
Страница 34: ...LLE14BRDA001A E This page is intentionally left blank...
Страница 91: ...LLE14BRDA001A E 7 27 7 4 2 Parameter list of BL motor 40340 E066 E067 inverter User parameter...
Страница 92: ...LLE14BRDA001A E 7 28 User parameter...
Страница 93: ...LLE14BRDA001A E 7 29 System parameter...
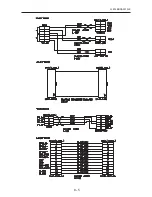
Страница 125: ...8 1 LLE14BRDA001A E 8 1 Wiring Diagram 5 6 0 59 80602 00107 80404 00043 80457 00085 80401 00038 80460 00123 8 SUPPLEMENT...
Страница 126: ...LLE14BRDA001A E 8 2 8 2 Connector Cable...
Страница 127: ...LLE14BRDA001A E 8 3...
Страница 128: ...LLE14BRDA001A E 8 4...
Страница 129: ...LLE14BRDA001A E 8 5...
Страница 130: ...LLE14BRDA001A E 8 6...
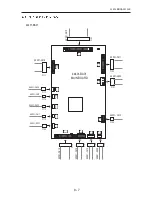
Страница 131: ...LLE14BRDA001A E 8 7 44401 BA01 2 2 2 2 2 2 2 2 2 2 2 44401 BA01 MAIN BOARD 2 2 2...
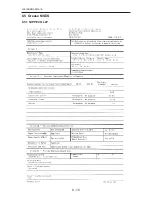
Страница 134: ...LLE14BRDA001A E 8 10 8 5 Grease MSDS 8 5 1 NIPPECO LLP...
Страница 135: ...LLE14BRDA001A E 8 11...
Страница 140: ...LLE14BRDA001A E 8 16 8 5 4 NBU15...
Страница 141: ...LLE14BRDA001A E 8 17...
Страница 142: ...LLE14BRDA001A E 8 18...
Страница 143: ...LLE14BRDA001A E 8 19...
Страница 144: ...LLE14BRDA001A E 8 20...
Страница 145: ...LLE14BRDA001A E 8 21 8 6 Troubles and Measures...
Страница 146: ...LLE14BRDA001A E 8 22...
Страница 147: ...LLE14BRDA001A E 8 23...
Страница 148: ...LLE14BRDA001A E 8 24...
Страница 149: ...LLE14BRDA001A E 8 25...
Страница 152: ...LLE14BRDA001A E 8 28 This page is intentionally left blank...


