background image


 Maintaining Your Computer   3-5

5. 

Clean the mouse as follows.

■  

Use tap water, or tap water and a mild detergent to
clean the mouse ball.

■  

Use a clean, lint-free cloth to dry the ball.

■  

Blow into the mouse socket to remove remaining dust
or lint.

6. 

Gently put the ball back into its socket.

7. 

Fit the ball cover over the ball and turn the cover
clockwise until it locks in place.

CD CARE

 When handling CDs, keep the following guidelines in mind.

■  

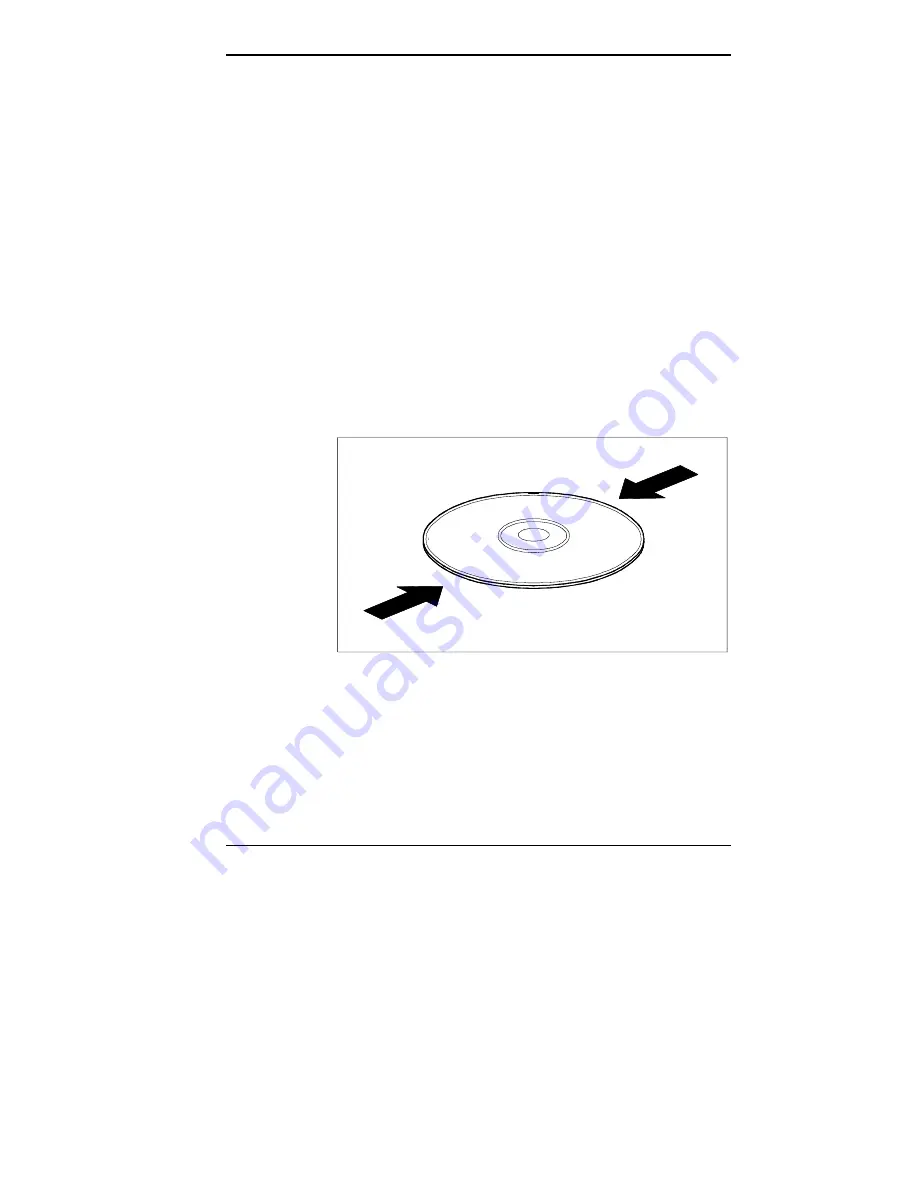
Always pick up the disc by its edges.

 Handle a disc by its edges

■  

Avoid touching the side of the disc that has no printing
or writing on it. This is the data side of the disc.

■  

Do not write on or apply labels to either side of the disc.


Содержание POWERMATE V486 - SERVICE

Страница 1: ...re warranted in accordance with the terms of the Warranty Statement accompanying each product However actual performance of each such product is dependent upon factors such as system configuration customer data and operator control Since implementation by customers of each product may vary the suitability of specific product configurations and applications must be determined by the customer and is...

Страница 2: ...nector 1 11 Printer Port 1 11 Serial Ports 1 12 Keyboard Port 1 12 Mouse Port 1 12 Power Supply Fan 1 12 Voltage Selector Switch 1 13 System Power Socket 1 13 Expansion Slot Covers 1 13 Sound Board Connectors multimedia models 1 14 Fax Modem Jacks fax modem models 1 17 NIC Connectors network ready models 1 19 Hard Disk 1 21 Keyboard 1 21 Function Keys 1 23 Status Lamps 1 23 Numeric Keypad Cursor C...

Страница 3: ... 1 37 System Reset 1 38 Backup 1 40 Security Features 1 40 Desktop Management Interface 1 41 DMI Components 1 42 Manageable Products 1 42 CI Module 1 42 DMI Browser 1 43 Usage 1 44 Troubleshooting 1 45 NEC FastFacts 1 45 Integrated Technologies 1 48 Processor Subsystem 1 49 PCI Local Bus 1 49 Flash ROM 1 50 Video Features 1 50 True Color 1 51 Dual IDE Ports 1 51 High Speed Communication Ports 1 52...

Страница 4: ...adow 2 11 Boot Sequence 2 12 Numlock 2 13 The Advanced Menu 2 14 Integrated Peripherals Menu 2 14 Parity 2 16 Large Disk Access Mode 2 16 The Security Menu 2 17 The Power Menu 2 20 The Exit Menu 2 22 Save Changes Exit 2 22 Discard Changes Exit 2 23 Get Default Values 2 23 Load Previous Values 2 24 Save Changes 2 24 Flash Utility 2 24 Mouse Driver 2 24 Changing Mouse Parameters 2 25 Command Line Op...

Страница 5: ...moving the Minitower Cover 4 6 Replacing the Minitower Cover 4 9 5 Adding Options Optional Hardware 5 1 Safety Precautions 5 3 Boards 5 5 Precautions 5 5 Slot Locations 5 6 Board Installation 5 7 Board Removal 5 13 Inside Expansion Slot in the Desktop 5 16 Installing a Board 5 17 Removing a Board 5 20 SIMM Upgrade Kits 5 22 Cautions 5 23 SIMM Installation 5 23 Checking the Memory in Your System 5 ...

Страница 6: ...ls 5 72 Parallel Printer 5 72 RS 232C Device 5 74 Multimedia Components multimedia models 5 77 Setting Up the Speakers 5 78 Connecting the Microphone 5 82 Fax Modem fax modem models 5 83 6 Setting System Board Jumpers Changing Jumper Settings 6 5 Clearing Your Password 6 6 7 Solving Problems Problem Checklist 7 1 Battery Replacement 7 7 Emergency Eject 7 11 If You Need Assistance 7 12 Getting Help...

Страница 7: ...ou Measure Up A 12 Checking Your Chair A 13 Checking Your Keyboard A 13 Checking Your Mouse A 13 Checking Your Monitor A 13 Checking You A 13 B Specifications C CD ROM Reader Configuration Rear Panel C 1 Jumper Settings C 3 D Sound Board Jumper Settings Factory Settings D 2 Jumper Functions D 4 MIDI Base I O Address D 4 Joystick Connector D 5 Audio Interface DMA Channels D 6 Audio Interface Base I...

Страница 8: ...2 10 Memory Shadow Parameters 2 11 Boot Parameters 2 12 Keyboard Parameters 2 13 Integrated Peripherals Parameters 2 15 Large Disk Parameters 2 16 System Security Options 2 18 Power Management Parameters 2 20 Recommended Memory Upgrade Path 5 26 Troubleshooting 7 2 Sound Board Jumper Settings Factory Settings D 2 ...

Страница 9: ...System Parameters to change your system configuration and to customize the system with security features Chapter 3 Maintaining Your Computer to extend the life and optimize the condition of your computer This chapter provides protective measures tips for routine care and guidelines for moving your computer Chapter 4 Removing the System Unit Cover contains procedures for removing and replacing the ...

Страница 10: ...x A Setting Up a Healthy Work Environment Appendix A Setting Up a Healthy Work Environment contains guidelines to help you use your computer productively and safely This appendix also instructs you on how to set up and use your computer to reduce your risk of developing nerve muscle or tendon disorders Appendix B Specifications provides a comprehensive list of system specifications by component Ap...

Страница 11: ... important informa tion about the material being described Names of keyboard keys are printed as they appear on the keyboard for example Ctrl Alt or Enter Text or keystrokes that you enter appear in boldface type For example type return and press Enter File names are printed in uppercase letters RELATED DOCUMENTS In addition to this guide the following printed documenta tion ships with your system...

Страница 12: ...led information about using the sound board installed in multimedia models Fax Modem User s Guide multimedia systems with fax modem only Describes how to connect and use the fax modem in fax modem models This guide includes procedures for sending and receiving a fax with Delrina WinFax LITE Network Interface Board User s Guide network ready systems only Provides network configuration information f...

Страница 13: ...To purchase the service and reference manual available in the U S and Canada call NEC at 1 800 632 4525 press 3 at the prompt and provide the document name and part number NEC FastFacts NEC FastFacts is an automated service that sends the latest information about NEC and its products directly to a fax machine The service is available 24 hours a day 7 days a week With FastFacts you can obtain produ...

Страница 14: ...Appendix A Setting Up a Healthy Work Environment for guidelines that help you use your computer productively and safely Information includes how to set up and use your computer to reduce your risk of developing nerve muscle or tendon disorders Run the system s Setup utility to check your computer s current time and date see Chapter 2 Be sure that the system s clock is set for your time zone Your c...

Страница 15: ...em security features NEC s FastFacts information service advanced integrated system technologies SYSTEM FEATURES The following sections introduce features on the outside of the system unit and several features inside the unit Keyboard and mouse features and multimedia components for multimedia models are also described NOTE This guide describes desktop and mini tower systems and includes features ...

Страница 16: ...Using Your Computer 1 3 Desktop front panel system controls and lamps Desktop front panel storage devices and controls ...

Страница 17: ...1 4 Using Your Computer Minitower front panel system controls and lamps Minitower front panel storage devices and controls ...

Страница 18: ...power consuming devices such as your monitor and hard disk drive An amber system unit power lamp indicates that the system is in Suspend mode Use Suspend mode when you need to be away from the system for a short period of time and you want to return to where you left off To wake the system from Suspend mode and resume system operation press a key or move your mouse System operation returns to wher...

Страница 19: ...em unless absolutely necessary while the disk lamp is lit To do so can damage your hard disk or data Diskette Drive Your system comes with a 3 1 2 inch 1 44 MB diskette drive which is assigned as drive A Diskette drive A is your primary bootable drive Use this drive if you need to load and start programs from a diskette Diskette drive features include a release button and a drive busy lamp The dis...

Страница 20: ...CD ROM reader to play your audio CDs The CD ROM reader is fully com patible with Kodak Multisession Photo CDs and standard audio CDs The CD ROM reader operates at different speeds depending on whether the CD you are using contains data or music This allows you to get your data faster and to see smoother animation and video The CD ROM reader has these features see the following figure A headphone j...

Страница 21: ...he CD tray Emergency eject screw allows the manual ejection of a CD if the eject function is disabled by software or if a power failure occurs See Emergency Eject in Chapter 7 for information about using this function Multimedia quad speed CD ROM reader See CD Loading in this chapter for information about loading a CD See your Ensemble User s Guide to play an audio CD Rear Panel The rear panel pro...

Страница 22: ...Using Your Computer 1 9 Desktop rear panel system I O connectors Desktop rear panel power supply features and slot covers ...

Страница 23: ...1 10 Using Your Computer Minitower rear panel system I O connectors and slot covers Minitower rear panel power supply features ...

Страница 24: ...24 by 768 pixels with 16 256 colors 800 by 600 pixels with 16 256 64 000 colors 640 by 480 pixels with 16 256 64 000 and 16 8 million colors The default Windows video resolution is 800 by 600 pixels with 256 colors To change video modes or install video drivers for popular software applications see Video Drivers in Chapter 2 See Video Features in this chapter for more information about your comput...

Страница 25: ...Germany with a 6 pin mini DIN connector Attach the keyboard that comes with your computer to this port CAUTION Always turn off system power before connecting or disconnecting the mouse or keyboard Failure to do so can damage the device or the system Before you attach the mouse or keyboard cable to the appropriate port carefully align the cable connector pins with the pin holes in the port Mouse Po...

Страница 26: ...is the connector for the system unit power cord This is the connection for alternating current AC from your wall outlet to the system unit Expansion Slot Covers The expansion slot covers are removable allowing the installation of 8 bit or 16 bit industry standard architecture ISA or 32 bit PCI expansion boards to the system The desktop system has four expansion slots three ISA slots and one shared...

Страница 27: ...edia models Sound board connectors allow the connection of audio components to the multimedia system The following figures show desktop and minitower sound board connectors A description of the connectors follows the figures Desktop sound board connectors ...

Страница 28: ...lets you connect a microphone for recording audio information in your data system files Line out jack allows you to connect powered speakers or an external amplifier for audio output This connection lets you bypass the system s internal amplifier on the system s sound board Speaker out jack lets you connect your speakers for stereo sound to the built in power amplifier on the system s sound board ...

Страница 29: ... works well with any application that is compatible with the standard PC joystick To use two joysticks you need a Y cable splitter NOTE The installation of a game card in your system will conflict with the joystick connector on your sound board To avoid a conflict either remove the game card or disable the joystick connector on your sound board by removing the JYEN jumper on the sound board see Ap...

Страница 30: ... a telephone to the same telephone line The fax modem provides the up to 14 400 bits per second bps data transmissions and 14 400 12 000 bps trans mit receive fax communications The fax modem is assigned as COM3 from the factory See your Fax Modem User s Guide for fax modem COM port and interrupt assignments See Fax Modem in Chapter 5 for information about connecting the fax modem to a telephone l...

Страница 31: ...1 18 Using Your Computer Minitower fax modem jacks ...

Страница 32: ...Ethernet network and communicate with other computers The network interface board also referred to as a network interface card NIC provides three connectors for coaxial and twisted pair network cabling BNC supports thin coaxial cables AUI connector supports thick coaxial cables RJ 45 connector supports twisted pair 10BASE T cables Network interface board in the desktop system ...

Страница 33: ...ws for Workgroups environment immediately after you connect it to an existing Windows for Workgroups network See the Quick Setup sheet that comes with your system for connection information See Network Drivers and Settings in Chapter 2 for additional information about the network interface board and setup for other client networks ...

Страница 34: ...troys all of the data on the disk Keyboard An industry standard membrane keyboard comes with your computer The keyboard is detachable and has adjustable supports Keyboard key functions depend on the operating system or software application program you use See the documentation that comes with your operating system or software A general description of keyboard features follows NOTE Most of the keys...

Страница 35: ...1 22 Using Your Computer Keyboard supports Keyboard features U S model ...

Страница 36: ...e direction of the cursor press the Num Lock key Num Lock lamp goes off To return to the Numeric Keypad mode press the Num Lock key To use a keypad cursor key while in Numeric Keypad mode press the Shift key and the keypad cursor key NOTE The system enables Numeric Keypad mode at power on You can set the Numeric Keypad mode off at power on with the Setup utility see Chapter 2 Standard Cursor Contr...

Страница 37: ...ou connect or disconnect your mouse Also the system fails to recognize that a mouse is attached if you connect the mouse after system power is on Speakers multimedia models Multimedia models come with a pair of high quality speakers The speaker set features volume treble boost bass boost and power on controls see the following figure An AC adapter comes with multimedia models To take full advantag...

Страница 38: ...ight speaker lets you adjust the volume between the two speakers Locating speaker controls Microphone multimedia models The microphone that comes with your computer allows you to record voice and sound into your computer data files The microphone jack is located on the rear of the system See Multimedia Setup in Chapter 5 for detailed connec tion information See the Ensemble User s Guide for inform...

Страница 39: ...ic files that contain the configuration information it needs to operate properly The system accesses the following files CONFIG SYS This text file tells the computer where in memory to load the operating system MS DOS what device drivers to install and what memory management features to activate For example CONFIG SYS directs the computer to load the video drivers that identify your monitor type a...

Страница 40: ...hat automatically start the Windows program when your computer boots CAUTION Do not delete the CONFIG SYS or AUTOEXEC BAT file Doing so will keep your computer and applications from running properly Copy the CONFIG SYS and AUTOEXEC BAT files to a diskette in case they are accidentally deleted or corrupted Use the following procedures to start up and shut down your computer Powering On Starting up ...

Страница 41: ... files If you have a diskette with MS DOS or another operating system s files in drive A the system boots from the diskette drive If you do not have a diskette in drive A the system boots from the hard disk A diskette without operating system files in drive A prevents a system boot and displays the error mes sage non system disk installed in drive A Booting from a diskette can be disabled for viru...

Страница 42: ...rs it finds and the parameters last saved it displays an error message The system then prompts you to run the Setup program to correct the configuration If POST does not find any discrepancies in its configuration test the computer loads system files into memory It then loads Windows Your computer is ready for use Powering Off Use the following steps to shut down power off your computer 1 Check th...

Страница 43: ...kette drives are not in use A lit hard disk lamp or diskette drive busy lamp indicates that a drive is in use 5 Turn off power to your monitor 6 Power off the system by pressing the system unit power button CAUTION Wait until a program is fin ished running before powering off the system Unless absolutely necessary never power off the system when the system power lamp is amber or when the hard disk...

Страница 44: ...e Loading Use the following procedure to insert a 3 1 2 inch diskette in the standard diskette drive 1 Holding the diskette at its top edge insert it label side up into the diskette drive Inserting a 3 1 2 inch diskette in the desktop ...

Страница 45: ...er 2 Insert the diskette all the way into the drive until you hear a click NOTE You must prepare a new diskette before storing information on it Use the MS DOS FORMAT command to prepare the diskette See your MS DOS documentation for information about formatting a diskette ...

Страница 46: ...the system power while the diskette is being accessed Do not reset the system except as a last resort when the diskette drive is in use CD Loading multimedia models To insert a CD into the CD ROM reader follow these steps 1 Press the eject retract button A CD tray will emerge from the reader door 2 Remove the CD from its protective case Hold the CD by its center hole and outer edges to avoid touch...

Страница 47: ...1 34 Using Your Computer Loading a CD into the desktop Loading a CD into the minitower ...

Страница 48: ... and ready to use WinFax LITE is an easy to use fax software package See Chapter 3 in the Fax Modem User s Guide that comes with your system for detailed information about using WinFax For data communications you can use Windows Terminal see the Microsoft Windows documentation that comes with your system Windows Terminal lets you connect your computer to other computers and exchange data With Term...

Страница 49: ...e is on When you power on your computer your system is in a Full Power On mode A green system unit power lamp indicates that the system is in a Full Power On mode Standby mode Standby is a power saving mode When the system goes into Standby mode it automatically turns power off to individual system components after a preset period of system inactivity If you do not use the components such as your ...

Страница 50: ...power shutdown When the system goes into Suspend mode it saves data and system status and then shuts off power to all possible components Suspend mode lets you save power without first saving your work You can initiate Suspend mode in two ways Manually by pressing the suspend button Pressing the suspend button is a convenient way of conserving energy when you are going to be away from your system ...

Страница 51: ...gram and data files are not usually affected by a system reset You can reset the system in two ways CAUTION Unless absolutely neces sary do not reset the system when the power lamp is amber or when the hard disk lamp or diskette drive busy lamp is on Information on the hard disk or diskette might be lost or damaged With a warm boot Press and hold Ctrl Alt and Del When all three keys are pressed th...

Страница 52: ...ram In this case first try a warm boot in Windows You change the system configuration after editing the CONFIG SYS file You change your system configuration settings or operating system and you want to start the system with the new settings The monitor screen is black If your screen is black it might only need a simple adjustment Before you reset the system check the following Move the mouse or pr...

Страница 53: ...at are on diskette and on the hard disk The standard practice for diskette backup is to copy each diskette store the original in a safe place and use the copy as your working diskette You can use the MS DOS DISKCOPY command for making copies of your diskettes See your MS DOS documentation for information about using the command SECURITY FEATURES Security features in the PowerMate V486 Series provi...

Страница 54: ...terface DMI is the new standard for managing computer systems DMI is an interface between management applications and managed components such as systems network boards and printers used with or without networked computers DMI allows a computer running a network management application to retrieve system tracking information such as memory capacity disk capacity expansion board settings or applicati...

Страница 55: ...ver These can be hard disks word processors CD ROMs printers operating systems graphics boards modems etc Manageable products or components can come with the system or be added later Each component supplies information to the MIF database by means of a MIF file that contains the product s pertinent management information CI Module The CI module is a Windows Direct Interface application provided by...

Страница 56: ...graphical user interface It displays components in a hierarchical tree structure Use it to install or remove MIF files to and from the database and to inspect or manage components already present in the database By pointing and clicking components can be expanded and collapsed To obtain specific attributes simply double click on an attribute and retrieve the associated value You can also use the t...

Страница 57: ...s These two functions are provided to expand the functionality of the NEC DMI interface The functions provide a mechanism for install ing removing new components from other vendors for example an NIC card printers and so on Usage To start the Browser simply double click on the NEC DMI Browser icon in the NEC Information group in Windows The Browser is very easy to use For example to obtain the ser...

Страница 58: ...DIR WIN16 BIN NECDMI EXE is present Make sure the file NECDMI DAT is located in the DMIDIR WIN16 BIN subdirectory Check that NECCI EXE is running NEC FASTFACTS NEC FastFacts is a self help automated electronic information service that you can use to obtain up to date technical information about your new system With FastFacts you can access information such as released BIOS versions for your system...

Страница 59: ...nt with new information as soon as it becomes available If you are new to FastFacts you might want to order a catalog that lists all the available documents and their document numbers Current catalogs include Catalog 1 Monitors Graphics Boards and Data Projector Products Catalog 2 CD ROM Hardware and Software Printers and Disk Drive Products Catalog 3 Laptop Desktop and Server Computer Products Pr...

Страница 60: ...ternational use enter the international long distance access number the U S country code the U S telephone number and the U S extension 01 708 238 7800 3 Listen to the instructions provided by the voice prompts Press 1 if you do not want an introduction to FastFacts Follow the automated instructions to order your document or catalog Press 2 if you want an introduction to FastFacts Follow the autom...

Страница 61: ...de ability security and power management features to help you get the most out of your computer and your work Your computer s key integrated features include a 486 microprocessor for powerful processing Flash ROM for fast economical BIOS upgrades Desktop Management Interface for system tracking information PCI bus for high speed local bus performance accelerated PCI graphics for exceptional video ...

Страница 62: ... s internal clock run at three times the external clock speed To take full advantage of microprocessor capabilities the system board design provides overall system balance PCI Local Bus The industry standard PCI bus is a highly integrated input output I O interface that offers the highest performance local bus available for the 486 based processor The PCI bus supports burst modes that send large c...

Страница 63: ...ors company wide control of BIOS revisions Video Features The system s high performance PCI local bus video with a bit block transfers BitBLT graphics accelerator and 1 MB of video memory support resolutions up to 1280 by 1024 pixels with 16 colors 1024 by 768 with 256 colors and 640 by 480 with 16 8 million colors With 2 MB of video memory the video hardware supports up to 1600 by 1200 pixels wit...

Страница 64: ...olor gives you the ability to display photo realistic images Dual IDE Ports The system board in the PowerMate V486 Series provides two IDE ports a fast IDE port the primary channel and a standard IDE port the secondary channel Each port supports two devices for a total of four IDE devices Your computer supports the installation of an IDE CD ROM reader for system configuration flexibility without t...

Страница 65: ...of high speed serial devices for faster data transfer rates The combination of the enhanced parallel port and buffered serial ports ensure optimum performance for future periph eral devices and operating systems ZIF Socket Your computer comes with the latest 237 pin ZIF socket for upgradeability all the way to the next generation of OverDrive processors Audio Support multimedia models The 16 bit s...

Страница 66: ...r free com munications The 14 400 bps fax modem also supports the latest high speed V 17 fax protocol for fax speeds up to 14 400 bps when talking with other V 17 fax boards and fax machines and 9600 bps for most fax machines Plug and Play Support Your computer comes with a Plug and Play BIOS which supports Plug and Play technology Plug and Play eliminates complicated setup procedures for installi...

Страница 67: ...y help the environment and cut your operating expenses A suspend button lets you quickly put the system into a full power reduction mode of operation This is a convenient way to save power when you need to be away from your computer for a short period of time Press a key or move the mouse and your system quickly returns to full power and to where you left off See Power Management in this chapter f...

Страница 68: ...E Your system ships from the factory with the correct system parameters for your configura tion Unless you add optional hardware you do not need to run Setup to operate your system However you might wish to run the Setup utility to set features that customize your system such as security features System configuration information is stored in nonvolatile memory A nonvolatile memory device retains i...

Страница 69: ...crepancy when the Power On Self Test POST displays an error message and prompts you to run Setup to check the installation of optional memory by comparing the amount memory installed with the amount of memory displayed by Setup to change certain system operating parameters such as boot device sequence and keyboard parameters to configure system connections for peripherals such as your diskette dri...

Страница 70: ...em Main Menu PhoenixBIOS Setup Copyright 1992 95 Phoenix Technologies Ltd Main Advanced Security Power Exit System Time 10 19 20 Item Specific Help System Date 03 12 1995 Diskette A 1 44 MB 3 Tab Shift Tab or Diskette B Not Installed Enter selects field IDE Adapter 0 Master C 540 Mb IDE Adapter 0 Slave None IDE Adapter 1 Master None IDE Adapter 1 Slave None Video System EGA VGA Memory Shadow Enabl...

Страница 71: ...s a summary of Main Menu Setup parameters You can set some Main Menu parameters directly from this window or you can set them from the Main menu option in the legend bar The Field Help window or Item Specific Help the area on the right side of the screen This help area provides help information for the Setup option currently selected The legend bar the area at the bottom of the screen The legend b...

Страница 72: ...d dual IDE controllers The Advanced menu also provides menu items for setting parity and for setting parameters for large disks for example to use large disks with Windows NT Some of the Advanced features are accessible only with a Supervisor password when the Supervisor password is set Security Use this menu to set User and Supervisor Passwords and the Backup and Virus check reminders Power Use t...

Страница 73: ...row keys Selects a different menu or arrow keys Moves the cursor up and down for item selection Tab or Shift Tab Cycles the cursor up and down for item selection Home or End Moves the cursor to top or bottom of window Page Up or Page Down Moves the cursor to next or previous page F5 or Selects the Previous Value for the field F6 or or Space Selects the Next Value for the field F9 Loads the Default...

Страница 74: ...ng triangle marks all selectable submenus The Field Help Window The Field Help window or Item Specific Help window on the right side of each menu displays the help text for the currently selected Setup option It updates as you move the cursor to each new field The General Help Window Pressing F1 or Alt H on any menu brings up the General Help window that describes the legend keys and their alterna...

Страница 75: ...the table for a description of Main Menu parameters from the summary window Legend Bar Main Menu Parameters PARAMETER OPTIONS DESCRIPTION System Time HH MM SS Sets the system time System Date MM DD YYYY Sets the system date Diskette A Diskette B 360KB 5 1 4 1 2MB 5 1 4 720KB 3 1 2 1 44MB 3 1 2 2 88MB 3 1 2 Not Installed Selects the type of diskette drive in your system Video System EGA VGA default...

Страница 76: ...st IDE port IDE1 connector the combination becomes 1 Master 1 Slave The master slave combination for configurations with an IDE hard disk and a CD ROM reader is 2 Masters If you add a hard disk to the fast IDE port IDE1 connector the combination becomes 2 Masters 1 Slave Jumper settings on the IDE device set the device to master or slave see the documentation that comes with the device Select the ...

Страница 77: ... Fixed Disk Automatically detected by the system Pressing Enter causes the system to attempt to detect the hard disk type If successful Setup fills in the remaining fields on this menu and you do not need to select the disk parameters Type 1 to 39 User Selecting 1 to 39 fills in all remaining fields with values for predefined disk type User prompts user to fill in remaining fields Heads 1 to 64 Sp...

Страница 78: ...eters CAUTION Incorrect settings can cause the system to malfunction Memory Shadow Parameters PARAMETER OPTIONS DESCRIPTION System Shadow Not user selectable Always enabled Video Shadow Enabled Always enabled Shadows video BIOS and improves performance Shadow Memory Regions Enabled Disabled Default is disabled Shadows optional ROM located in specified segments of memory and can improve performance...

Страница 79: ...N Boot Sequence A then C default C then A C only The BIOS attempts to load the operating system from the disk drives in the sequence selected here C only under Supervisor password control provides virus protection Setup Prompt Enabled default Disabled Displays Press F2 for Setup during bootup POST Errors Enabled default Disabled At boot error pauses and displays Press F1 to resume F2 for Setup Flo...

Страница 80: ... Numlock directly from the Main Menu summary window to display the Keyboard Features menu Use the legend keys to make your selections and exit to the Main Menu Use the following table to configure keyboard parameters Keyboard Parameters PARAMETERS OPTIONS DESCRIPTION Numlock Auto default On Off On or Off turns Num Lock on or off at bootup Auto turns Num Lock on if it finds a numeric key pad Keyboa...

Страница 81: ...dvanced menu to incorrect values can cause your system to malfunction Integrated Peripherals Menu Select Integrated Peripherals menu on the Advanced Menu to configure the connections between the system processor and the I O ports serial port 1 serial port 2 and the printer port the diskette drives and hard disk controllers NOTE A Supervisor password might be required to select parameters from the ...

Страница 82: ... unique address and interrupt request for the LPT port Auto selects the next available combination LPT Mode Output only default Bi directional ECP Enables parallel port to function normally Output only bidirectionally or in an enhanced capabilities port ECP mode Check your printer documentation to set the correct LPT mode for your printer Diskette Controller Enabled default Disabled Enables the on...

Страница 83: ...the non parity SIMMs that come in your system and replace them with parity SIMMs Large Disk Access Mode Select the Large Disk Access Mode parameter if you need to configure a large disk see the following table Use the legend keys to make your selections and exit to the Main Menu Large Disk Parameters PARAMETER OPTIONS DESCRIPTION Large Disk Mode DOS Other Select DOS if you have DOS Select Other if...

Страница 84: ... affect the features that appear on the Security menu as well as on other Setup menus Enabling Supervisor Password requires a password for entering Setup Passwords are not case sensitive Pressing Enter at either Set Supervisor Password or Set User Password on the menu displays a Set Password dialog box with the following prompts Enter new password Re enter new password To set a password type the p...

Страница 85: ...User password Set User Password Up to seven alphanumeric characters Pressing Enter displays the dialog box for entering the user password This password gives RESTRICTED access to Setup menus Requires the prior setting of a Supervisor password Password on Boot Disabled default Enabled Enabled requires a password on boot cold boot only no password required for warm boot Requires the prior setting of...

Страница 86: ...empt to modify the boot sector will not be able to do so System Backup Reminder Virus Check Reminder Disabled default Daily Weekly Monthly When a schedule is specified displays a message during boot up asking Y N if you have backed up the system or scanned it for viruses Message returns on each boot until you respond with Y Daily displays the message on the first boot of the day weekly on the firs...

Страница 87: ...ngs for Power Management Use the following table to make your selections NOTE To disable all power management features set APM advanced power management to Disabled See the following table to set power management parameters Power Management Parameters FEATURE OPTIONS DESCRIPTION APM Enabled default Disabled APM advanced power management allows APM aware software to better manage power savings Powe...

Страница 88: ... Standby Disabled Suspend allows the system to enter Suspend mode when the suspend button is pressed Standby enables the system to enter Standby mode when the suspend button is pressed Parallel Port Activity Enabled default Disabled Enables parallel port activity by resetting the timer and bringing the system to full power when it is in a low power management mode Serial Port Activity Enabled defa...

Страница 89: ... select one of the items from the menu or menu bar to exit Save Changes Exit After making your selections on the Setup menus always select Save Changes to Non Volatile RAM NVRAM to make them operative Unlike standard RAM memory NVRAM is sustained by an onboard battery and stays on after you turn your system off After you save your selections the program displays this message Values have been saved...

Страница 90: ...Setup values in the Setup menus select Load ROM Default Values from the Main Menu The program displays this message ROM Default values have been loaded Press space to continue If during boot up the BIOS program detects a problem in the integrity of values stored in NVRAM it displays these messages System CMOS checksum bad run SETUP Press F1 to resume F2 to Setup The CMOS values have been corrupted...

Страница 91: ...r selections FLASH UTILITY Check the NEC Bulletin Board Service BBS for available updates to your system BIOS You can obtain information to update your system with the latest BIOS version from the NEC Bulletin Board Service See NEC Bulletin Board Service at the end of this chapter for information about using the bulletin board available in the U S and Canada MOUSE DRIVER Mouse driver software cont...

Страница 92: ...ement Then at the MS DOS prompt type LMOUSE and press Enter NOTE You can include the LMOUSE command in an AUTOEXEC BAT file Changing Mouse Parameters Use the mouse parameters to change the function of the mouse and the way that your screen cursor responds to mouse movement You can combine any number of parame ters when loading the mouse drivers The parameters described in the following section are...

Страница 93: ...en you need to go between your drawing and the toolbox or a menu Ballistic arguments include the following BHIGH sets the ballistic effect to its highest setting BLOW sets the ballistic effect to its lowest setting BON enables the ballistic effect BOFF disables the ballistic effect Driver orientation NORTH SOUTH EAST WEST You can use this parameter to change the direction in which the screen curso...

Страница 94: ...t the cursor moves The syntax for the sensitivity level is as follows Sn where n is a two digit number from 00 10 The default is S04 Button orientation SWAP This parameter lets you swap the functions of the left and right mouse buttons The swap argument toggles the functions between the two Number of mouse buttons nK You can specify whether you have a two or three button mouse using the K command ...

Страница 95: ...800 by 600 64K colors Trident 1024 by 768 16 colors Trident AGI 1024 by 768 256 color Trident 1280 by 1024 16 colors The default video mode is 800 by 600 pixels with 256 colors You can change the default video resolution in Windows Setup see your Windows documentation The installation of 1 MB of video DRAM provides a total of 2 MB of video DRAM and the following additional Windows drivers Trident ...

Страница 96: ...ivers see Video Drivers in this chapter Use the following steps to log onto the NEC BBS NOTE The BBS screens contain information that you might want to read The following procedure steps you through using the BBS as simply as possible The first time you use the BBS it requests informa tion for a new user questionnaire 1 From the Windows for Workgroups Progam Manager select Accessories and double c...

Страница 97: ...nu item Enter the BBS phone number 508 635 4706 Your phone system or location might require a 1 or 91 prefix Click OK 4 Press Enter twice 5 Enter your first name last name and password Press Enter after each 6 Follow the screen prompts until the NECTECH Main Menu is displayed The prompts require that you do the following Press S and then Enter Press S and then Enter Press Enter three times 7 At th...

Страница 98: ...tem for other network client environments see your network administrator For convenience 3Com EtherDisk drivers for client networks are preloaded on the hard disk A 3Com EtherDisk diskette comes with the system as a backup copy of the drivers For complete network installation information see the Network Interface Board User s Guide and the documentation that comes with your network operating syste...

Страница 99: ...age and to maintain its condition and performance Protective Measures There are several ways that you can protect your system from possible damage NEC strongly recommends the following protective measures Connect a surge suppressor between your computer and a grounded wall outlet A surge suppressor protects your system from sudden transient increases and decreases in electrical power Be sure to co...

Страница 100: ... If you plan to use software programs other than NEC supplied software NEC strongly recommends that you take the necessary steps such as virus checks to protect your system Place your computer away from direct sunlight and extreme hot and cold temperatures The recommended operating environment is from 50 F to 95 F 10 C to 35 C The recommended non operating environment shipping or storage is from 1...

Страница 101: ...eaner or solvent on any part of the system Check the system regularly for any loose material such as paper books magazines that blocks air circulation around your unit Keep food and liquids away from your computer Periodically clean the keyboard with a vacuum cleaner brush attachment Do not use any liquid cleaners on the keyboard as they can damage the keyboard If an object such as a paper clip fa...

Страница 102: ...se ball and tracking mechanism Periodically however you might need to wipe the mouse ball clean Use the following procedure to clean the mouse 1 Turn off your computer and any peripherals attached to it 2 Turn your mouse upside down Locate the mouse ball cover Locating the mouse ball cover 3 Turn the ball cover counterclockwise and remove the cover 4 Gently turn the mouse over and let the ball fal...

Страница 103: ... lint 6 Gently put the ball back into its socket 7 Fit the ball cover over the ball and turn the cover clockwise until it locks in place CD CARE When handling CDs keep the following guidelines in mind Always pick up the disc by its edges Handle a disc by its edges Avoid touching the side of the disc that has no printing or writing on it This is the data side of the disc Do not write on or apply la...

Страница 104: ...dust from the disc by wiping it with a soft cloth Gently brush the cloth from the center of the disc toward the edge CAUTION Avoid using benzene paint thinner record cleaner static repellent or any other chemical on the disc Chemicals and cleaners can damage the disc Wipe a disc from the center and toward the edge ...

Страница 105: ... CD ROM reader remove the CD 3 Turn off the system unit and any external options con nected to it 4 Unplug the system unit power cable from the wall outlet or surge suppressor then from the unit 5 Unplug any external options from the wall outlets or surge suppressor then disconnect them from the system unit 6 Pack the system components in the original shipping materials and cartons If these are no...

Страница 106: ...chapter provides cover removal and replacement procedures for desktop and minitower systems See the sections appropriate for your system DESKTOP COVER Use the following procedures to remove and replace the desktop cover Removing the Desktop Cover Remove the desktop cover as follows 1 Turn off and unplug the system unit and monitor 2 Disconnect the keyboard and mouse from the rear of the system 3 U...

Страница 107: ...lease the cover from the unit as follows From the rear of the system grasp the sides of the cover Press your thumbs against the rear panel and slide the cover away from the front of unit until it stops about an inch NOTE The cover fits tightly You might need to press the front edge of the cover to release it from the front panel ...

Страница 108: ...Removing the System Unit Cover 4 3 Releasing the cover 6 Lift the cover up and away from the unit Removing the cover ...

Страница 109: ...owing steps to replace the desktop cover CAUTION To prevent damage to sys tem cables carefully tuck the cables out of the path of the cover 1 Position the cover on the system unit with the cover tabs aligned above the cutouts in the system unit frame Aligning the desktop cover ...

Страница 110: ...et the front panel NOTE The cover fits tightly If the cover does not slide all the way to the front panel place one hand on the front of the unit while you press each side of the cover forward from the rear Sliding the desktop cover 3 Secure the cover with two screws ...

Страница 111: ...s to the rear of the system unit 5 Plug in your power cables MINITOWER COVER Use the following procedures to remove and replace the minitower cover Removing the Minitower Cover Remove the minitower cover as follows 1 Turn off and unplug the system unit and monitor 2 Disconnect the keyboard and mouse from the rear of the system ...

Страница 112: ...e System Unit Cover 4 7 3 Unplug any external options such as a monitor or a printer connected to the rear of the system unit 4 Remove three cover screws from the rear of the system unit Removing minitower screws ...

Страница 113: ...4 8 Removing the System Unit Cover 5 Pull the cover about two inches from the rear of the unit Releasing the cover 6 Lift the cover up and away from the system unit ...

Страница 114: ...over CAUTION To prevent damage to sys tem cables carefully tuck the cables out of the path of the cover 1 Align the cover above the unit and about two inches in front of the front panel Check that the front end of the cover s grounding strip is behind the front panel of the system frame Aligning the minitower cover ...

Страница 115: ... 10 Removing the System Unit Cover 2 Slide the cover to meet the rear panel Be sure that the system unit frame slides under the three cover tabs one top tab and two side tabs Sliding the minitower cover ...

Страница 116: ...System Unit Cover 4 11 3 Secure the cover with three screws Securing the minitower cover 4 Connect the monitor keyboard mouse and any other external devices to the rear of the system unit 5 Plug in your power cables ...

Страница 117: ...deo DRAM processor upgrades such as an OverDrive processor storage devices such as hard disks CD ROM readers and diskette drives external peripherals such as a printer or serial device procedures for connecting multimedia components to multimedia models and a telephone line to the fax modem in fax modem models OPTIONAL HARDWARE Many optional components are available for customizing your computer t...

Страница 118: ... in line memory module SIMM sockets located on the system board for the installation of SIMM upgrade kits The system supports up to 64 MB of high speed memory see SIMM Upgrade Kits in this chapter The system board also provides cache sockets that allow you to add 256 KB of optional secondary cache to your system Video upgrade The system comes with 1 MB of video DRAM You can upgrade video memory to...

Страница 119: ...s in this chapter for detailed information External options External peripherals such as state of the art printers are compatible with your system See the following sections for specific information and guidelines on installing options in your system SAFETY PRECAUTIONS Take care when you work inside the system and when you handle computer components Avoid electric shock or personal injury by obser...

Страница 120: ...anti static devices such as wrist straps and floor mats Always hold a chip or board by its edges Avoid touch ing the components on the chip or board Take care when connecting or disconnecting cables A damaged cable can cause a short in the electrical circuit Misaligned connector pins can cause damage to system components at power on When you install a cable be sure to route the cable so it is not ...

Страница 121: ...following procedures to install Plug and Play ISA boards non Plug and Play ISA boards PCI boards such as LAN cards graphics adapters and disk controllers Precautions Always remove an expansion board from the shipping material very carefully Static discharge can damage board components Take the following precautions when handling a board Avoid carpets in cool dry areas Before handling a board disch...

Страница 122: ...CI ISA slot ISA expansion slots support industry standard 8 bit or 16 bit expansion boards The PCI ISA slot also supports PCI expansion boards PCI expansion boards run at the system s processor speed The PCI bus handles 32 bits of data at a time being wider as well as faster than the standard ISA bus PCI boards can send and receive data much faster which boosts system performance Locating desktop ...

Страница 123: ...or 16 bit ISA or PCI expansion board in your system unit 1 Follow any preinstallation instructions in your option documentation such as setting switches or jumpers on the board Any switch or jumper information in NEC option docu mentation is common to all NEC systems Use this information for the board you are installing in your system ...

Страница 124: ...nsion Slot in the Desktop in this chapter Otherwise continue to the next step 4 Remove the screw securing an expansion slot cover and remove the cover Save the screw for installing the board Keep the slot cover in a convenient place for possible use CAUTION A slot cover can damage the system board or any option board if it falls into the system Take special care to keep the slot cover from falling...

Страница 125: ...Adding Options 5 9 Removing a slot cover in the desktop Removing a slot cover in the minitower ...

Страница 126: ...t If you are installing a full size board align it with the guide rail Press the board firmly into the expansion slot connector You might have to gently rock the board from side to side to seat it into the connector Inserting the board in the desktop Inserting the board in the minitower ...

Страница 127: ...Adding Options 5 11 6 Insert the screw to attach the board to the support bracket Securing the board in the desktop ...

Страница 128: ...5 12 Adding Options Securing the board in the minitower 7 Replace the system unit cover see Chapter 4 ...

Страница 129: ... the system WARNING Be sure that the system unit power is turned off and the system is unplugged before you begin the removal procedure 1 If you have any cables connected to the board that you need to remove label the connectors Then disconnect the cables NOTE To remove a board from an inside slot in the desktop see Inside Expansion Slot in the Desktop following this section ...

Страница 130: ...5 14 Adding Options 2 Remove the screw that secures the board to the support bracket Removing the screw in the desktop ...

Страница 131: ...Adding Options 5 15 Removing the screw in the minitower ...

Страница 132: ...g Options 3 Pull the board out of the connector You might have to gently rock the board from side to side to release it from its connector Removing the board from the desktop Removing the board from the minitower ...

Страница 133: ... inside expansion slot in the desktop system 1 Remove the screw that secures the expansion slot cover to the rear of the system Remove the slot cover CAUTION A slot cover can damage the system board or any option board if it falls into the system Take special care to keep the slot cover from falling when you remove the screw If the slot cover does fall into the unit be sure to remove it before you...

Страница 134: ...ring the L bracket to the slot cover and remove the L bracket Keep the slot cover in a convenient place for possible use Removing the L bracket 3 Attach the L bracket to the expansion board bracket with the screw you removed in the previous step ...

Страница 135: ...the bracket end facing the rear of the unit and insert it into the expansion slot Press the board firmly into the expansion slot connector You might have to gently rock the board from side to side to seat it into the connector 5 Insert the screw at the rear of the system to secure the board in place ...

Страница 136: ... To remove a board from the inside expansion slot in the desktop follow these steps WARNING Be sure that the system unit power is turned off and the system is unplugged before you begin the removal procedure 1 If you have any cables connected to the board label the connectors Then disconnect the cables ...

Страница 137: ...Remove the screw that secures the expansion board to the rear of the system Removing the screw 3 Pull the board out of the connector You might have to gently rock the board from side to side to release it from the connector ...

Страница 138: ...fore you can add 36 bit parity SIMMs CAUTION To avoid corrosion between different metals only use tin plated SIMM sticks SIMM sticks must have a speed of 70 nanoseconds ns Slower SIMMs are not supported SIMM sticks are installed in two SIMM sockets on the system board and increase the total system high speed memory The system supports up to 64 MB of high speed memory Use the following procedures t...

Страница 139: ...tricity by touching a grounded metal object such as the metal frame inside the system unit Always hold a SIMM by its edges Avoid touching the components on the SIMM SIMM Installation Use the following procedures to install SIMMs in your system Checking the Memory in Your System Use the following steps to locate SIMM sockets and to check the memory configuration in your system 1 Remove the system u...

Страница 140: ...5 24 Adding Options 2 Locate the two SIMM sockets SIMM socket 1 and SIMM socket 2 on the system board Locating SIMM sockets in the desktop ...

Страница 141: ...that is presently in the system Multimedia systems with a DX4 processor such as PowerMate V4100 multimedia models ship with 16 MB of memory other systems ship with 8 MB of memory For optimized performance fill SIMM sockets according to the following table using 4 MB 8 MB 16 MB and 32 MB sticks ...

Страница 142: ...MB 16 MB 4 MB 24 MB 24 MB 8 MB 16 MB 16 MB 8 MB 32 MB 32 MB 16 MB 32 MB 16 MB Empty 36 MB 36 MB 4 MB 32 MB 32 MB 4 MB 40 MB 8 MB 32 MB 48 MB 48 MB 16 MB 32 MB 32 MB 16 MB 64 MB 64 MB 32 MB 64 MB 32 MB Empty Standard configuration for all systems except multimedia systems with a DX4 processor Standard configuration for all multimedia systems with a DX4 processor Installing SIMMs Use the following s...

Страница 143: ...the SIMM in SIMM socket 1 NOTE If you are installing a SIMM in socket 2 first remove the SIMM in socket 1 SIMM socket 1 must be empty before you can access socket 2 Press the metal clips at the outer edges of the socket away from the SIMM see the following figures Push the SIMM away from the locking tabs and remove it from the socket Removing a SIMM ...

Страница 144: ...e you install a SIMM reduce static discharge by touching the system s metal chassis Locate the notched end of the SIMM Locating the notched end of the SIMM Locate the appropriate SIMM socket see the previ ous figures and the table Recommended Memory Upgrade Path ...

Страница 145: ...ngle into the socket CAUTION Be sure to install the SIMMs in the correct sockets Carefully tilt the SIMM towards the locking tabs Using equal pressure at the ends of the SIMM push it until it locks under the metal clips at the ends of the socket CAUTION Be careful when handling the SIMM The SIMM and socket tabs are fragile Inserting the SIMM ...

Страница 146: ... SECONDARY CACHE Secondary cache increases system performance Your system supports the addition of 256 KB of secondary cache The system requires the following cache module options one 32 KB by 8 bit tag cache module 28 pin four 64 KB by 8 bit cache modules 32 pin Use the following steps to install the secondary cache modules CAUTION Be sure that the system unit power is turned off and the system i...

Страница 147: ...s remove the boards see Board Removal earlier in this chapter NOTE If you have a desktop system you might need to remove the 3 1 2 inch drive bracket to access the tag cache socket To remove the 3 1 2 inch drive bracket see step 3 in Installing a Storage Device in the Desktop later in this chapter Locating the cache sockets in the desktop ...

Страница 148: ...5 32 Adding Options Locating the cache sockets in the minitower ...

Страница 149: ...s follows CAUTION Reduce static discharge by touching the metal frame of the system unit Locate the notched end of the cache module Align the notched end of the module with the notched end of the tag cache socket Aligning the cache module with the socket ...

Страница 150: ...les Check that all pins are correctly inserted into the holes and that none are bent CAUTION Pins bend and break easily To avoid bending any pins during insertion use equal pressure on both ends of the module If you bend a pin straighten it carefully Checking pin alignment ...

Страница 151: ...che modules 5 Configure the system for 256 KB of secondary cache by setting the following jumpers on the system board JP16 set a jumper on pins 2 and 3 JP17 set a jumper on pins 1 and 2 See Chapter 6 to locate and set the JP16 and JP17 Secondary Cache jumpers 6 Replace any expansion boards you removed see Board Installation earlier in this chapter and reconnect any cables 7 Replace the system unit...

Страница 152: ...ules The upgrade significantly increases video performance and allows your system to display more colors at higher resolutions Use the following steps to upgrade video memory in your system 1 Remove the system unit cover see Chapter 4 WARNING Be sure that the system unit power is turned off and the system is unplugged before you begin the installation procedure ...

Страница 153: ... 2 Locate the video DRAM sockets on the system board If you have expansion boards obstructing your view of the sockets remove the board see Board Removal earlier in this chapter Locating video DRAM sockets in the desktop ...

Страница 154: ...city by touching the metal frame of the system unit Locate the notched end of the video DRAM socket see the following figure Align the notched end of the module over the notched end of the socket Carefully insert the video DRAM module into the socket Using equal pressure gently press down until the module is fully seated in the socket ...

Страница 155: ... module 5 Replace any expansion boards that you removed see Board Installation earlier in this chapter 6 Replace the system unit cover see Chapter 4 NOTE After upgrading video memory you can use a different video driver to display more colors at higher resolutions See Video Drivers in Chapter 2 for available drivers ...

Страница 156: ... the chip upgrades in your system CAUTION Incorrect installation of the chip can damage the chip system board or both Follow the installation instructions carefully CAUTION Your system requires a heatsink on the upgrade chip Verify with your dealer that you have the correct heatsink for your chip 1 Remove the system unit cover see Chapter 4 WARNING Be sure that the system unit power is turned off ...

Страница 157: ... OverDrive socket on the system board see the following figures If you have expansion boards obstructing your view of the socket remove the boards see Board Removal earlier in this chapter Locating the PGA OverDrive socket in the desktop ...

Страница 158: ... 42 Adding Options Locating the PGA OverDrive socket in the minitower 3 Open the lever on the socket as follows Release the lever by pulling it away from the socket Swing the lever back as far as it goes ...

Страница 159: ...of the socket 5 Carefully pick up the upgrade chip CAUTION Before picking up the chip reduce static discharge by touching the metal frame of the system unit CAUTION Your system requires a heatsink on the upgrade chip Verify with your dealer that you have the correct heatsink for your chip ...

Страница 160: ...ocket as follows Locate the alignment hole on the notched corner of the chip socket Locate the dot on the notched corner of the chip Align the notched corner of the chip over the corner of the socket with the alignment hole Aligning the chip with the socket ...

Страница 161: ... the chip can damage the system board the chip or both 8 Lock the chip in place by swinging the socket lever down towards the socket 9 Replace any expansion boards that you removed see Board Installation earlier in this chapter and reconnect any cables 10 Replace the system unit cover see Chapter 4 ...

Страница 162: ...es up to two diskette drives including the standard 1 44 MB diskette drive up to four IDE devices such as IDE hard disks and an IDE CD ROM reader Other storage devices might require the installation of a compatible controller board See your hardware dealer for the storage devices available for your system Device Slots The desktop system has four storage device slots the mini tower has five device ...

Страница 163: ...ne accessible device slot contains the standard CD ROM reader You can install accessible devices such as a diskette drive tape drive or CD ROM reader with a 5 1 4 inch form factor frame in the 5 1 4 inch slots You can also install a hard disk with a 5 1 4 inch form factor in the 5 1 4 inch slots The following figures show the device slot locations Locating device slots in the desktop ...

Страница 164: ...re you install a storage device in the system follow any preinstallation instructions that come with the device For example check the following items for these devices Diskette drive remove any termination on the optional diskette drive See the documentation that comes with the drive ...

Страница 165: ... The cables that you use to install optional storage devices in your system include a diskette drive signal cable IDE interface cables system power cables The addition of a diskette drive requires the replacement of the existing diskette drive cable The addition of an IDE cable in hard disk models requires the replacement of the existing IDE cable The existing diskette drive or IDE cable supports ...

Страница 166: ...5 50 Adding Options System board cable connectors in the desktop ...

Страница 167: ...Adding Options 5 51 System board cable connectors in the minitower ...

Страница 168: ... cable connectors are keyed to fit only in the correct position Power cable connectors Diskette Drive Signal Cable A two connector diskette drive signal cable comes attached to the system board and to the standard 1 44 MB diskette drive The installation of a second diskette drive in your system requires the replacement of the standard two connector diskette drive signal cable with a three connecto...

Страница 169: ...edge of the cable with pin 1 the notched end on the drive connector Align the colored edge of the cable with the pin 1 side of the system board diskette drive cable connector Pin 1 on the system board diskette drive connector is on the end closest to the rear of the system The following figure shows a three connector diskette drive signal cable Optional three connector diskette drive signal cable ...

Страница 170: ...ch port supports two IDE devices The addition of an IDE device to an IDE port requires the replacement of the existing two connector IDE cable with a three connector IDE cable NEC part number 158 050691 000 IDE cables do not come in systems that do not have a hard disk installed If you install an optional IDE CD ROM reader connect it to the standard IDE port IDE2 connector This lets you use the fa...

Страница 171: ... IDE port connector Pin 1 on the system board IDE connectors is on the connector end closest to the rear of the system Optional IDE cable connectors Storage Device Installation Use the appropriate procedures to install storage devices in your system To install storage devices in the desktop see Installing a Storage Device in the Desktop To install storage devices in the minitower see Installing a ...

Страница 172: ...apter for device preparation information NOTE If your 5 1 4 inch device comes with drive rails do not attach them Remove any rails already attached See the documentation that comes with the device 2 Remove the system unit cover see Chapter 4 WARNING Be sure that the system power is off and the system and its peripherals are unplugged before you begin the installation procedure 3 Remove the 3 1 2 i...

Страница 173: ... require the removal of the 3 1 2 inch drive bracket Remove the four screws securing the drive bracket to the chassis Carefully lift the drive bracket up and place it on top of the power supply Take care to avoid pulling on the installed drive cables Removing the 3 1 2 inch drive bracket ...

Страница 174: ...slot prepare the slot as follows Release the front panel by removing five screws from the back of the front panel If you are installing an accessible device such as a diskette drive or CD ROM reader locate the blank panel in the front panel for the device slot Preparing the device slot ...

Страница 175: ...ted metal plate in front of the device slot remove the plate by pulling it back and forth until it releases from the chassis 5 Replace the front panel Secure the panel in place with the five screws you removed earlier 6 Insert the device connector end first into the device slot NOTE To easily access device connectors for cabling do not insert a 5 1 4 inch device all the way into the slot ...

Страница 176: ...chapter Take care to prevent bending drive connector pins Be sure to align the IDE cable connector as shown in the figure NOTE The installation of an IDE device requires the replacement of an existing two connector IDE cable with a three connector IDE cable see IDE Cables in this chapter For best performance connect a hard disk to the fast IDE port IDE1 connector Connecting IDE device cables ...

Страница 177: ...skette drive signal cable and power cable NOTE The installation of a second diskette drive requires the removal of the standard two connector diskette drive cable and the installation of a three connector cable See Diskette Drive Signal Cable in this chapter for cable installation information Be sure to align the signal cable connector as shown in the figure Connecting 1 2 MB diskette drive cables...

Страница 178: ...s in the device with the holes in the device bracket Secure the device to the bracket with the screws that come with the drive Use three screws two screws on one side one screw on the other side to secure a 3 1 2 inch drive Use four screws two screws on each side to secure a 5 1 4 inch drive Securing a 3 1 2 inch device ...

Страница 179: ...Adding Options 5 63 Securing the device ...

Страница 180: ...crews you removed earlier Securing the 3 1 2 inch drive bracket 10 If you installed a 1 2 MB diskette drive remove the protective cardboard insert from the drive 11 Replace the system unit cover see Chapter 4 Be sure that you do not pinch any cables or wires when you replace the cover 12 Connect external peripherals and power cables 13 Run the Setup program to set your new configuration see Chapte...

Страница 181: ...rs and switches See Device Preparation earlier in this chapter for device preparation information NOTE If your 5 1 4 inch device comes with drive rails do not attach them Remove any rails already attached See the documentation that comes with the device 2 Remove the system unit cover see Chapter 4 WARNING Be sure that the system power is off and the system and its peripherals are unplugged before ...

Страница 182: ... system If you are installing a hard disk in the 5 1 4 inch slot keep the slot cover handy Otherwise store the slot cover Replace the cover if you remove the device from the slot Locating the slot cover 4 Insert the device into the device slot NOTE To easily access device connectors for cabling do not insert a device all the way into the 5 1 4 inch device slot ...

Страница 183: ...allation information Take care to prevent bending drive connector pins Be sure to align the IDE cable connector as shown in the figure NOTE The installation of an IDE device requires the replacement of an existing two connector IDE cable with a three connector IDE cable see IDE Cables in this chapter For best performance connect an optional hard disk to the fast IDE port IDE1 connector Connecting ...

Страница 184: ...skette drive signal cable and power cable NOTE The installation of a second diskette drive requires the removal of the standard two connector diskette drive cable and the installation of a three connector cable See Diskette Drive Signal Cable in this chapter for cable installation information Be sure to align the signal cable connector as shown in the figure Connecting 1 2 MB diskette drive cables...

Страница 185: ... as follows See the figure appropriate for your device Align the holes in the device with the holes in the device bracket Secure the device to the bracket with the four screws that come with the drive two screws on each side Securing a 3 1 2 inch device ...

Страница 186: ... such as a diskette drive or CD ROM reader locate the blank panels on the front of the system unit cover Locate the blank panel for the device slot that contains the new device Remove the blank panel by pressing the panel tabs inward from inside of the cover and pushing the blank panel out ...

Страница 187: ...lank panel tabs 8 If you installed a 1 2 MB diskette drive remove the protective cardboard insert from the drive 9 Replace the system unit cover see Chapter 4 Be sure that you do not pinch any cables or wires when you replace the cover ...

Страница 188: ...multimedia models which include the speakers and microphone that come with the system to the sound board a telephone line to the fax modem ports for fax modem models Parallel Printer Use the following steps to connect a parallel printer to your system unit If you have a serial printer see the next section RS 232C Device NOTE Before connecting a printer to your system be sure that you have set up t...

Страница 189: ...cable to the printer port on the rear of the system unit Secure the cable as follows Secure the system unit connection with the screws provided Lock the connector to the printer with the connector clips Connecting a printer cable to the desktop ...

Страница 190: ...Use the following procedure to connect an RS 232C device such as a pointing device or serial printer to your computer NOTE Before connecting an RS 232C device to your system be sure that you have set up the de vice correctly Follow the setup instructions that come with the option ...

Страница 191: ...onnected to the system unit 2 Make sure that any power to your RS 232C device is off and the power cable is unplugged 3 Connect your RS 232C cable to one of the system s serial ports and to the device Secure the cable with the screws provided Connecting an RS 232C cable to the desktop ...

Страница 192: ...5 76 Adding Options Connecting an RS 232C cable to the minitower ...

Страница 193: ...to connect a microphone for voice input Line out jack lets you bypass your system board s internal amplifier to connect powered speakers or an external amplifier for audio output Speaker out jack provides a speaker connection for audio output from the sound board s built in power amplifier Connect the speakers that come with your multimedia system to this jack NOTE You can connect optional headpho...

Страница 194: ...s 3 Connect the right speaker cable to the Speaker Out jack at the rear of the system see the following figures 4 Connect the 6 volt AC adapter that comes with your multimedia system as follows CAUTION Do not install batteries in the speakers with an AC adapter installed Plug one end of the AC adapter to the DC 6V jack on the right speaker Connect the other end of the adapter into a properly groun...

Страница 195: ...Adding Options 5 79 Connecting speaker components ...

Страница 196: ...5 80 Adding Options Connecting the speaker cable to the desktop system Connecting the speaker cable to the minitower system ...

Страница 197: ...ur audio source 3 Adjust the volume by turning the volume control on the front of the right speaker 4 Press the Bass and Treble Booster buttons on the front of the right speaker to set the Bass and Treble Boost function 5 Balance the speaker output by adjusting the balance knob on the rear of the right speaker Locating speaker controls ...

Страница 198: ...Mount the microphone see the following figure Remove the center and the backing from one side of the adhesive pad that comes with the microphone Attach the pad to the microphone holder Remove the backing from the other side of the adhe sive pad and attach it to where you wish to keep the microphone on your computer for example Slide the microphone into the holder Setting up the microphone ...

Страница 199: ...onnect your telephone cable from the phone jack on the wall NOTE The fax modem requires an analog tele phone line The fax modem does not operate on a digital line for example Public Branch Exchanges PBX 3 Connect the modular telephone cable that comes with your system to the telephone jack on the wall and to the fax modem jacks shown in the following figures 4 Connect your telephone to the other f...

Страница 200: ...5 84 Adding Options Connecting a telephone line to the desktop ...

Страница 201: ...system unit power cable and any other cables that you disconnected 6 Check your telephone dial tone A dial tone on the telephone handset indicates a proper connection To use your fax modem see your Fax Modem User s Guide CAUTION Do not lift the handset when the fax modem is in use ...

Страница 202: ...ou forgot your password and cannot boot your system CAUTION Jumpers are set correctly at the factory for your configuration Only change or check the appropriate jumper setting if you are adding secondary cache you forgot your password or you are upgrading your processor Otherwise keep the jumpers at their factory settings The following figures show jumper locations on the system board and a descri...

Страница 203: ...6 2 Setting System Board Jumpers System board jumper locations and factory settings JP2 jumper settings ...

Страница 204: ...Setting System Board Jumpers 6 3 JP16 and JP17 jumper settings JP1 and JP19 jumper settings VR1 VR2 VR3 and VR4 jumpers ...

Страница 205: ...6 4 Setting System Board Jumpers JP3 through JP9 J9 JP11 and JP21 through JP23 jumpers ...

Страница 206: ...al options WARNING The system power must be off before changing a jumper setting 2 Remove the system unit cover see Chapter 4 3 Locate the jumper on the system board see the figure earlier in this chapter You might have to remove any installed expansion boards to access the jumper see Board Removal in Chapter 5 4 Change the jumper setting by lifting the plastic block and placing it on the appropri...

Страница 207: ...remove any installed expansion boards to access the jumper see Board Removal in Chapter 5 4 Set a jumper on the JP2 pins 1 and 2 5 Replace the system unit cover see Chapter 4 6 Connect system power cables and external options 7 Power on the system The system lets you boot your computer 8 Power off and unplug the system and any external options 9 Remove the jumper block from the JP2 pins 10 If you ...

Страница 208: ... yourself PROBLEM CHECKLIST First check the items in the following list If these do not help see the table that follows the list If you still cannot determine the problem see If You Need Assistance in this chapter Check that the following conditions are true for your computer The power switch for each component is on All cables and power cords are tightly connected The electrical outlet to which y...

Страница 209: ...ameters are set correctly particularly if you just installed an option The system makes a continuous sound pattern Turn system power off wait 5 seconds and turn the power on again If the sound continues call the NEC Technical Support Center See If You Need Assistance later in this chapter for the telephone number The system no longer maintains the date time or your system configuration Replace the...

Страница 210: ...ive insert a diskette with system files into drive A If bootable diskette does not boot use Setup to verify that the initial boot parameter is set to diskette drive A and not a hard disk Monitor Problems The monitor screen remains dark Check that the monitor power cable is connected to the monitor and a power outlet Be sure that the monitor signal cable is connected to the system unit Check that t...

Страница 211: ...damaged Be sure that the correct video driver is installed Keyboard Mouse Problems An image appears on the screen but nothing happens when you use the keyboard or mouse Check and tighten the keyboard or mouse cable connection If this doesn t help power off the system Wait 5 seconds and power on the system Performance Problems System performance appears sluggish Check that you have your system set ...

Страница 212: ...fferent disc to see if the problem is limited to one disc CD ROM disc does not eject due to a power failure or software error Power off the system See Emergency Eject in this chapter Cannot play music CD Use sound software see your Ensemble User s Guide Speaker Problems No sound from speakers Check that speaker power is on A power button on the front of the right speaker controls power to the spea...

Страница 213: ...rophone Problems You get no response from your microphone Adjust the MIC level through software see your Ensemble User s Guide Fax Modem Problems Fax modem does not operate See your Fax Modem User s Guide for a comprehensive list of common problems and their solutions ...

Страница 214: ... can run Setup and print out or write down your system configuration settings Then you can restore your system to its current settings WARNING The battery can explode if it is incorrectly replaced or improperly discarded Use only the same battery or an equivalent type recommended by the manufacturer when replacing the battery Lithium acts as a catalyst when exposed to water and causes spontaneous ...

Страница 215: ...e system unit cover see Chapter 4 3 Remove the CMOS battery as follows Locate the battery socket on the system board Remove any expansion boards in the way see Board Removal in Chapter 5 Locating the battery socket on the system board ...

Страница 216: ... 7 9 Carefully lift the battery clip until there is enough space to slide the battery out of the socket CAUTION To maintain a tight battery contact with the socket do not over bend the battery clip Removing the battery ...

Страница 217: ...positive side facing up slide the new battery into the socket Inserting the new battery 5 Replace any expansion boards that you removed see Board Installation in Chapter 5 6 Replace the system unit cover see Chapter 4 7 Connect external peripherals and power cables 8 Run Setup to reconfigure your system parameters ...

Страница 218: ...m power 2 Locate the Emergency Eject hole This opening allows access to a screw inside the reader for manual control of the eject retract CD functions 3 Insert a very thin flat tipped screwdriver into the hole and align it with the screw Turn the screwdriver counterclockwise to manually eject the tray To manually retract the tray turn the screwdriver clockwise Emergency eject hole on the CD ROM re...

Страница 219: ...r Dealer The dealer from whom you purchased your system is backed by complete support resources and programs within NEC Your dealer can provide you with details on all avail able support options Getting Help from NEC If you have a problem that you cannot resolve yourself within your company or through your NEC dealer help is available in the U S and Canada from the NEC Technical Support Center TSC...

Страница 220: ...l Support Center fax number U S and Canada only 508 635 4666 Note the following guidelines to use the E mail or fax support service Include one of the following words in the subject field so that someone with expertise on that subject can respond Monitor Printer CD Desktop for desktop or minitower systems Notebook Provide as much specific information about your question for a quick and accurate re...

Страница 221: ...ly to a fax machine The service is available 24 hours a day 7 days a week With FastFacts you can obtain product literature and technical information bulletins By using FastFacts you can be kept up to date on the latest technical information for your PowerMate V486 Series system See FastFacts in Chapter 1 for information about using FastFacts ...

Страница 222: ...R YOU Computers are everywhere More and more people sit at computers for longer periods of time This appendix explains how to set up your computer to fit your physical needs This information is based on ergonomics the science of making the workplace fit the needs of the worker Some nerve tendon and muscle disorders musculoskeletal disorders may be associated with repetitive activities improper wor...

Страница 223: ...re more susceptible to developing these disorders due to pre existing conditions or psychosocial factors see Pre existing Conditions and Psychosocial Factors at the end of this appendix To reduce your risk of developing these disorders follow the instructions in this appendix If you experience discomfort while working at your computer or afterwards contact a physician as soon as possible Signs of ...

Страница 224: ...ou use frequently within easy reach Adjust your workstation set up to the proper height as described in this appendix by lowering the table or stand that holds your computer equipment or raising the seat height of your chair To create more desk space you can put your computer base on the floor Adjust your chair Adjust your keyboard and mouse Adjust your monitor ...

Страница 225: ... with the backrest adjusted to support your lower back Maintain a comfortable stable position Check the following The backrest of your chair should support the inward curve of your lower back Tilt the backrest slightly back 100 to 110 so that some of the weight of your upper body is transferred to the backrest and off your spine ...

Страница 226: ...against the front of the chair Extend your lower legs slightly so that the angle between your thigh and lower leg is slightly more than 90 Place your feet flat on the floor Only use a footrest when attempts to adjust your chair and workstation fail to keep your feet flat Be sure that you have adequate clearance between the top of your thighs and the underside of your workstation ...

Страница 227: ...you use a mouse position it at the same height as the keyboard and next to the keyboard Keep your wrists straight and use your entire arm when moving a mouse Do not grasp the mouse tightly Adjust the keyboard height so that your elbows are near your body and your forearms are parallel to the floor Your upper arms should hang comfortably at your sides Adjust your keyboard slope so that your wrists ...

Страница 228: ...your wrists between typing Avoid resting your wrists on sharp edges Type with your wrists straight Instead of twisting your wrists sideways to press hard to reach keys move your whole arm Keep from bending your wrists hands or fingers sideways Press the keys gently do not bang them Keep your shoulders arms hands and fingers relaxed ...

Страница 229: ...eck the following when you position the monitor Adjust the monitor height so that the top of the screen is at or slightly below eye level Your eyes should look slightly downward when viewing the middle of the screen Position your monitor 18 to 28 inches from your eyes Rest your eyes periodically by focusing on an object at least 20 feet away Blink often ...

Страница 230: ...an anti glare filter Clean your screen regularly Use a lint free non abrasive cloth and a non alcohol neutral non abrasive cleaning solution or glass cleaner to minimize dust Adjust the monitor s brightness and contrast controls to enhance readability Use a document holder placed close to the screen Position whatever you are looking at most of the time the screen or reference material directly in ...

Страница 231: ...ged periods follow these instructions Vary your tasks throughout the day Take frequent short breaks that involve walking standing and stretching During these breaks stretch muscles and joints that were locked in one position for an extended period of time Relax muscles and joints that were active ...

Страница 232: ...on alter your sitting posture periodically and keep your hands and wrists warm NOTE For more information on workstation setup see the American National Standard for Human Factors Engineering of Visual Display Terminal Workstations ANSI HFS Standard No 100 1988 The Human Factors Society Inc P O Box 1369 Santa Monica California 90406 ...

Страница 233: ...ry habits and other conditions Psychosocial factors associated with these disorders include workplace stress poor job satisfaction lack of support by management and or lack of control over one s work Contact a physician if you experience pain tenderness swelling burning cramping throbbing weakness soreness tingling and or numbness in the hands wrists arms shoulders neck back and or legs CHECKING Y...

Страница 234: ...ht when moving the mouse Checking Your Monitor Did you adjust your monitor so that the top of the screen is at or slightly below eye level Do you periodically rest your eyes by blinking often or looking away from the screen Is your monitor 18 28 inches from your eyes Do you use a document holder placed close to the screen Checking You Is your work area set up to promote a natural and relaxing work...

Страница 235: ... feel any sustained discomfort For more information on workstation setup see the American National Standard for Human Factors Engineering of Visual Display Terminal Workstations ANSI HFS Standard No 100 1988 The Human Factors Society Inc P O Box 1369 Santa Monica California 90406 ...

Страница 236: ...ernally 33 MHz externally zero wait state Page Hit PowerMate V4100 100 MHz internally 33 MHz externally zero wait state Page Hit PGA OverDrive Socket Integrated Socket supports an optional processor upgrade Cache Internal Cache PowerMate V466 8 KB write back 4 way set associative PowerMate V4100 16 KB write back 4 way set associative Optional secondary cache 256 KB using one 32 KB by 8 bit module ...

Страница 237: ...mic RAM DRAM Standard Memory 1 MB Expandable to 2 MB Calendar Clock Year Month Day Hour Minute Second 01 Second maintained by battery backup Battery Type 3 volt lithium non rechargeable Input Output I O Facilities Integrated Industry Standard Interfaces Parallel one 25 pin connector Serial two RS 232C ports support asynchronous communication up to 9600 bps 9 pin connectors VGA Video Monitor suppor...

Страница 238: ...s Desktop systems four slots Three 8 16 bit ISA slots One shared 32 bit PCI and 8 16 bit ISA slot Minitower systems five slots Four 8 16 bit ISA slots One shared 32 bit PCI and 8 16 bit ISA slot Keyboard Industry Standard 101 keys U S Canada Australia and Asia 102 keys UK and Germany PS 2 compatible Function Keys 12 keys capable of up to 48 functions Status Lamps numeric lock capital lock and scro...

Страница 239: ...4 KB sec mode 2 Access time typical 230 msec Built in buffer 128 KB Read Error Rate ECC ON 1 block 1012 bits ECC OFF 1 block 109 bits Host Interface IDE ATAPI Photo CD Compatibility Multisession Photo CD Single session Photo CD Device Slots One 3 1 2 inch externally accessible slot contains standard 1 44 MB diskette drive Two 5 1 4 inch externally accessible slots in the desktop three slots in the...

Страница 240: ...d True Color at 640 by 480 Graphics Support with 1 MB video DRAM 1280 by 1024 pixels 16 256 colors at 87 Hz I 1024 by 768 pixels 16 256 colors at 60 Hz 70 Hz and 72 Hz 1024 by 768 pixels 64K colors at 64 Hz 87 Hz I 800 by 600 pixels 16 256 colors at 56 Hz 60 Hz and 72 Hz 800 by 600 pixels 64K colors at 56 Hz and 60 Hz 640 by 480 pixels 16 256 colors at 60 Hz 72 Hz 640 by 480 pixels 16 8 million co...

Страница 241: ...ammable sampling rate 5 kHz to 45 kHz in 228 steps 16 bit and 8 bit DMA channels using a single interrupt Dynamic filtering for digital audio recording and playback Built in Mixer Mixes sources from digitized voice CD audio and inputs from MIDI device line in microphone and PC speaker Selectable input source or mixing source of various audio sources for recording Automatic gain control amplifier f...

Страница 242: ...odels 3 inch Stereo Speakers Bass and treble boost buttons Built in power booster Balance knob Power source 6 volt AC power adapter 3 5 mm stereo plug Fax Modem Board fax modem models Model Zoom FaxModem VFPV 32bis 14 000 bps V 32bis send receive data fax modem Compatibility with the Hayes AT command set and extended Microcom Network Protocol MNP 5 and V 42bis commands Class I and Class 2 Group 3 ...

Страница 243: ...on volatile memory storage for two user profiles and four telephone numbers Four COM ports and four interrupts 40 character command buffer for chaining commands Auto negotiation of highest mutually supported level of error correction data compression and modem speed Automatic speed selection automatic fallback to slower speed on initial connection and during call Communications software compatible...

Страница 244: ...EE 802 3 industry standard for a 10 Mbps CSMA CD local area network Connectors RJ 45 AUI BNC Dimensions Desktop System Unit Height 4 4 in 11 2 cm Width 16 9 in 42 9 cm Depth 16 2 in 41 2 cm Minitower System Unit Height 14 5 in 36 8 cm Width 8 5 in 21 6 cm Depth 16 44 in 41 8 cm Keyboard Height 1 6 in 4 1 cm Width 19 0 in 48 3 cm Depth 8 4 in 21 3 cm ...

Страница 245: ... system configuration Desktop System Unit 24 5 lb 11 1 kg Minitower System Unit 28 5 lb 12 9 kg Keyboard 3 5 to 4 lb 1 6 to 1 8 kg Power Universal Power Supply 115 230 V switch selectable Recommended Operating Environment Temperature 50 F to 95 F 10 C to 35 C Relative Humidity 20 to 80 ...

Страница 246: ...ROM reader that comes in multimedia models Use this information if you need to remove reconfigure or reinstall the CD ROM reader REAR PANEL The rear panel of the quad speed CD ROM reader provides features for cabling and configuring the reader These features are shown in the following figure and then described Rear view of the quad speed reader C ...

Страница 247: ... IDE interface port see thefollowing section IDE cable connector Connects the system s IDE interface to the CD ROM reader Connect the IDE interface cable from the standard IDE port IDE2 connector to this connector Align the colored edge of the IDE interface cable with the pin 1 side of the IDE interface connector Power connection Provides a power connector for operating power from your computer ...

Страница 248: ...S Use the following jumper setting information to set your quad speed CD ROM reader configuration NOTE The quad speed CD ROM reader jumpers are set correctly at the factory for the standard multimedia configuration Quad speed reader jumper settings ...

Страница 249: ... MIDI interface Situations that might require changing jumper settings include You add a peripheral device that uses the same I O addresses DMA channel or interrupt setting as your sound board known as a hardware conflict You install a board with another joystick game connector in your system CAUTION Sound board jumpers are set correctly at the factory for your multimedia configuration The board i...

Страница 250: ...DBS1 jumpered jumpered 5 Audio base I O address IOS0 IOS1 jumpered jumpered 220H Audio interface interrupt IS0 IS1 not jumpered jumpered IRQ5 MIDI interface MPUEN jumpered enabled Sound board driver software sets the audio interface interrupt to IRQ7 The driver software IRQ7 setting overrides the sound board IS0 and IS1 jumper settings The following figure shows jumper locations Descriptions of th...

Страница 251: ...Sound Board Jumper Settings D 3 Sound board jumper locations and functions ...

Страница 252: ...tions describe the sound board jumper functions and settings MIDI Base I O Address Jumper MSEL sets the base I O address for the MPU 401 UART MIDI interface Two base I O addresses are available 300H 330H factory setting Base I O address settings of the MIDI interface ...

Страница 253: ...D 5 Joystick Connector Jumper JYEN enables factory setting or disables the joystick connector on the sound board If you are using a joystick connector on another board disable the one on the sound board Joystick connector settings ...

Страница 254: ...both low and high DMA channels for direct data transfers to system memory Jumpers DAS0 and DAS1 set low DMA channels 0 1 factory default setting and 3 for 8 bit data transfers Jumpers DBS0 and DBS1 set high DMA channels 5 factory default setting 6 and 7 for 16 bit data transfers Low DMA channel settings ...

Страница 255: ...Sound Board Jumper Settings D 7 High DMA channel settings ...

Страница 256: ...r Settings Audio Interface Base I O Address Jumpers IOS0 an IOS1 set the audio interface base I O address Four address are available 220H factory setting 240H 260H and 280H Base I O address settings for the audio interface ...

Страница 257: ...io interface interrupts Four interrupts lines are available IRQ 2 5 factory default setting 7 and 10 NOTE Sound board driver software sets the audio interface to IRQ7 The driver software IRQ7 setting overrides the sound board IS0 and IS1 jumper settings IRQ settings for the audio interface ...

Страница 258: ...D 10 Sound Board Jumper Settings MIDI Interface Jumper MPUEN enables disables the MPU 401 UART MIDI interface on the sound board The default setting is enabled MPU 401 UART MIDI settings ...

Страница 259: ...fore changing a jumper setting 2 Remove the system unit cover see Chapter 4 3 Locate the jumper s on the sound board see the figure earlier in this chapter You might have to remove the sound board or another expansion board from the system to access the jumper see Board Removal in Chapter 5 4 Change the jumper setting 5 If you removed the sound board or any other board from the system replace it s...

Страница 260: ...vailable to the user for operating system and application programs BIOS Basic Input Output System A collection of primitive computer routines usually burnt into ROM that controls the real time clock keyboard disk drives video display and other peripheral devices bit Binary digit The smallest unit of computer data bits per second bps A unit of transmission Also called baud rate board Printed circui...

Страница 261: ...contiguous bits C chip A small piece of semiconductor material usually silicon that contains miniaturized electronic circuits CD ROM reader compact disc read only memory A device that uses laser technology to read data or play audio stored on a CD clock Electronic timer used to synchronize computer operations CMOS Complementary Metal Oxide Semiconductor A chip that contains nonvolatile memory CMOS...

Страница 262: ...emory to load the operating system what device drivers to install and what memory management features to activate conventional RAM The first megabyte of RAM in the system which contains 640 KB of base memory and 384 KB of reserved memory cursor A movable image on the display screen that indicates where the next entered data appears D diskette A thin flexible platter coated with a magnetic material...

Страница 263: ... accept data function key The set of keys on the keyboard usually F1 through F12 that let you get help and error message information or quickly select frequently used commands H hard disk A rigid magnetic storage device that provides fast access to stored data hardware The electrical and mechanical parts from which a computer is made hertz Hz A unit of frequency equal to one cycle per second I inp...

Страница 264: ...n I O device that diverts the attention of the microprocessor from the program to a special address K kilobyte KB 1024 bytes L load The process of copying a program into the computer s memory from a storage device M megabyte MB 1 048 576 bytes memory Electronic storage area in a computer that retains infor mation and programs A computer has two types of memory read only memory ROM and random acces...

Страница 265: ...ins its data when system power is turned off Nonvolatile memory in your system is a com plementary metal oxide semiconductor CMOS chip which is backed up by an internal battery The backup battery preserves the clock calendar data and system configuration parameters stored in CMOS See volatile memory O operating system Set of programs that manage the overall operation of the computer overwrite Stor...

Страница 266: ...ides the means for an interface between the microproc essor and external devices A cable connector is usually plugged into the port to attach the device to the computer processor In a computer a functional unit that interprets and executes instructions prompt A special symbol indicating the beginning of an input line Also a message that appears on the screen indicating that the user must take a ce...

Страница 267: ...deo display resolution is determined by the number of pixels on the screen Reso lution is usually specified in pixels by scan lines for exam ple 640 by 480 See pixels RS 232C Standard interface for serial devices S serial interface An interface that communicates information one bit at a time serial printer A printer with a serial interface shadowing To copy the system and video BIOS from chip to R...

Страница 268: ...wer is turned off Standard memory and memory that you add to your computer are volatile memory See nonvolatile memory W wait state The additional cycle beyond the minimum cycles required by the microprocessor to complete a memory transaction When additional cycles are required the microprocessor must wait for the additional cycle before the transaction is completed A zero wait state means that the...

Страница 269: ...Glossary 10 write To record or store information to a storage device write protection Allows reading from a diskette but prevents writing to a diskette ...

Страница 270: ...52 5 61 5 68 IDE 5 49 5 54 5 55 5 60 5 67 power 5 49 5 52 storage device 5 49 5 53 Cache internal B 1 secondary 5 30 B 1 Care CD 3 5 3 6 mouse 3 4 3 5 system 3 1 3 3 CD ROM reader cabling 5 54 C 2 configuring C 2 connectors C 1 C 2 drive assignment 1 7 eject retract button 1 8 emergency eject 1 8 7 11 features 1 7 1 8 installing 5 46 5 47 5 58 5 61 5 68 5 70 jumper settings C 2 C 3 support 1 51 us...

Страница 271: ...5 61 5 68 features 1 6 signal cable 5 49 5 52 5 53 support 5 46 termination 5 48 using 1 31 Diskette drive controller 2 14 2 15 Diskettes formatting 1 32 loading 1 31 removing 1 33 DMI 1 41 1 45 1 41 Documentation xiii xv 7 14 Drive A 1 6 Drivers mouse 2 24 2 27 nework 2 31 video 2 28 Dual IDE ports 1 48 1 51 Dual IDE controllers 2 9 2 14 E Electronic information service 1 45 7 13 7 14 E mail tech...

Страница 272: ...evices IDE devices headphones 1 7 5 77 Health A 1 Help 7 12 7 14 I I O ports 2 14 IDE cables 5 54 IDE controllers 2 9 2 14 IDE devices automatic detection 2 10 cables 5 49 5 54 5 55 connecting 5 54 5 60 5 67 jumper settings 5 49 master slave configuration 2 9 5 49 system support 2 9 IDE hard disk 1 21 IDE ports 5 49 5 54 Installing options See also Expansion boards SIMM Storage devices boards 5 5 ...

Страница 273: ...ximum 5 22 nonvolatile 2 1 2 22 parity 2 16 shadowing 2 11 SIMM upgrade kits 5 22 video DRAM B 2 Microphone connecting 5 77 5 82 features 1 25 jack 1 15 mounting 5 82 Microprocessor 1 48 1 49 B 1 Monitor options 5 2 Mouse care 3 4 3 5 connecting 1 12 port 1 12 using 1 24 Mouse driver 2 24 2 27 Moving guidelines 3 7 Multimedia components 5 77 setup 5 77 5 78 5 82 N NEC Bulletin Board Service 2 24 2...

Страница 274: ...36 Power saving features 1 1 1 5 1 36 1 54 Power socket 1 13 Power supply fan 1 12 system power socket 1 13 type B 10 voltage selector switch 1 13 Powering off 1 29 Powering on 1 26 1 29 Primary IDE channel 1 51 2 9 5 54 Printer connecting 5 72 5 73 parallel 1 11 5 72 serial 5 74 5 75 Printer port connector 1 11 5 73 settings 2 14 Problem checklist 7 1 7 2 Product information 1 45 7 13 7 14 Protec...

Страница 275: ...24 Main Menu 2 3 Main menu options 2 8 Main Menu summary window 2 4 2 8 master slave configuration 2 9 memory 2 8 2 16 memory shadowing 2 11 menu bar 2 5 parity 2 14 2 16 passwords 2 17 power management 2 20 Power menu 2 20 saving changes 2 22 2 24 Security menu 2 17 selecting a menu bar option 2 5 selecting a menu item 2 7 standard IDE controller 2 14 starting 2 3 system date 2 8 system time 2 8 ...

Страница 276: ...ckup 1 40 System care 3 1 3 3 System reset 1 38 1 40 System technologies 1 48 1 54 T Technical support 7 12 7 14 Treble Booster button 5 81 Troubleshooting 7 1 7 2 True Color 1 48 1 51 U User password 1 40 2 17 2 18 V VGA monitor connector 1 11 Video DRAM 5 36 B 2 drivers 1 11 2 28 graphics B 5 modes 1 11 2 28 specifications B 5 support 1 11 1 50 upgrade 5 36 Video performance 5 36 Virus protectio...

Страница 277: ...erference by one or more of the following measures Reorient or relocate the receiving antenna Increase the separation between the equipment and receiver Connect the equipment to an outlet on a circuit different from the one to which the receiver is connected Use shielded and properly grounded I O cables and power cable to ensure compliance of this unit to the specified limits of the rules FCC Mode...

Страница 278: ...determine how many devices can be connected to your telephone line In most areas the sum of the RENs of all devices on any one line should not exceed five 5 If too many devices are attached they may not ring properly Modem Service Requirements If the modem malfunctions all repairs should be performed by NEC Technologies or an NEC Authorized Service Center It is the responsibility of users requirin...

Страница 279: ...ephone extension cord The customer should be aware that compliance with the above conditions may not prevent degradation of service in some situations Repairs to certified equipment should be made by an authorized Canadian main tenance facility designated by the supplier Any repairs or alterations made by the user to this equipment or equipment malfunctions may give the telecommunica tions company...

Страница 280: ...ou d un type recommandé par le constructeur Mettre au rébut les batteries usagées conformément aux instructions du fabricant BATTERY DISPOSAL Do not place used batteries in your regular trash The nickel cadmium or nickel metal hydride batteries must be collected recycled or disposed of in an environmentally approved manner The incineration landfilling or mixing of batteries with the municipal soli...

Отзывы: