5-140 Installing and Using Utilities
2. If the browser displays a warning indicating that the Web site is being blocked, click
Add
to
display the Trusted Sites dialog box. Click
Add
to add the site to your Trusted Sites zone, then
click
Close
to dismiss the dialog box.
3. If the browser displays additional warning messages about running Web-based content, click
Close
or
OK
to dismiss these messages.
4.
After login, go to [Control Panel] - [Remove KVM Console] and click [
]
to start the Remote
KVM console.
5. The Upgrade Side’s login screen is displayed on the mainframe. Click “CtrlAlt” button
[
] on
the Remote KVM Console window
and press “Del” on the virtual keyboard. This will send “Ctrl
+ Alt + Del” signal and allows to login.
For more details about the Remote KVM Console window and the virtual keyboard, go to chapter 4
“System Configuration” and see “Remote KVM Console” under “Using Remote Management”.
After you initiate the remote session, see TIPS for more information about what you can do on the
Upgrade Side and how you can merge the system after you have finished performing upgrade tasks.
To terminate a Remote KVM session with the Upgrade Side
1.
Verify that the install processing is completed as well as the install program is all finished.
2.
Select [X]on the upper right-hand side of the Remote KVM consol to close the window.
3.
Select File menu
on the upper left-hand side, choose
Finish
to log out from the main window.
4.
Close the browser window with login page.
TIPS:
Terminating the Remote KVM is not mandatory. You can merge the system while maintaining the
Remote KVM connection.
TIPS:
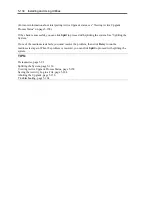
Connecting to the Upgrade Side with Remote Desktop, page 5-141
Running Software Installers, page 5-142
Restarting the Upgrade Side, page 5-145
Viewing Active Upgrade Process Status, page 5-158
Merging the System, page 5-150
Aborting the Upgrade, page 5-156
Troubleshooting, page 5-164
Содержание EXP320J
Страница 12: ... THIS PAGE IS INTENTIONALLY LEFT BLANK ...
Страница 25: ...xiii APPENDIX A SPECIFICATIONS A 1 APPENDIX B I O PORT ADDRESSES B 1 ...
Страница 26: ...xiv THIS PAGE IS INTENTIONALLY LEFT BLANK ...
Страница 28: ...1 2 Precautions for Use 使用上的注意 本章包含著對服務器恰當安全的操作必要的信息 ...
Страница 54: ...1 28 Precautions for Use This page is intentionally left blank ...
Страница 64: ...2 10 General Description Rear View ...
Страница 68: ...2 14 General Description CPU IO Module CPU IO module ...
Страница 88: ...2 34 General Description This page is intentionally left blank ...
Страница 100: ...3 12 Windows Setup and Operation 3 Confirm that RDR of the disk is cancelled ...
Страница 101: ...Windows Setup and Operation 3 13 4 Cancel the disk of the corresponding slot in the same manner ...
Страница 218: ...4 92 System Configuration This page is intentionally left blank ...
Страница 253: ...Installing and Using Utilities 5 35 DIMM Allows the information of DIMM on the CPU modules to be viewed ...
Страница 390: ...5 172 Installing and Using Utilities This page is intentionally left blank ...
Страница 408: ...6 18 Maintenance 3 Stop of PCI module 1 4 Start of PCI module 1 ...
Страница 410: ...6 20 Maintenance This page is intentionally left blank ...
Страница 454: ...7 44 Troubleshooting This page is intentionally left blank ...
Страница 485: ...System Upgrade 8 31 board must not be mixed with N8804 005 or N8803 035 ...
Страница 500: ......
Страница 503: ......


