4-18 System Configuration
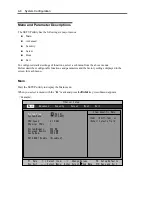
Select “Set Supervisor Password” or “Set User Password” and press
Enter
to display the following
pop-up screen. The screen below shows when “Set Supervisor Password” is selected.
Set a password on this pop-up screen. Enter a password of up to seven alphanumeric characters and
symbols from the keyboard.
IMPORTANT:
User password setup is not available before Supervisor password setup.
Do not set any password before installing the OS.
If you forget your password, contact your sales agent.
See the table below for setup options on the screen.
Option Parameter
Description
Supervisor
Password Is
Unset
Set
Indicates Supervisor password setup status (view
only).
User Password
is
Unset
Set
Indicates User password setup status (view only).
Set Supervisor
Password
[Enter]
Press
Enter
to display the supervisor password
entry screen. This option is available only when
you log into the SETUP utility with the supervisor
password.
Set User
Password
[Enter]
Press
Enter
to display the user password entry
screen. With a user password, accessing the
SETUP menus is restricted.
Main Advanced
Security
Server Boot Exit
ftServer Setup
F1 Help ↑↓ Select Item -/+ Change Values F9 Setup Defaults
Esc Exit ←→ Select Menu Enter Select Sub Menu F10 Save and Exit
Supervisor Password Is: Unset
User Password Is: Unset
Set Supervisor Password
[
Enter
]
Set User Password [Enter]
Password on boot [Disabled]
Item Specific Help
Supervisor Password
controls access to the
setup utility.
Set Supervisor Password
Enter New Password [ ]
Confirm New Password [ ]
Содержание EXP320J
Страница 12: ... THIS PAGE IS INTENTIONALLY LEFT BLANK ...
Страница 25: ...xiii APPENDIX A SPECIFICATIONS A 1 APPENDIX B I O PORT ADDRESSES B 1 ...
Страница 26: ...xiv THIS PAGE IS INTENTIONALLY LEFT BLANK ...
Страница 28: ...1 2 Precautions for Use 使用上的注意 本章包含著對服務器恰當安全的操作必要的信息 ...
Страница 54: ...1 28 Precautions for Use This page is intentionally left blank ...
Страница 64: ...2 10 General Description Rear View ...
Страница 68: ...2 14 General Description CPU IO Module CPU IO module ...
Страница 88: ...2 34 General Description This page is intentionally left blank ...
Страница 100: ...3 12 Windows Setup and Operation 3 Confirm that RDR of the disk is cancelled ...
Страница 101: ...Windows Setup and Operation 3 13 4 Cancel the disk of the corresponding slot in the same manner ...
Страница 218: ...4 92 System Configuration This page is intentionally left blank ...
Страница 253: ...Installing and Using Utilities 5 35 DIMM Allows the information of DIMM on the CPU modules to be viewed ...
Страница 390: ...5 172 Installing and Using Utilities This page is intentionally left blank ...
Страница 408: ...6 18 Maintenance 3 Stop of PCI module 1 4 Start of PCI module 1 ...
Страница 410: ...6 20 Maintenance This page is intentionally left blank ...
Страница 454: ...7 44 Troubleshooting This page is intentionally left blank ...
Страница 485: ...System Upgrade 8 31 board must not be mixed with N8804 005 or N8803 035 ...
Страница 500: ......
Страница 503: ......


