18
© by N&W GLOBAL VENDING SpA
02-2007 266 00
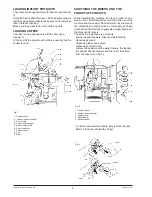
MAINTENANCE MENU
Press once the programming button located on the internal
side of the push-button board for the machine to go into
“Maintenance” mode.
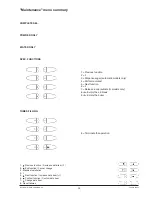
When in maintenance mode the buttons take on the
following functions:
Previous function / Decrease data item (-1)
Exit function / Cancel change
Next function / Increase data item (+1)
Confirm function / Confirm data item
Change data item
Scroll through the menu with the “ ”and “ ” buttons to
show the following functions:
“STATISTICS”
Functions: display statistics, print statistics, delete statis-
tics, display selection counters.
“COMPLETE SEL.”
(For automatic models only)
Function of test dispensing complete with cup, sugar and
stirrer
“POWD. ONLY”
Function of test dispensing (powder only)
“WATER ONLY”
Function of test dispensing (water only)
“NO ACCESSORIES”
(For automatic models only)
Function of test dispensing without cup, sugar and stirrer
In the test dispensing functions, when pressing the confirm
button “ ” the selection buttons will take on the original
function for 7 seconds, permitting the test dispensing
provided for each function.
N.B.: For espresso coffee based selections, only the
additions are dispensed with the partial dispensing of
powder and water; if a selection requires no addition
the message “Sel. disabled” will be displayed, indicat-
ing a disabled selection.
“SPECIAL FUNCTIONS”
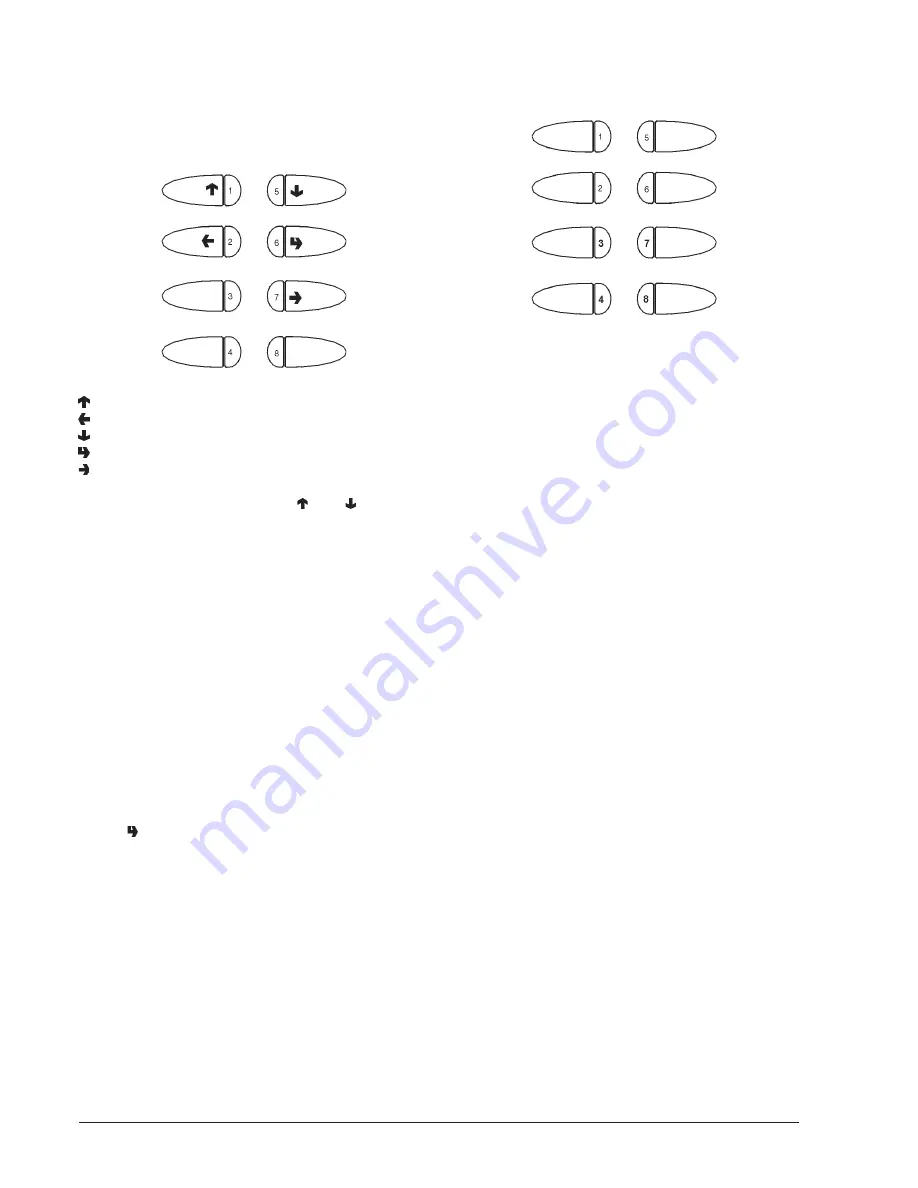
When the display shows “Special functions” the buttons
take on the following functions:
2
Grind a coffee dose
3
Dispense sugar (automatic models only)
4
Autotest
6
Rotate the coffee unit
7
Release a cup (automatic models only)
8+6
Empty the air-break
8+4
Empty the boiler
Grinding a coffee dose (direct function)
Press button “2” for grinding coffee; this function is useful
for getting a dose of ground coffee and checking its weight.
Dispensing sugar (direct function)
Automatic models only.
Press button “3” for performing a sugar dispensing test.
Autotest (direct function)
Before performing this operation, remove the waste tray
and the powder and coffee canisters.
From the “Special functions” menu press button “4” on the
display and the message “AUTOTEST” will start blinking.
Press button “2” to cancel the operation, confirm with
button “6” to start the autotest cycle.
In a sequence:
- The doser units are activated for 2 seconds
- The mixers are activated for 2 seconds
- A cup is released (automatic models only)
- A stirrer is released (automatic models only)
- The coffee unit is rotated
- Liquid waste container float
- Push-button panel test; the machine displays the
number of the button which must be pressed and waits
for this to be done before going to the next button
(number 9 corresponds to the wash button).
Fig. 22
Fig. 23
Содержание Colibri UL 120V
Страница 2: ......
Страница 4: ......
Страница 44: ...N W GLOBAL VENDING S P A Sx39701...
Страница 45: ...Colibr UL 120V Schema elettrico funzionale espresso semiautomatico...
Страница 46: ...N W GLOBAL VENDING S P A Sx44700...
Страница 47: ...Colibr UL 120V Schema elettrico funzionale espresso automatico...
Страница 48: ...by N W GLOBAL VENDING SpA NOTE...
Страница 49: ...by N W GLOBAL VENDING SpA NOTE...
Страница 50: ...by N W GLOBAL VENDING SpA NOTE...
Страница 52: ......

