Air Driven Gas Booster Compressor, 8” Drive AG Series • OM-12J
9
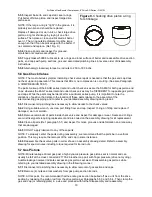
swollen. Inspect molded seat on opposite pilot valve. If damaged, replace pilot valve. The molded seat
pilot valve under the flow fitting uses the shorter of the two springs.
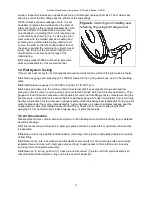
NOTE: Unless excessive leakage occurs, it is not
advisable to replace the inside seal on the stem of
either pilot valve as this requires disassembly of the
air drive cylinder. If replacement is required, care
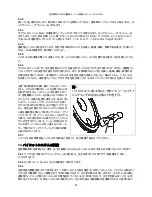
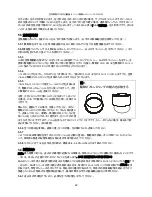
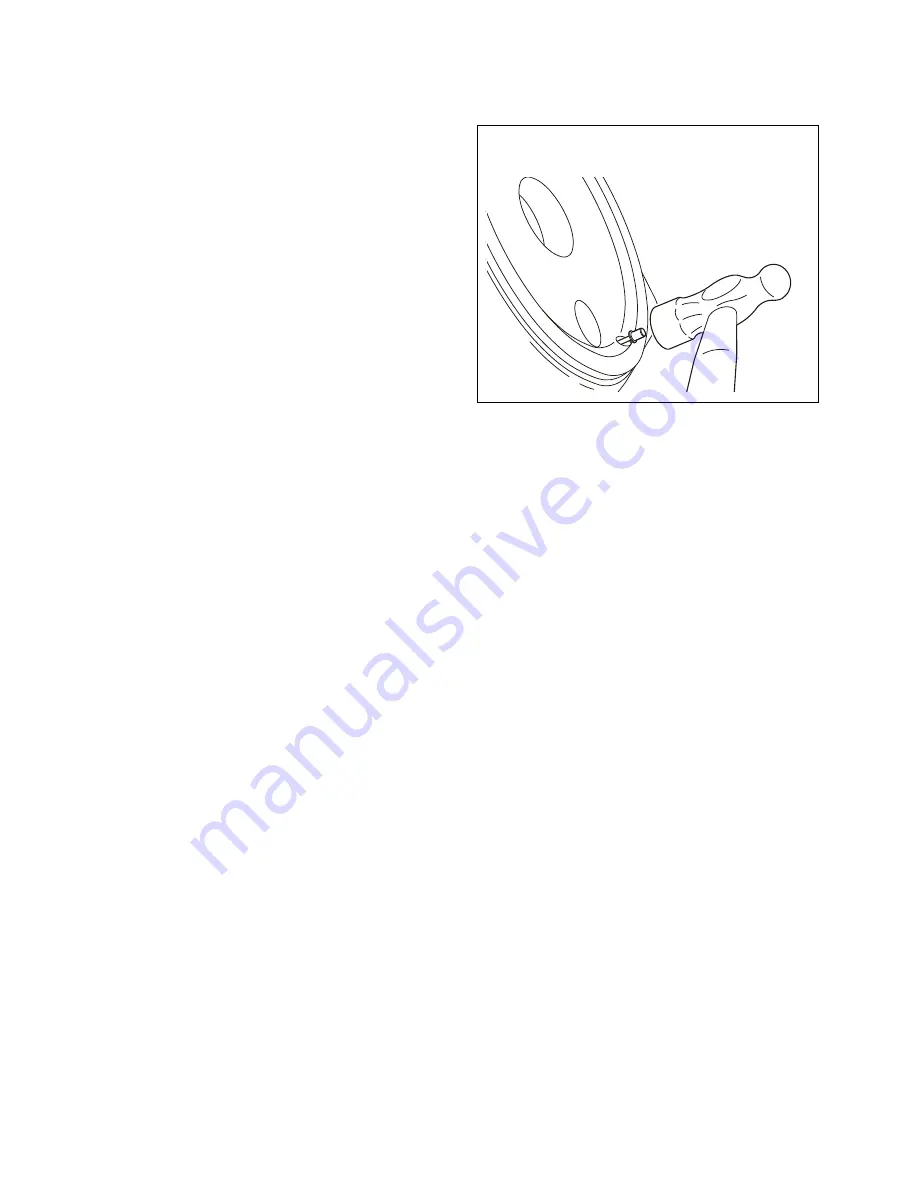
must be taken in installing the Tru-Arc retaining ring
concentrically as shown in (Fig. 8.) Using the pilot
stem valve with the molded seat as a seating and
centering tool, put the retaining ring, retainer and
seal on the stem so that the molded rubber face of
the valve is against the retaining ring. Insert in seal
cavity. Tap the top of the pilot valve lightly with a
small hammer to evenly bend the legs of the
retaining ring.
5.3.7
Apply Haskel 50866 Lubricant to pilot valve
parts and reassemble in the reverse manner.
5.4 Pilot System Testing
If the air drive will not cycle, the following test procedure will determine which of the pilot valves is faulty:
5.4.1
Remove gauge port pipe plug (p/n 17568-2) located in the cycling valve body, next to the retaining
plate.
5.4.2
Install pressure gauge (0 to 160 PSI or higher) in 1/8" NPT port.
5.4.3
Apply air pressure to the air drive inlet (and external pilot if so equipped). Gauge will read low
pressure until pilot valve on cycling valve end is contacted by drive piston and it reverses direction, Then
gauge will read full pilot air pressure until opposite pilot valve (on flow fitting end) is contacted-venting the
pilot pressure. Correct pilot valve action therefore will cause gauge to "snap" immediately from low to high
as drive reciprocates. A slow increase in gauge reading indicates leakage past replaceable O-ring on pilot
valve located under the cycling valve assembly. A slow decrease in pressure indicates leakage past the
molded seat on pilot valve located under the flow fitting. Check also for correct spring length (Ref.
paragraph 5.3.6) and external air leaks at gauge plug, or ends of pilot tube.
5.5 Air Drive Section
Disassemble air drive cylinder section and piston in the following manner (while referring to your detailed
assembly drawing):
5.5.1
Disconnect all plumbing lines to allow gas pump sections be moved left or right when drive section
is separated.
5.5.2
Remove bolt, lock washer and flat washer (hold long nut to prevent unscrewing) located on topside
of flow fitting.
5.5.3
Remove (8) nuts. lock washers and flat washers securing (4) air drive main tie bolts and carefully
separate drive end caps (with intact gas pump sections) to gain access to drive piston and cross pins
securing rod to drive piston assembly.
5.5.4
Remove (1) E-ring, push out (1) cross pin and disconnect (1) piston rod from piston assembly so
that air barrel and drive piston o-ring can be removed for inspection.
Figure 8.
Centering and installing seal
retaining ring using pilot step as tool
Содержание Haskel 8AGD-1
Страница 15: ...8 OM 12J 15 2 3 T 2 3 1 4 25 1 8AGT 8AGD 40 1 10 1 2 3 2 3 1 5 1 10 1 80 C...
Страница 16: ...8 OM 12J 16 1 8AGD 8AGT 2 8AGT 25mm 145 C...
Страница 18: ...8 OM 12J 18 3 5 1 2 2 3 4 4 1 1 bar 5 5 1 CV No 242 CV O...
Страница 19: ...8 OM 12J 19 IPA 50 50 5 2 5 2 1 5 2 2 3 O O 4 5 2 3 5 3 4 5...
Страница 24: ...8 OM 12J 24 O 5 7 8 5 7 9 6 6 1 6 2 70 bar 6 3...
Страница 25: ...8 OM 12J 25 6 4 6 5 6 5 1 bar 8AGD 5 15 5 8AGD 14 15 5 8AGD 30 17 2 8AGD 60 21 7 6 5 2 A A B B B 5 5 34 5 bar...
Страница 26: ...8 OM 12J 26 7 7 1 7 2 7 3 1 4 bar 5 2 O O O 9 5 5 5...
Страница 28: ...8 AG OM 12J 28 2 3 T 1 2 2 3 1 psi 0 4 25 1 0 2 8AGT 2 8AGD Haskel 40 1 10 1 2 3 2 3 1 5 1 10 1 150 F...
Страница 29: ...8 AG OM 12J 29 8AGD 8AGT 8AGD 1 2 1 1 8AGD 8AGT 2 2 1 2 2 2 8AGT...
Страница 31: ...8 AG OM 12J 31 3 5 1 2 2 3 4 4 1 15 psi 5 5 1 Loctite CV Blue 242 Loctite CV O...
Страница 32: ...8 AG OM 12J 32 Stoddard 50 50 5 2 5 2 1 4 5 2 2 3 O O 4 3 4 Pilot shaft end seal...
Страница 38: ...8 AG OM 12J 38 B 80 500 psi 7 7 1 7 2 7 3 20 psi 5 2 O O 9 5 5 6 O 6...
Страница 41: ...8 AG OM 12J 41 1 8AGD 8AGT 2 2 8AGT 1 300 F...
Страница 43: ...8 AG OM 12J 43 4 1 15 PSI 5 5 1 Loctite CV 242 Loctite CV O 50 50 5 2 5 2 1...
Страница 44: ...8 AG OM 12J 44 5 2 2 3 O O 4 5 2 3 5 5 2 3 1 O 2 2 1 6 30 5 2 4 5 2 1 5 2 3 3 4 5 6...
Страница 48: ...8 AG OM 12J 48 5 7 3 O 5 7 4 O O 5 7 5 O 5 7 6 5 1 5 7 7 O 5 7 8 5 7 9 6 6 1 6 2 1000 PSlG 6 3...
Страница 49: ...8 AG OM 12J 49 6 4 6 5 6 5 1 PSlG 8AGD 5 225 8AGD 14 225 8AGD 30 250 8AGD 60 315 6 5 2 A A B B B 80 500 PSI...
Страница 50: ...8 AG OM 12J 50 7 7 1 7 2 7 3 20 psi 5 2 O O 9 5 5 5 O 6...


