Page
18
of
33
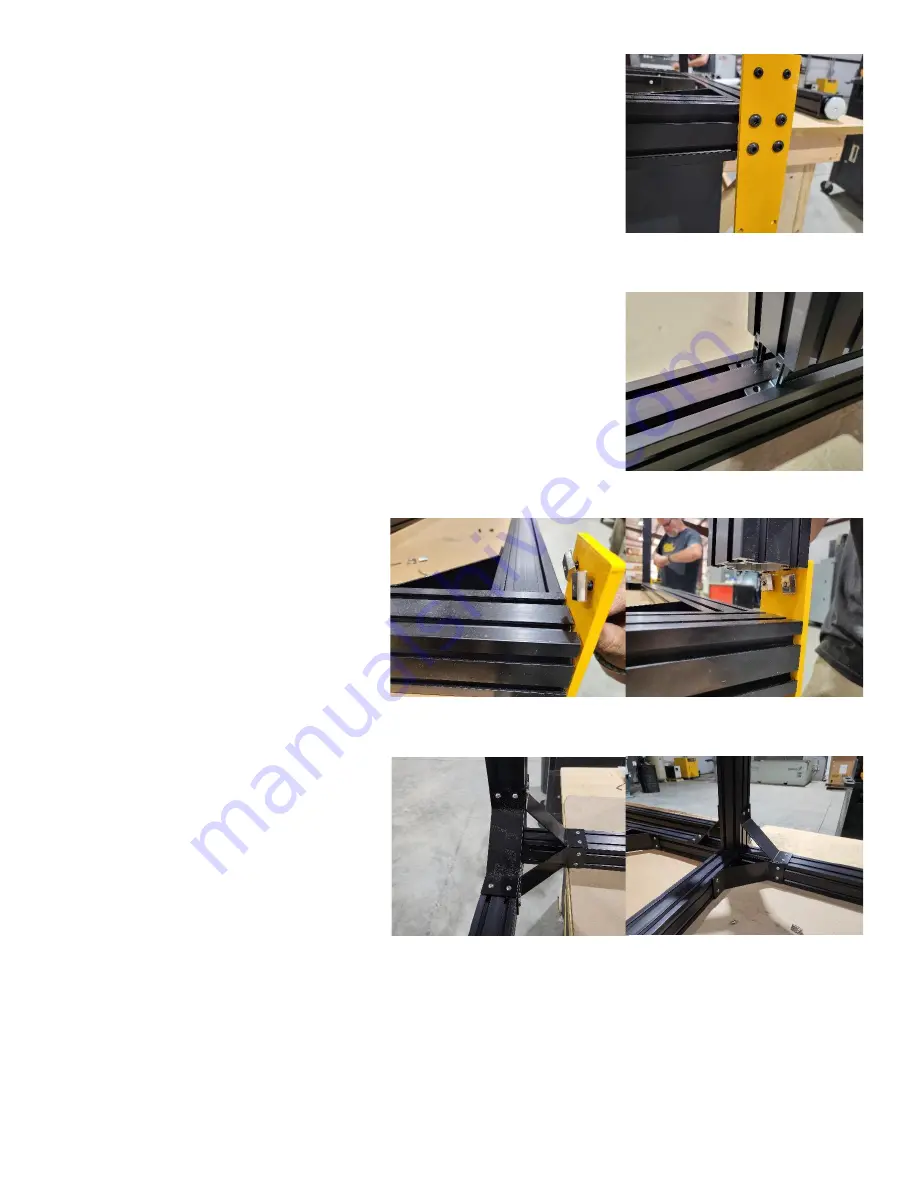
Pick up one end of the frame and block it up. If on a table, hang one end of
the frame (2650 extrusion) off the table. Locate a Y end plate. Using (4)
5/16x3/4 screws, attach the Y end plate to the end of the 2650 extrusion
using the 4 holes close to the smaller M5 holes. The smaller holes should
be pointed up. Repeat the process for the other 2650 extrusion. The Y end
plates will act as feet. Place something underneath to keep from scratching
the end plates. Block up the other end of the frame and repeat the process
for the other side. Check square throughout the process.
Slide (2) 760 leg extrusions onto the inside corner joiners, one leg extrusion
for each 2650. There are two tapped holes diagonally from each other on
one end of the 760 extrusions. Make sure the tapped holes on the 760
extrusions are pointing up. Leave the legs loose. The legs will need to be
adjusted when installing the subframe. Leave the legs near the center of
the 2650 extrusion.
Place (2) M5x16 button cap screws through
the outside of the y end plate and lightly
thread on a large t nut to each screw. Slide
a 760 leg extrusion onto the t nuts. Tighten
the M5x12 button caps while making sure
the leg is flush with the outside of the 2650
extrusion. Repeat for the other y end
plates and legs.
Place (2) drop-in t nuts in the grooves of the
legs, one in each slot, for each face of the
leg that is perpendicular to the 2650
extrusion and the front/rear 1450
extrusion. There will be (4) drop-in t nuts
for each leg total. Use M5x8 button caps to
install gussets on the legs using the drop-in
t nuts. There will be 2 gussets for each leg.
The 2650 Extrusion and the front/rear 1465 extrusion will need (2) corresponding t nuts for each set on the
legs.
Do not connect the middle legs to the 1465 extrusion. The middle legs will only be attached by gusset to the
2650 extrusion. Leave the gussets loose as the legs will need to be adjusted when installing the subframe.


