


Description of the “Data Acquisition” View
Page 50
4.1
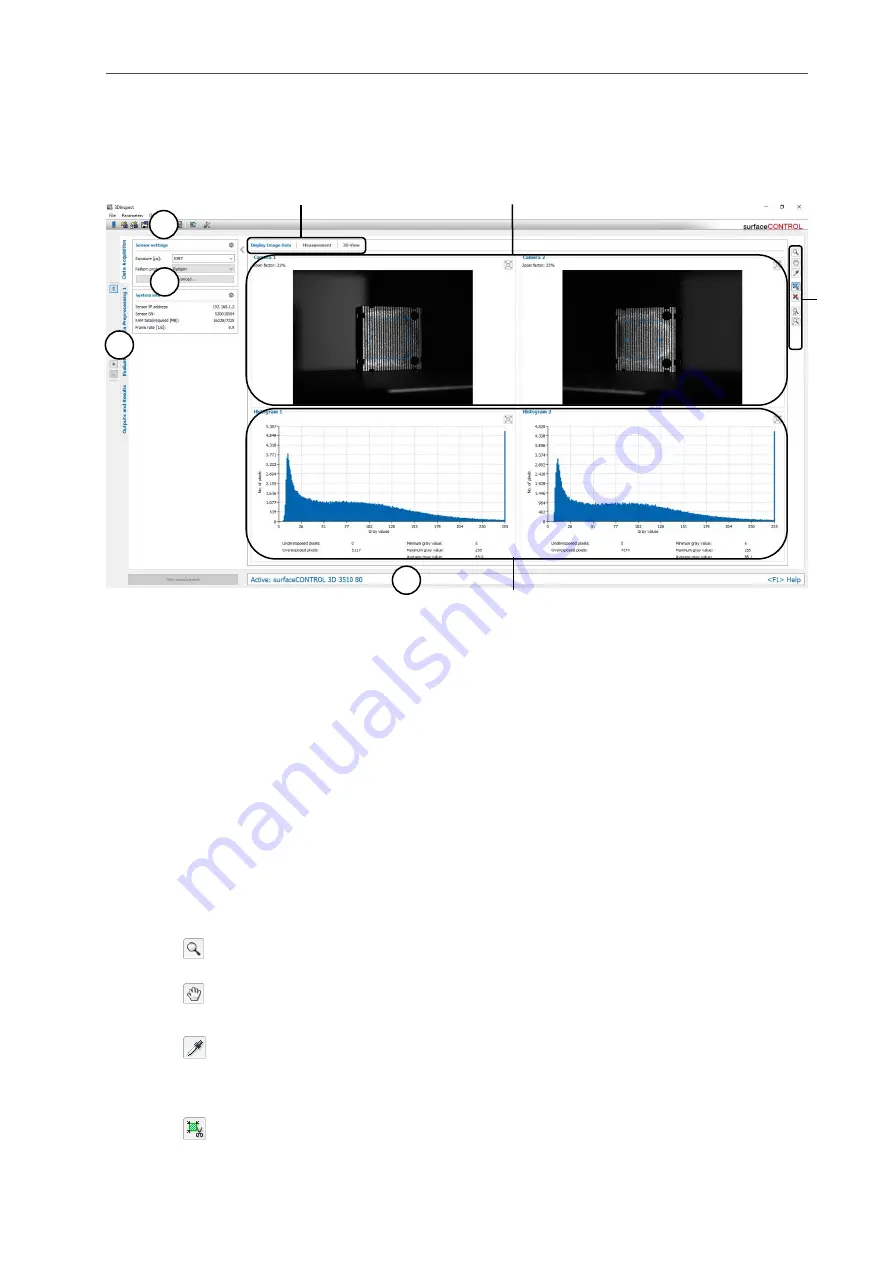
Description of the "Display Image Data" Tab
The “Display Image Data” view shows the raw image of each camera in the sensor and the correspondig
histogram. The images are transferred continuously from the sensor. This view is useful for detecting and
eliminating sources of errors and interference, such as overexposure.
Fig. 4.1: "Display Image Data" view
Display elements and parameters in the "Display Image Data" view:
A
“General” toolbar: Using this toolbar, you can select the data source (see Chapter
),
save and load parameters and reset selected parameters to default settings (see Chapter
).
B
Sensor settings: Change the settings of the sensor with these values. Detail information about
each parameter can be found in Chapters
and
C
Tab bar for switching between views: This tab bar allows you to switch between the four main
views (see Chap.
D
Status line: Status and error messages are displayed on the status line (see Chapter
1
Tab bar for switching between subviews: This tab bar allows you to switch between the sub-
views of the “Data acquisition” view (see Chap.
2
„Display“ / „Measurement“ toolbar: Using this toolbar, you scale the 2D-display and activate
various options for mouse interaction:
Activates or deactivates the "Zoom" mode. In this mode you can zoom in parts of the
camera image and so directly set the scaling of the image with your mouse.
Activates or deactivates the "Move image" mode. In this mode you can move the im-
age.
Activates the "Show pixel information" mode. In this mode the gray values of an individ-
ual pixel is shown. To do so, move the mouse pointer to the desired pixel and press
the left mouse button.
Activates the "Set region of interest" mode. In this mode you may define a rectangular
range for each camera. Pixels which are inside the range will be used for computing
the 3D point cloud. Pixels which are outside the range will be discarded. In order to set
a range, move the mouse pointer to the desired position, press the left mouse button
and keep it pressed to draw out a range.
A
B
C
D
2
1
3
4
Содержание reflectCONTROL RCS
Страница 1: ...3DInspect 1 1 Instruction Manual ...
Страница 25: ...Working with 3DInspect Page 25 ...
Страница 72: ...Description of the Data Preprocessing View Page 72 ...
Страница 74: ...Description of the Data Preprocessing View Page 74 ...
Страница 129: ...Appendix Page 129 ...
Страница 133: ......


