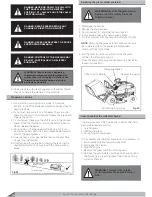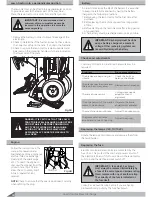
1. Connect each end of the RED “Jumper Cable” to the
positive (+) terminals of each battery. Make sure you do
not touch the chassis with the cables.
2. Connect one end of the BLACK “Jumper Cable” to the
negative (–) terminal of the charged battery.
3. Connect the other end of the BLACK “Jumper Cable” to
the mower’s engine block.
4. Start the engine that has the weak battery last. Allow the
engine to run.
5. To disconnect the “Jumper Cables”, reverse the above
steps.
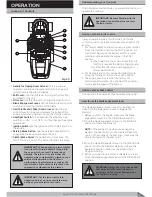
To start cutting
1. Put the accelerator into the “FAST” position.
2. Raise the cutting deck to its highest position.
3. Engage the blades.
4. Start moving forwards onto the grass area very
gradually and with particular caution, as already
described.
5. Adjust the forward speed and the cutting height
according to the lawn condition (height, density and
dampness of the grass).
Depending on the lawn cutting conditions (height,
density, humidity, wet/dry…e.t.c.) the correct output
power is required to achieve a uniform cut. The
following table is a general guide to assist you during
this process:
Lawn Tractor Rear Discharge
24
Mowing and Bagging
WARNING:
This work is to be done to all
four wheels, WITH THE ENGINE OFF AND
THE BLADES DISENGAGED.
IMPORTANT:
To prevent the excessive
wear of the driving belts we recommend
turning on the blade drive while the gas
control lever is in the central position.
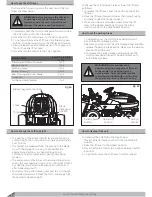
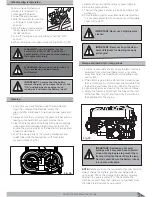
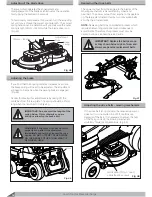
Attaching the support wheels
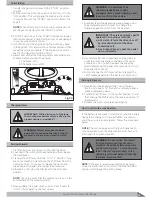
1. Once you have reached the area to be mowed, check to
ensure that the grass-catcher or stone-guard is correctly
´WWHGDQGWKDWWKHFXWWLQJGHFNZKHHOVDUHSRVLWLRQHGDW
the required height.
2. The support wheel in the lowest position of the mowing
mechanism ensures the space between the ground and
edge of the mowing mechanism. It also prevents damage
to the lawn.
3. If another position of the wheel is required, release the
spring with a screwdriver and adjust it if necessary. This
elementary operation is to be done with all 4 wheels.
G r a s s
S p e e d
G e a r ing
High and dense grass
Wet/humid lawn
2.5 km/h
1st – 2nd
Average condition grass
4 – 6 km/h
3rd – 4th
Low grass – dry lawn
6 – 8 km/h
5th – 6th
Crossing from place to
another
Over 8 km/h
7th
IMPORTANT:
If you require crossing an
obstacle, ensure that you turn the blades
OFF and lift the mowing mechanism up.
WARNING:
Before mowing remove all
the stones, branches and other objects
from the lawn. Have suitable work
clothing and shoes on. Prevent children
and animals to be near the mowing
mechanism. Be careful also nearby the
driving belts or grass ejection.
Remember that the user is responsible
for any damage or accident to the other.
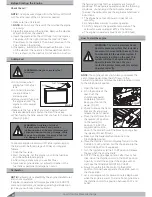
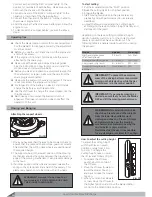
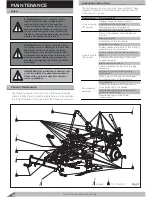
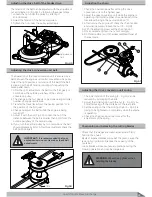
How to adjust the cutting height
To adjust the cutting height
with the lift lever in seven
positions, range from 3 mm
to 9 mm. To change the
cutting height, raise or lower
the lift lever as follows (Fig 31):
1. To release the lift lever,
push the button on top of
the lift lever.
2. Move the lift lever forward to
lower the mower housing
and back to raise the mower
housing.
3. When you ride on a sidewalk
or road, move the lift lever to
the highest position and move the blade rotation
control to the DISENGAGE position.
Fig 30
Fig 31
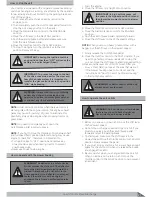
Operating Tips
Check the blade rotation control for correct adjustment.
For the blade(s) to disengage correctly, the adjustment
must be correct.
Before you use the unit, check the oil in the engine and
add oil if necessary.
,IWKHHQJLQHZLOOQRWVWDUW´UVWPDNHVXUHWKHZLUHLV
attached to the spark plug.
Make sure all the belts are inside all the belt guides.
See the instructions on how to remove and install the
motion drive and mower drive belts.
Before you make an inspection, adjustment (except for
the carburetor) or repair, make sure the wire from the
spark plug is disconnected.
Make sure the seat switch wire is connected. If the wire
is not connected, the engine will not start.
For longer life of the battery on electric start models,
charge the battery every three months.
Use the shift lever to change the ground speed, not the
throttle control.
Belt noise can occur when the blade or clutch is
engaged. This noise is normal and does not affect the
operation of the unit.
Содержание Gizmow T130
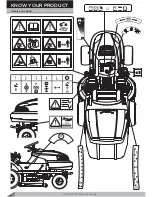
Страница 12: ...KNOW YOUR PRODUCT Lawn Tractor Rear Discharge 12 Decals and Labels ...
Страница 37: ...PARTS SCHEDULE Lawn Tractor Rear Discharge 37 T130 T140 T160 T180 Lawn Tractor Rear Discharge ...
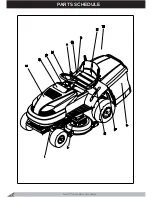
Страница 38: ...PARTS SCHEDULE Lawn Tractor Rear Discharge 38 ...
Страница 40: ...Lawn Tractor Rear Discharge 40 PARTS SCHEDULE T130 T160 T140 T180 LAWN TRACTOR 1A ...
Страница 44: ...T130 T160 T140 T180 LAWN TRACTOR 1B PARTS SCHEDULE Lawn Tractor Rear Discharge 44 ...
Страница 49: ...T130 T160 LAWN TRACTOR 1C Lawn Tractor Rear Discharge 49 PARTS SCHEDULE ...
Страница 50: ...T140 T180 LAWN TRACTOR 1C PARTS SCHEDULE Lawn Tractor Rear Discharge 50 ...
Страница 53: ...T130 T160 T140 T180 LAWN TRACTOR 1D Lawn Tractor Rear Discharge 53 PARTS SCHEDULE ...
Страница 56: ...T130 T160 T140 T180 CUTTING DECK 2 PARTS SCHEDULE Lawn Tractor Rear Discharge 56 ...
Страница 60: ...T130 T160 FRONT AXLE 7 PARTS SCHEDULE Lawn Tractor Rear Discharge 60 ...
Страница 61: ...T140 T180 FRONT AXLE 7 Lawn Tractor Rear Discharge 61 PARTS SCHEDULE ...
Страница 63: ...T130 T160 T140 T180 LIFTING LEVER 11 Lawn Tractor Rear Discharge 63 PARTS SCHEDULE ...
Страница 65: ...T130 T160 T140 T180 HUB 14 Lawn Tractor Rear Discharge 65 PARTS SCHEDULE ...
Страница 67: ...T130 T160 T140 T180 REAR AXLE 15A Lawn Tractor Rear Discharge 67 PARTS SCHEDULE ...
Страница 69: ...T130 T160 T140 T180 REAR AXLE 15B Lawn Tractor Rear Discharge 69 PARTS SCHEDULE ...
Страница 73: ...T130 T160 T140 T180 HOOD 24 Lawn Tractor Rear Discharge 73 PARTS SCHEDULE ...
Страница 75: ...T130 T160 T140 T180 PANEL 25 Lawn Tractor Rear Discharge 75 PARTS SCHEDULE ...
Страница 77: ...T130 T160 T140 T180 ELECTRICAL SYSTEM 27 Lawn Tractor Rear Discharge 77 PARTS SCHEDULE ...
Страница 78: ...T130 T160 T140 T180 ELECTRICAL SYSTEM 27a PARTS SCHEDULE Lawn Tractor Rear Discharge 78 ...
Страница 80: ...T130 T160 T140 T180 SEAT 32 PARTS SCHEDULE Lawn Tractor Rear Discharge 80 ...
Страница 82: ...T130 T160 T140 T180 BUNKER 34 PARTS SCHEDULE Lawn Tractor Rear Discharge 82 ...
Страница 84: ...T130 T160 T140 T180 GEAR SHIFTING 35 PARTS SCHEDULE Lawn Tractor Rear Discharge 84 ...
Страница 86: ...T130 T160 T140 T180 SEGMENT 36 PARTS SCHEDULE Lawn Tractor Rear Discharge 86 ...
Страница 88: ...T130 T160 T140 T180 PLATE 37 PARTS SCHEDULE Lawn Tractor Rear Discharge 88 ...
Страница 90: ...T130 T160 T140 T180 DECALS 38 PARTS SCHEDULE Lawn Tractor Rear Discharge 90 ...

