22
ENGLISH
3.
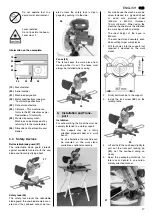
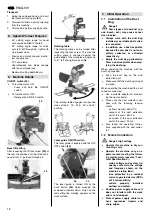
Retighten grub screws
(56)
and
(58)
to secure the setting.
9.6
Checking and Replacing
the Carbon Brushes
3
Note:
Worn carbon brushes are recog-
nizable by
intermittent operation of the motor;
interference in radio and TV recep-
tion while the motor is running;
motor stalling.
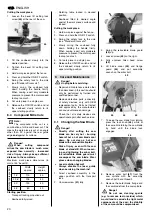
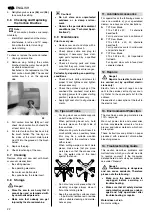
To check or replace the carbon brushes:
1.
Unplug power cable.
2.
Remove plug holding the carbon
brushes from the motor housing with
a suitable screwdriver.
Illustrated is the replacement of the
front carbon brush
(59)
. The second
carbon brush is on the opposite
side.
3.
Pull carbon brushes
(59)
out and
check. Each carbon brush should be
at least 6 mm long.
4.
Put intact carbon brushes back into
the brush holder. The two lugs on
the sides of the small metal plate
must fit into the grooves in the brush
holder.
5.
Replace the plug.
6.
Check functioning of the saw.
9.7
Cleaning
Remove chips and saw dust with brush
or vacuum cleaner from:
the setting devices;
the operating elements;
the motor ventilation slots;
the space below the table insert.
9.8
Storage
A
Danger!
x
Store the saw in such way that it
cannot be used or tampered with
by unauthorized persons.
x
Make sure that nobody can get
injured by the stored machine.
A
Caution!
x
Do not store saw unprotected
outdoors or in damp environ-
ment.
x
Observe the permissible ambient
conditions (see "Technical Speci-
fications").
9.9
Maintenance
Prior to every use
x
Remove saw dust and chips with a
vacuum cleaner or brush.
x
Check power cable and plug for
damage; if necessary have dam-
aged parts replaced by a qualified
electrician.
x
Check all moving parts and make
sure that they can move freely and
smoothly across their entire ranges.
Periodically, depending on operating
conditions
x
Check all nuts, bolts and screws for
proper fit and tightness and tighten
where necessary.
x
Check the pull-back springs of the
sawhead (the sawhead must return
by spring power to its upper starting
position), replace if necessary.
x
Apply light coat of oil to all guide ele-
ments.
For long stock use suitable supports
on both sides of the saw.
When performing bevel cuts, hold
the work piece on the right side of
the saw blade.
When making cuts that will result in
small cutoffs, use an auxiliary fence
(this may be a suitable wooden
board, fixed to the machine's fence
with screws).
When cutting warped or bent work
pieces, make sure that you place
work piece so that the convex side
(i.e. the
outer
side of the bow)
against the fence.
Do not cut any work piece while it is
standing on edge; always place it
flat on the rotating table.
Keep the supporting surfaces clean
– in particular, remove resin residue
with a suitable cleaning and mainte-
nance spray.
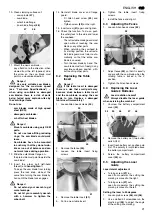
For special tasks the following accesso-
ries are available at your specialized
dealer – see back cover for illustrations:
A
TCT Saw Blade
210 x 1.8/1.4 x 30, 24 alternate
bevel teeth
For rip and cross cuts in solid wood.
B
TCT Saw Blade
210 x 2.4/1.8 x 30, 40 alternate
bevel teeth
For rip and cross cuts in solid wood
and particle board.
C
TCT Saw Blade
210 x 2.4/1.6 x 30, 64 trapezoidal
flat teeth
For rip and cross cuts in faced and
veneered sheets.
A
Danger!
Repairs to electric tools must
be carried out by qualified electri-
cians only!
Electric tools in need of repair can be
sent to the service centre of your coun-
try. Refer to the spare parts list for the
address.
Please attach a description of the fault to
the electric tool.
The machine's packaging materials are
100% recycable.
Worn out power tools and accessories
contain considerable amounts of valua-
ble raw and rubber materials, which can
be recycled.
These instructions are printed on paper
produced with elemental chlorine-free
bleaching process.
This section describes problems and
malfunctions which you should be able
to resolve yourself. If the measures
detailed here do not solve your problem,
see under "Repairs".
A
Danger!
Troubleshooting is dangerous
and can cause accidents. Therefore
please note the following:
x
Make sure the power cable is
unplugged before servicing or
troubleshooting.
x
Make sure that all safety devices
and protective guards are undam-
aged and fully operational after
troubleshooting or repairs.
Motor does not run
No mains voltage
59
10. Tips and Tricks
11. Available Accessories
12. Repairs
13. Environmental Protection
14. Troubleshooting Guide


