MEP PH160 Скачать руководство пользователя страница 42

42

7

MANUTENZIONE

MANUTENZIONE

MANUTENZIONE

MANUTENZIONE

MANUTENZIONE

7.1

7.1

7.1

7.1

7.1

MANUTENZIONE ORDINARIA

MANUTENZIONE ORDINARIA

MANUTENZIONE ORDINARIA

MANUTENZIONE ORDINARIA

MANUTENZIONE ORDINARIA

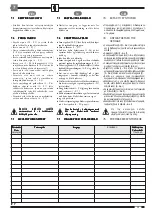
• Le operazioni di manutenzione ordinaria sono

di competenza di personale generico e quindi
non specializzato.

OGNI FINE LAVORO:

OGNI FINE LAVORO:

OGNI FINE LAVORO:

OGNI FINE LAVORO:

OGNI FINE LAVORO:

• pulire accuratamente ogni parte della macchina,

rimuovendo trucioli ed altri residui di lavorazio-
ne, in modo particolare nel guidalama, all’inter-
no delle ganasce della morsa ,e sulla rete
metallica (filtro) (4 - F. 4) del coperchio (3)
serbatoio liquido di refrigerazione.

• Pulire accuratamente anche l’area di lavoro (in

prossimità della segatrice).

Non utilizzare per la pulizia, getti d’aria

Non utilizzare per la pulizia, getti d’aria

Non utilizzare per la pulizia, getti d’aria

Non utilizzare per la pulizia, getti d’aria

Non utilizzare per la pulizia, getti d’aria
compressa, ma pennello e aspiratore

compressa, ma pennello e aspiratore

compressa, ma pennello e aspiratore

compressa, ma pennello e aspiratore

compressa, ma pennello e aspiratore
industriale.

industriale.

industriale.

industriale.

industriale.

OGNI 40 ORE DI LAVORO:

OGNI 40 ORE DI LAVORO:

OGNI 40 ORE DI LAVORO:

OGNI 40 ORE DI LAVORO:

OGNI 40 ORE DI LAVORO:

• verificare il corretto serraggio di tutte le viti,

aventi una certa importanza meccanica.

7.2

7.2

7.2

7.2

7.2

SOSTITUZIONE LIQUIDO

SOSTITUZIONE LIQUIDO

SOSTITUZIONE LIQUIDO

SOSTITUZIONE LIQUIDO

SOSTITUZIONE LIQUIDO
REFRIGERANTE

REFRIGERANTE

REFRIGERANTE

REFRIGERANTE

REFRIGERANTE

• La perdita delle proprietà originali del liquido

refrigerante, è una condizione difficilmente
valutabile. Si consiglia pertanto di sostituirlo
periodicamente ad intervalli prestabiliti o quan-
do risulti molto “sporco” e saturo d’impurità.
Registrare sulla scheda di manutenzione ogni
sostituzione, con data e firma.

• Per sostituire il liquido refrigerante, procedere

Per sostituire il liquido refrigerante, procedere

Per sostituire il liquido refrigerante, procedere

Per sostituire il liquido refrigerante, procedere

Per sostituire il liquido refrigerante, procedere
come segue:

come segue:

come segue:

come segue:

come segue:

• rimuovere il coperchio/filtro (3 - F. 4);
• procurarsi un recipiente di adeguata capacità e

posizionare sotto il tappo di scarico (5);

• rimuovere il tappo di scarico (5) e lasciare

defluire tutto il liquido all’interno del conteni-
tore;

• svuotato completamente il serbatoio, se neces-

sario, sciacquarlo con acqua;

• riavvitare il tappo;
• immettere nel serbatoio il liquido “vergine”

fino a sfiorare la paratia (2 - F. 4);

• riposizionare il coperchio/filtro (3).

Interpellare un’azienda specializzata ed

Interpellare un’azienda specializzata ed

Interpellare un’azienda specializzata ed

Interpellare un’azienda specializzata ed

Interpellare un’azienda specializzata ed
autorizzata per lo smaltimento degli oli

autorizzata per lo smaltimento degli oli

autorizzata per lo smaltimento degli oli

autorizzata per lo smaltimento degli oli

autorizzata per lo smaltimento degli oli
esausti. Non disperdere il liquido refri-

esausti. Non disperdere il liquido refri-

esausti. Non disperdere il liquido refri-

esausti. Non disperdere il liquido refri-

esausti. Non disperdere il liquido refri-

gerante nell’ambiente.

gerante nell’ambiente.

gerante nell’ambiente.

gerante nell’ambiente.

gerante nell’ambiente.

MAINTENANCE

MAINTENANCE

MAINTENANCE

MAINTENANCE

MAINTENANCE

7.1

7.1

7.1

7.1

7.1

ORDINARY MAINTENANCE

ORDINARY MAINTENANCE

ORDINARY MAINTENANCE

ORDINARY MAINTENANCE

ORDINARY MAINTENANCE

• Ordinary maintenance operations are to be

executed by the generic, unskilled
personnel.

AT EACH END OF JOB:

AT EACH END OF JOB:

AT EACH END OF JOB:

AT EACH END OF JOB:

AT EACH END OF JOB:

• Clean any machine part thoroughly, removing

chips and other processing waste, in particular
in the blade guide, in the vise jaws and on the
metal net (filter) (4 – F. 4) of the cooling liquid
tank cover (3).

• Clean the working area thoroughly too (next to

the sawing machine).

For cleaning, do not use compressed air

For cleaning, do not use compressed air

For cleaning, do not use compressed air

For cleaning, do not use compressed air

For cleaning, do not use compressed air
jets, but use the brush and industrial

jets, but use the brush and industrial

jets, but use the brush and industrial

jets, but use the brush and industrial

jets, but use the brush and industrial
aspirator.

aspirator.

aspirator.

aspirator.

aspirator.

EVERY 40 WORKING HOURS:

EVERY 40 WORKING HOURS:

EVERY 40 WORKING HOURS:

EVERY 40 WORKING HOURS:

EVERY 40 WORKING HOURS:

• Check that all screws which are important from

a mechanical viewpoint, are properly tightened.

7.2

7.2

7.2

7.2

7.2

REPLACING THE COOLING

REPLACING THE COOLING

REPLACING THE COOLING

REPLACING THE COOLING

REPLACING THE COOLING
LIQUID

LIQUID

LIQUID

LIQUID

LIQUID

• The loss of the cooling liquid original properties,

is a condition which is difficult to assess. Thus,
it is recommended to replace it periodically at
scheduled intervals or when it is very “dirty” or
saturated with impurities.

• Record any  replacement on the maintenance

schedule card with date and signature.

• To replace the cooling liquid, act as

To replace the cooling liquid, act as

To replace the cooling liquid, act as

To replace the cooling liquid, act as

To replace the cooling liquid, act as
follows:

follows:

follows:

follows:

follows:

• Remove the cover/filter (3 – F. 4);
• Take a container with appropriate capacity and

position it under the drain plug (5);

• Remover the drain plug (5) and let all the liquid

in the container flow down;

• Once the tank has been completely emptied, if

necessary, rinse it with water;

• Re-screw the plug;
• Pour the “virgin” liquid into the tank until it

touches the firewall (2 – F. 4);

• Reposition the cover/filter (3).

Contact a specialised and authorised

Contact a specialised and authorised

Contact a specialised and authorised

Contact a specialised and authorised

Contact a specialised and authorised
company to dispose of the exhausted

company to dispose of the exhausted

company to dispose of the exhausted

company to dispose of the exhausted

company to dispose of the exhausted
oils. Do not throw the cooling liquid in

oils. Do not throw the cooling liquid in

oils. Do not throw the cooling liquid in

oils. Do not throw the cooling liquid in

oils. Do not throw the cooling liquid in

the environment.

the environment.

the environment.

the environment.

the environment.

WARTUNG

WARTUNG

WARTUNG

WARTUNG

WARTUNG

7.1

7.1

7.1

7.1

7.1

GEWÖHNLICHE WARTUNG

GEWÖHNLICHE WARTUNG

GEWÖHNLICHE WARTUNG

GEWÖHNLICHE WARTUNG

GEWÖHNLICHE WARTUNG

• Die gewöhnlichen Wartungsarbeiten sind

Aufgabe einfachen Bedienungspersonals ohne
spezielle Qualifikation.

NACH JEDER ARBEITSSCHICHT:

NACH JEDER ARBEITSSCHICHT:

NACH JEDER ARBEITSSCHICHT:

NACH JEDER ARBEITSSCHICHT:

NACH JEDER ARBEITSSCHICHT:

• Alle Maschinenteile sorgfältig säubern. Späne

und sonstige Rückstände, insbesondere in des
Blattführung, im Innern der Spannbacken des
Schraubstocks sowie auf dem Metallnetz (Filter)
(4 - F. 4) des Kühlflüssigkeitstankdeckels (3)
entfernen.

• Die Betriebsumgebung der Sägemaschine ist

ebenfalls sorgfältig zu säubern.

Für die Säuberung keine

Für die Säuberung keine

Für die Säuberung keine

Für die Säuberung keine

Für die Säuberung keine
Druckluftstrahlen sondern Pinsel und

Druckluftstrahlen sondern Pinsel und

Druckluftstrahlen sondern Pinsel und

Druckluftstrahlen sondern Pinsel und

Druckluftstrahlen sondern Pinsel und
Industriesauger verwenden.

Industriesauger verwenden.

Industriesauger verwenden.

Industriesauger verwenden.

Industriesauger verwenden.

ALLE 40 BETRIEBSSTUNDEN:

ALLE 40 BETRIEBSSTUNDEN:

ALLE 40 BETRIEBSSTUNDEN:

ALLE 40 BETRIEBSSTUNDEN:

ALLE 40 BETRIEBSSTUNDEN:

• Den festen Anzug aller Schrauben von

mechanischer Bedeutung kontrollieren.

7.2

7.2

7.2

7.2

7.2

AUSWECHSELN DER

AUSWECHSELN DER

AUSWECHSELN DER

AUSWECHSELN DER

AUSWECHSELN DER
KÜHLFLÜSSIGKEIT

KÜHLFLÜSSIGKEIT

KÜHLFLÜSSIGKEIT

KÜHLFLÜSSIGKEIT

KÜHLFLÜSSIGKEIT

• Es ist schwierig zu beurteilen, wann die Kühlflüssigkeit

ihre Originaleigenschaften verliert. Es empfiehlt sich
daher eine regelmäßige Auswechselung in zuvor festgelegten
Zeitabständen oder immer dann, sobald sie sich als sehr
“schmutzig” beziehungsweise mit Verunreinigungen
gesättigt erweist. Registrieren Sie auf der Wartungskarte
jede Auswechselung und versehen Sie den Vorgang mit
Datum und Unterschrift.

••••• Für die Auswechselung der Kühlflüssigkeit wie folgt

Für die Auswechselung der Kühlflüssigkeit wie folgt

Für die Auswechselung der Kühlflüssigkeit wie folgt

Für die Auswechselung der Kühlflüssigkeit wie folgt

Für die Auswechselung der Kühlflüssigkeit wie folgt
vorgehen:

vorgehen:

vorgehen:

vorgehen:

vorgehen:

• den Deckel/Filter (3 - F.4) abnehmen;
• einen Behälter ausreichenden Fassungsvermögens

bereitstellen und unter dem Auslaßstöpsel (5) positionieren;

• den Auslaßstöpsel (5) abnehmen und die gesamte

Kühlflüssigkeit in den Behälter fließen lassen;

• den Tank vollständig entleeren und gegebenenfalls mit

Wasser ausspülen;

• den Stöpsel wieder aufschrauben;
• die “reine” Kühlflüssigkeit  in den Tank leiten, bis die

Höhe der Scheidewand (2 - F.4) gerade erreicht wird;

• Deckel/Filter (3) wiedereinsetzen.

Wenden Sie sich für die Entsorgung der

Wenden Sie sich für die Entsorgung der

Wenden Sie sich für die Entsorgung der

Wenden Sie sich für die Entsorgung der

Wenden Sie sich für die Entsorgung der
verbrauchten Öle an eine diesbezüglich

verbrauchten Öle an eine diesbezüglich

verbrauchten Öle an eine diesbezüglich

verbrauchten Öle an eine diesbezüglich

verbrauchten Öle an eine diesbezüglich
spezialisierte und zugelassene Firma.

spezialisierte und zugelassene Firma.

spezialisierte und zugelassene Firma.

spezialisierte und zugelassene Firma.

spezialisierte und zugelassene Firma.

Die Kühlflüssigkeit darf nicht in die Umwelt

Die Kühlflüssigkeit darf nicht in die Umwelt

Die Kühlflüssigkeit darf nicht in die Umwelt

Die Kühlflüssigkeit darf nicht in die Umwelt

Die Kühlflüssigkeit darf nicht in die Umwelt
geleitet werden.

geleitet werden.

geleitet werden.

geleitet werden.

geleitet werden.

I

UK

D

Содержание PH160

Страница 1: ...ure Figura Figura Afbeelding Fig Fig Kuva Fig T tabella T tabella T tabella T tabella T tabella Table Tabelle Table Tabla Tabela Tabel Tabell Tabell Taulukko Tabel Tabella P posizione P posizione P po...

Страница 2: ...ly forfurthertechnicalandoperatinginformation contact the nearest AUTHORIZED RETAILER DIRECTLY Before each intervention Before each intervention Before each intervention Before each intervention Befor...

Страница 3: ...ta en el desmontaje y entrete nimiento extraordinario porque estas opera ciones tendr n que ser efectuadas siempre y exclusivamente por la ASISTENCIA T CNICA AUTORIZADA Para una correcta relaci n con...

Страница 4: ...med produkten utan risk f r andra personer maskinen och milj n som har k nnedom om grundl ggande fels kningsmetoder och kan utf ra enkla kontroller och underh ll enligt anvisningarna p f ljande sidor...

Страница 5: ...ettelse eller ukorrekt fortolkning av sikkerhetsforskriftene der beskrives i denne h ndbok Instruksjonsh ndboken skal kunne brukes i maskinens operative livstid og v re tilgjengelig i minst 10 r Det t...

Страница 6: ...except for Any maintenance operations except for those specifically described in the pages those specifically described in the pages those specifically described in the pages those specifically descr...

Страница 7: ...caci n y el quitado de las tipo de material La colocaci n y el quitado de las tipo de material La colocaci n y el quitado de las piezas se debe efectuar siempre con las dos piezas se debe efectuar sie...

Страница 8: ...te har insp nts i f rv g p ett som inte har insp nts i f rv g p ett som inte har insp nts i f rv g p ett korrekt s tt i maskinens insp nningsdon korrekt s tt i maskinens insp nningsdon korrekt s tt i...

Страница 9: ...ed foretasavspesialutdannetpersonaleved autorisert serviceverksted autorisert serviceverksted autorisert serviceverksted autorisert serviceverksted autorisert serviceverksted YLEISET YLEISET YLEISET Y...

Страница 10: ...o Zweifel an derUnversehrtheitdesInhaltsaufkommenlassen In diesemFalldenKartonunverz glich ffnenunddie Lieferung auf m gliche Sch den hin berpr fen 3 1 3 1 3 1 3 1 3 1 WARRANTY WARRANTY WARRANTY WARRA...

Страница 11: ...siones y peso ref F A mm X 960 Y 550 Z 790 Kg 105 X 960 Y 550 Z 790 Kg 105 X 960 Y 550 Z 790 Kg 105 X 960 Y 550 Z 790 Kg 105 X 960 Y 550 Z 790 Kg 105 Quitar el embalaje que contiene la m quina utiliza...

Страница 12: ...verde schroeven Til met zijn twee n de bedrijfsunit op en zet hem op de rand van het onderstel Zet de unit vast met de vier bijgeleverde schroeven A F 1 Breng de geleidestang B van de werkstukstopper...

Страница 13: ...efter levering efter levering Innpakkingsmaterialet m kun kastes i Innpakkingsmaterialet m kun kastes i Innpakkingsmaterialet m kun kastes i Innpakkingsmaterialet m kun kastes i Innpakkingsmaterialet...

Страница 14: ...in zwei Teile metallischer Werkst cke aller Art Rohre Stangen Profileisen usw entwickelt und konstruiert DieMaschineistmiteinerAnlagezurautomatischen K hlung des Blattes mit emulgierbarem l ausgestatt...

Страница 15: ...TIFICACI N Los datos para la identificaci n de la m quina est nindicadosenlaplaca G F 1 Constructor N de serie Modelo A o de construcci n Para la Tensi n el ctrica V Frecuencia Hz Potencia el ctrica k...

Страница 16: ...op andere wijze gebruikt wordt of de genoemde technische parameters niet of de genoemde technische parameters niet of de genoemde technische parameters niet of de genoemde technische parameters niet...

Страница 17: ...lmistettu varten tuote on rakennettu valmistettu varten tuote on rakennettu valmistettu ja suojattu Muu k ytt tai ja suojattu Muu k ytt tai ja suojattu Muu k ytt tai ja suojattu Muu k ytt tai ja suoja...

Страница 18: ...e refrigera o 16 Robinets liquide r frig rant Grifos l quido refrigerante Torneiras do l quido de refrigera o 4 3 4 3 4 3 4 3 4 3 COMPOSIZIONE F 1 COMPOSIZIONE F 1 COMPOSIZIONE F 1 COMPOSIZIONE F 1 CO...

Страница 19: ...DELAR F 1 DELAR F 1 4 3 4 3 4 3 4 3 4 3 KOMPONENTER F 1 KOMPONENTER F 1 KOMPONENTER F 1 KOMPONENTER F 1 KOMPONENTER F 1 Pos Pos Pos Pos Pos Beschrijving Beschrijving Beschrijving Beschrijving Beschrij...

Страница 20: ...me Note the following tables T 3 show some Note the following tables T 3 show some examplesofthemostcommoncuttingconditions examplesofthemostcommoncuttingconditions examplesofthemostcommoncuttingcondi...

Страница 21: ...esconditionsdecoupeslespluscommunes exemplesdesconditionsdecoupeslespluscommunes exemplesdesconditionsdecoupeslespluscommunes Le choix du type de lame et de la vitesse de coupe est Le choix du type de...

Страница 22: ...r dan de aangegeven waarde meer dan de aangegeven waarde Z aantaltandenperduimvandezaagband V zaagsnelheid m min meter per minuut R zaagsnede met koelvloeistof C zaagcapaciteit in mm 4 5 4 5 4 5 4 5 4...

Страница 23: ...STO TAULUKOIDEN 3 JA 4 SANASTO TAULUKOIDEN 3 JA 4 SANASTO Sez Leikatun osan leikkauskuva Mat Leikatun osan materiaali S leikatun osan millimetrein paksuus Pienempi kuin osoitettu arvo Suurempi kuin os...

Страница 24: ...tank 1 F 4 which shall be flush to the separating firewall 2 F 4 4 9 4 9 4 9 4 9 4 9 NOISE NOISE NOISE NOISE NOISE Under normal conditions of use the band sawing machine PH 160 PH 160 PH 160 PH 160 P...

Страница 25: ...nadaporunabombael ctrica autocebante 15 F1 Antes de poner en funcionamiento la m quina asegurarse siempre de la presencia del l quido refrigerante en el interior del dep sito 1 F 4 que deber resultar...

Страница 26: ...skall vara i niv med skiljev ggen 2 F 4 4 9 4 9 4 9 4 9 4 9 BULLER BULLER BULLER BULLER BULLER Bands gen PH 160 PH 160 PH 160 PH 160 PH 160 uppvisar under normala anv ndningsf rh llanden en ljudniv s...

Страница 27: ...lmistaja ei ole vastuussa mink nlaisista vioista valmistaja ei ole vastuussa mink nlaisista vioista valmistaja ei ole vastuussa mink nlaisista vioista valmistaja ei ole vastuussa mink nlaisista vioist...

Страница 28: ...n tensione 4 11 4 11 4 11 4 11 4 11 PULSANTE DI COMANDO F 3 PULSANTE DI COMANDO F 3 PULSANTE DI COMANDO F 3 PULSANTE DI COMANDO F 3 PULSANTE DI COMANDO F 3 Il pulsante di comando rotazione lama posto...

Страница 29: ...ff 2 Noodstopknop 3 Schakelaar zaagsnelheid langzaam snel 4 Lampje machine onder spanning 4 11 4 11 4 11 4 11 4 11 BEDIENINGSKNOP F 3 BEDIENINGSKNOP F 3 BEDIENINGSKNOP F 3 BEDIENINGSKNOP F 3 BEDIENING...

Страница 30: ...n den Spannstock einsetzen und darauf achten da sich kein Gegenstand zwischen dem Teil und den Spannbacken befindet Das Werkst ckspannelement 3 F 1 positionieren und mit dem Knauf C sichern Durch Bet...

Страница 31: ...ation doit tre effectu e Cette op ration doit tre effectu e Cette op ration doit tre effectu e Cette op ration doit tre effectu e Cette op ration doit tre effectu e chaque fois qu il faut couper des p...

Страница 32: ...op hun plaats zitten Controleer of de hendel 6 F 1 voor spanning van de zaagband geblokkeerd is 5 4 5 4 5 4 5 4 5 4 AANBRENGEN VAN HET AANBRENGEN VAN HET AANBRENGEN VAN HET AANBRENGEN VAN HET AANBRENG...

Страница 33: ...FORBEREDELSER TIL BRUK 5 1 5 1 5 1 5 1 5 1 ELEKTRISK KOBLING ELEKTRISK KOBLING ELEKTRISK KOBLING ELEKTRISK KOBLING ELEKTRISK KOBLING Maskinen blir levert med ledning man m derfor montere en ny godkje...

Страница 34: ...hand is free and far from the cutting area the cutting area the cutting area the cutting area the cutting area 6 4 6 4 6 4 6 4 6 4 FIRST STARTING FIRST STARTING FIRST STARTING FIRST STARTING FIRST STA...

Страница 35: ...a cuchilla asegurarse de tener siempre la cuchilla asegurarse de tener siempre la cuchilla asegurarse de tener siempre la cuchilla asegurarse de tener siempre la cuchilla asegurarse de tener siempre l...

Страница 36: ...om bandet startas skall man f rs krasigomattalltidhadenfriahanden f rs krasigomattalltidhadenfriahanden f rs krasigomattalltidhadenfriahanden f rs krasigomattalltidhadenfriahanden f rs krasigomattallt...

Страница 37: ...RUK OPERATIVT BRUK OPERATIVT BRUK OPERATIVT BRUK OPERATIVT BRUK 6 1 6 1 6 1 6 1 6 1 SETTE DEN I FUNKSJON SETTE DEN I FUNKSJON SETTE DEN I FUNKSJON SETTE DEN I FUNKSJON SETTE DEN I FUNKSJON Koble forsy...

Страница 38: ...k that all the adjusting levers grips are correctly locked 6 6 6 6 6 6 6 6 6 6 HINWEISE HINWEISE HINWEISE HINWEISE HINWEISE DerRaumbedarfsowiedieAufstellungsweisederMaschine m ssenimvorausklarfestgele...

Страница 39: ...Se forem notadas anomalias no funcionamento parar imediatamente a m quina e verificar a causa e o tipo de avaria Se necess rio dirigir se ASSIST NCIA T CNICA AUTORIZADA absolutamente pro bido absolut...

Страница 40: ...T R ABSOLUT F RBJUDET DET R ABSOLUT F RBJUDET DET R ABSOLUT F RBJUDET DET R ABSOLUT F RBJUDET Att sm rja s gklingan bandet f re under efter s gningen Att arbeta om inte bandledaren r riktigt p plats A...

Страница 41: ...AJA EI OTA VASTUUTA Mink ntyyppisest tai laajuisesta vahingosta joka on johtunut koneen sopimattomasta k yt st t m n k ytt oppaan turvallisuusm r ysten noudattamatta j tt misest tainiidenv rintulkinna...

Страница 42: ...difficult to assess Thus it is recommended to replace it periodically at scheduled intervals or when it is very dirty or saturated with impurities Record any replacement on the maintenance schedule c...

Страница 43: ...nillos de importancia mec nica 7 2 7 2 7 2 7 2 7 2 SUSTITUCI N DEL LIQUIDO SUSTITUCI N DEL LIQUIDO SUSTITUCI N DEL LIQUIDO SUSTITUCI N DEL LIQUIDO SUSTITUCI N DEL LIQUIDO REFRIGERANTE REFRIGERANTE REF...

Страница 44: ...ETSTIMME Kontrolleraattallaskruvarsomharenmekanisk betydelse r korrekt tdragna 7 2 7 2 7 2 7 2 7 2 UTBYTE AV UTBYTE AV UTBYTE AV UTBYTE AV UTBYTE AV KYLV TSKA KYLV TSKA KYLV TSKA KYLV TSKA KYLV TSKA K...

Страница 45: ...snestett ymp rist n j hdytysnestett ymp rist n j hdytysnestett ymp rist n j hdytysnestett ymp rist n VEDLIKEHOLD VEDLIKEHOLD VEDLIKEHOLD VEDLIKEHOLD VEDLIKEHOLD 7 1 7 1 7 1 7 1 7 1 ALMINNELIG VEDLIKEH...

Страница 46: ...the blade tension lever 6 F 1 energetically acting toward the electric motor Remove the blade 2 F 6 from the driven pulley 3 then from blade guide devices 4 F 6 and finally from the driving pulley 5 I...

Страница 47: ...la imposibilidad de caer de nuevo involuntariamente Aflojar en rgicamente interviniendo hacia el motor el ctrico la palanca de tensi n cuchilla 6 F 1 Extraer la cuchilla 2 F 6 de la polea conducida 3...

Страница 48: ...tskick ochattdetintekanfalla oavsiktligt Lossa med kraft genom att verka i riktning mot den elektriska motorn p spaken f r bandets sp nning 6 F 1 Drautbandet 2 F 6 fr ndendrivnaremskivan 3 och d refte...

Страница 49: ...ll paineella 7 5 7 5 7 5 7 5 7 5 HUOLTOTOIMENPITEET HUOLTOTOIMENPITEET HUOLTOTOIMENPITEET HUOLTOTOIMENPITEET HUOLTOTOIMENPITEET 7 3 7 3 7 3 7 3 7 3 EKSTRA VEDLIKEHOLD EKSTRA VEDLIKEHOLD EKSTRA VEDLIKE...

Страница 50: ...RING SKEMA ELEKTRISK INSTALLERING SKEMA ELEKTRISK INSTALLERING WIRING DIAGRAM WIRING DIAGRAM WIRING DIAGRAM WIRING DIAGRAM WIRING DIAGRAM SCHEMA IMPIANTO ELETTRICO SCHEMA IMPIANTO ELETTRICO SCHEMA IMP...

Страница 51: ......

Страница 52: ...e wijze De Fabrikant is op geen enkele wijze De Fabrikant is op geen enkele wijze De Fabrikant is op geen enkele wijze aansprakelijk voor schade van welke aansprakelijk voor schade van welke aansprake...

Отзывы: