background image

Advanced protein features

 Chapter 6

Zetasizer Nano accessories guide

Page 6-19

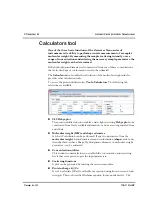
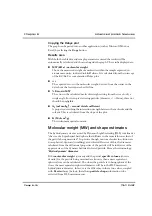
To find the molecular weight estimate, enter the measured 

Hydrodynamic 

diameter 

value into the text box and the estimated molecular weight will 

automatically be calculated. The molecular weight is displayed in four ways:

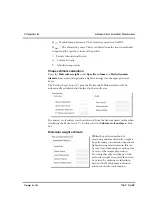
Hydrodynamic diameter estimate

This works in the same way as above, except the 

molecular weight

 (in kDaltons) 

is entered to find the Hydrodynamic diameter instead.

Concentration utilities

Globular 

Proteins

Linear 

polysaccharides

Branched poly-

saccharides

Starburst 

polymers

Содержание Zetasizer Nano Series

Страница 1: ...nd MRK1378 01 Malvern Instruments Limited Enigma Business Park Grovewood Road Malvern Worcs WR14 1XZ U K Tel 44 0 1684 892456 Fax 44 0 1684 892789 www malvern com Q SelAccessories Guide Zetasizer Malv...

Страница 2: ......

Страница 3: ...Zetasizer Nano accessories guide MAN0487 Issue 1 1 April 2013...

Страница 4: ...any part of this publication is allowed without the express written permission of Malvern Instruments Ltd Head office Malvern Instruments Ltd Enigma Business Park Grovewood Road Malvern Worcestershire...

Страница 5: ...ta potential cell 2 29 Surface zeta potential cell Introduction 3 1 Measurement technique 3 3 Preparation for measurement 3 4 Controlling an SZP measurement via an SOP 3 10 Performing the measurement...

Страница 6: ...Microrheology utilities 5 3 Exporting the microrheology data 5 4 Controlling the microrheology measurement via an SOP 5 6 Microrheology measurement process 5 9 Displaying the microrheology measuremen...

Страница 7: ...d the health and safety information in the basic guide before operating the system This manual focuses on specific issues of the Zetasizer Nano accessories that are not covered by the above manuals Ac...

Страница 8: ...t ZEN1020 Surface zeta potential cell Cell intended for the measurement of the zeta potential at the sur face of a flat material in an aqueous environment Use with DTS0012 and PCS1115 cuvette describe...

Страница 9: ...o fill each cell with sample and then insert into the Zetasizer Nano instrument Some accessories require configuration of the software and SOP parameters Where required the software controls are ident...

Страница 10: ...s available for use with the Zetasizer Nano when connected to a SEC system It includes the flowcell ZEN0023 Connection use and operation of a flow mode optioned Zetasizer Nano is described in the Flow...

Страница 11: ...for the Nano ZS The Zetasizer Nano ZSP has increased capability for the measurement of small and weakly scattering molecules and particles This increased sensitivity improves the measurement of zeta p...

Страница 12: ...Chapter 1 Introduction and accessory range Page 1 6 MAN 0487...

Страница 13: ...their use and application The aspects covered are Identification of each cell of the dispersion units with guidance on selection How to fill each cell with sample and then insert into the Zetasizer Na...

Страница 14: ...e The two trays that hold the cuvettes can be removed for cleaning The cuvette holder provides a place to store the thermal cap during changeover of cells The cap is released by raising the cap and li...

Страница 15: ...The optical quality of the cells is vitally important when performing molecular weight and low concentration protein measurements derived count rate 100kcps therefore glass or quartz type cuvettes sh...

Страница 16: ...ty Good to very good Good to very good Minimum Sample volume 0 75ml 1ml Advantages Low cost Single use disposable no cleaning Use with MPT 2 Titrator No sample cross contamination Fast sample change o...

Страница 17: ...0 C systems Zetasizer Nano S90 ZS90 Zetasizer V Requires careful filling to avoid bubbles Not resistant to organic solvents Unsuitable for use at high temperatures above 70 C Only applicable to system...

Страница 18: ...tor Highest optical quality Can use nearly any dispersant Low sample volume Disadvantages Requires cleaning after measurement With manual use requires careful filling to avoid bubbles Requires cleanin...

Страница 19: ...specific advice will be given Size cells and cuvettes All size cells should be rinsed cleaned with filtered dispersant before use Molecular weight cells and cuvettes All molecular weight cells should...

Страница 20: ...e depends on the actual cell type and it is easier to ensure a certain depth of the sample in the cell This minimum is 10mm from the bottom of the cell the measurement is made 8mm from the bottom of t...

Страница 21: ...sensitivity of the S90 and ZS90 means that they are unlikely to be suitable for the majority of molecular weight measurements Flowcells Flowcells will be filled during the measurement procedure Refer...

Страница 22: ...n using the MPT 2 Titrator Always minimise the tubing within the cell area before inserting into the pinch valve channel Follow the instructions in the previous section on how to insert the cell Do no...

Страница 23: ...area Cleaning cuvettes Two main types of cuvette are available Disposable polystyrene Do not clean and re use disposable cuvettes It gives inaccurate results Reusable glass or quartz The cleaning pro...

Страница 24: ...provide a low cost alternative to previous reusable quartz capillary cells The stoppers can be replaced with Luer connectors to provide leak free connection to the optional MPT 2 Titrator Size measure...

Страница 25: ...illing a cell for a protein mobility measurement involves a different technique Refer to the Advanced protein features chapter DTS1070 cell The cell name DTS1070 will be identified on the central sect...

Страница 26: ...rt a cell stopper in each port Remove any liquid spilt on the electrodes contacts Note The stoppers must be fitted before a measurement is performed Ensure that one stopper is fitted firmly and the ot...

Страница 27: ...t do form Turn the cell upright and continue to inject slowly until the sample is at the top of the electrodes Check again for bubbles in the cell Tap the cell gently to dislodge these ill 7938 Check...

Страница 28: ...sation of the cell Inserting the folded capillary cell ill 8507 Place a thermal contact plate into the recess on either side of the folded cap illary cell The plates provide increased temperature stab...

Страница 29: ...pillary cell orientation and insertion The clear folded capillary zeta potential cells can show significant differences in sample count rate depending on the orientation of the cell in the cell holder...

Страница 30: ...below for connecting the cell for the Titrator Always minimise the tubing within the cell area before inserting into the pinch valve channel The tubing is attached to the folded capillary cell using...

Страница 31: ...rodes The cell should then be flushed through with water as described below To clean the cell Fill one syringe with de ionised water or the dispersant Place the full syringe in one of the sample ports...

Страница 32: ...er of samples can be prepared and the Dip cell inserted to measure each one in turn For aqueous samples the Dip cell can be used in conjunction with the disposable polystyrene DTS0012 For non aqueous...

Страница 33: ...ween the sample electrodes The cuvette must not be filled more than the recommended maximum depth of 10mm Tilt the cuvette to a maximum angle of 45 Slowly insert the cell into the cuvette until the me...

Страница 34: ...p cell and cuvette can be removed together If adequate purchase cannot be obtained on both parts then the following procedure is recommended Lift the Dip cell up out of the cuvette but before complete...

Страница 35: ...ts especially between different types of sample Cross contamination between samples can seriously affect the results Caution Do not immerse the complete cell Only the sample electrodes must dip in to...

Страница 36: ...ctrodes with pure dispersant Note The electrode holder is made from Natural PEEK Polyetheretherketone which is resistant to a wide range of chemical products However seek advice from Malvern and the s...

Страница 37: ...he electrodes Description ill 8450 The High concentration cell is intended primarily for the measurement of zeta potential of concentrated aqueous samples The cell can be used in conjunction with the...

Страница 38: ...e Titrator in the same manner as the Folded capillary cell ill 8449 The metal face of the cell must face the front of the instrument this is to ensure good thermal contact between cell and instrument...

Страница 39: ...8447 Remove the screw cap Separate the two halves of the cell by pulling the rear casing vertically away from the metal front Note how the electrode chambers and quartz measurement cell block are ass...

Страница 40: ...minutes Rinse with water once cleaned Electrode chambers and port Electrode Chamber Scrub gently with interdental brush and Hellmanex then scrub with copious amounts of de ionised water Smaller inter...

Страница 41: ...in this manual Description ill 8687 The surface zeta potential cell is intended for the measurement of the zeta potential at the surface of a flat material in an aqueous environment The cell is a dip...

Страница 42: ...Chapter 2 General cells and cuvettes Page 2 30 MAN 0487...

Страница 43: ...ype device and can be used with 1ml cell DTS0012 and PCS1115 It is incompatible with the MPT 2 Titrator The cell consists of a height adjustable sample barrel in which the sample is glued onto a sampl...

Страница 44: ...components to prepare load and set the sample Surface zeta potential cell with palladium electrodes A 12 well plate for storing the samples 10 PEEK sample holders A screwdriver for cell tightening For...

Страница 45: ...smotic surface flow while at distances further from the surface it will be dominated by the electrophoretic motion of the tracer itself The graph below shows a typical plot of reported zeta displaceme...

Страница 46: ...in the next sections once these are com plete the measurement can be performed Loading the surface zeta potential cell with sample Inserting the surface zeta potential cell into the instrument Loadin...

Страница 47: ...securely held in place for the duration of the experiment Inserting the surface zeta potential cell The insertion of the surface zeta potential cell into the Zetasizer Nano is done in three stages Fi...

Страница 48: ...mbly into the tool so that the white mark on the cell is facing the front of the tool indicated by the white spot and tilting forward Adjust the cell cap to alter the sample barrel position until the...

Страница 49: ...ing the tracer particles Sufficient suspension should be added to the cell so that the sample electrodes and screw are all completely submerged This is approximately 1 2 ml Fill the cuvette the prepar...

Страница 50: ...e holder barrel and elec trodes are covered As the cell is inserted it displaces the sample so any bub bles will be pushed out from the top of the electrode gap Once the electrodes are covered bring t...

Страница 51: ...ial cell from the drop down list Set the Attenuator to 11 To identify if your sample is aligned correctly open the instrument lid and rotate the cell cap clockwise in increments of approximately 1 8 t...

Страница 52: ...e are described in the above manual The other SOP sections are specific to the SZP cell being used these are described below Also note that some of the other dialogue pages will alter slightly to acco...

Страница 53: ...will be the only cell choice available The Zetasizer software will configure all settings and parameters to match this cell The default selection is the Surface zeta potential cell SZP measurement The...

Страница 54: ...ements made at each displacement away from the surface and the length of any delay between repeat measurements SZP displacement The SZP displacement options define the distances to be used during a su...

Страница 55: ...n options are the same as standard measurement duration options available during normal zeta potential measurements Tracer measurements The tracer measurements options define the number of repeat meas...

Страница 56: ...o be set It is generally best to leave these set to default Size ranges and measurement thresholds can be applied to the analysis to filter spurious peaks prior to the analysis being performed These c...

Страница 57: ...ow which enables various attributes of the analysis model to be altered These include the measured zeta Display range and the measurement thresholds If it is known that all particles within the sample...

Страница 58: ...will set the distance to the first required displacement position This is a manual operation and the user must open the cell area lid turn the head of the cell the specified amount then close the lid...

Страница 59: ...ven to set the cell to the next measurement position This process will continue until all measurements have been made at all the positions specified in the SOP and the surface zeta potential measureme...

Страница 60: ...m the main menu With the Edit result window open the Debye length model tracer material and dispersant properties can then all be changed The surface zeta potential edit result option allows points to...

Страница 61: ...r the measurement it is recommended that this is disposed of and a new one used for all subsequent measurements General cleaning As a complete assembly the cell can be cleaned using de ionised water o...

Страница 62: ...nst the materi als identified below before inserting a sample It is also recommended that a test is performed on the material with the sample before more permanent usage is undertaken With proper use...

Страница 63: ...fitted an option part number label will be attached to the front of the cuvette holder The flow mode option is included as a standard fitment on the Zetasizer Nano ZSP Flow mode The Flow mode option...

Страница 64: ...s to be monitored Applications Applications for this feature include use as a chromatography detector and a process monitor Separations detector The Zetasizer Nano can be connected to a size exclusion...

Страница 65: ...and ZS means that many processes can be monitored without further sample preparation simplifying the measurement Note The method of sampling the process and transferring this to the Zetasizer is not p...

Страница 66: ...ware saved as a text file and inserted into a spreadsheet software package such as Microsoft Excel for analysis This is done using the Export flow result macro option in the Tools menu If this macro i...

Страница 67: ...will display the window below ill 8822 The window shows the following Chromatogram This shows the flow mode plot By default the Intensity trace is displayed on the left y axis and the Z average mean...

Страница 68: ...e to select a region of the chromatogram which is highlighted in purple By right clicking the mouse it is then possible to perform a DLS analysis of this region This calculates and intensity weighted...

Страница 69: ...ts dialogue Choose Con figure and then disable the option to Filter flow mode data to do this With reference to the originally attributed baseline level the software will display any peaks that may ha...

Страница 70: ...plained later in this chapter Peaks tab The Peaks tab displays all the details about the calculated peaks shown in the flow mode plot To display a peak s details either select a blue peak bar in the p...

Страница 71: ...put 1 2 and Flow settings will be included in the SOP selections The SOP Editor and setup is described in full in the Zetasizer Nano user manual Most of the SOP sections are common to Measurement type...

Страница 72: ...With the Enable input check box selected the input condi tions required for the external signal can be setup Input name Use Input name to name the type of input Use a name that represents the signal o...

Страница 73: ...external detector and the Zetasizer Nano This parameter ensures that data recorded by the Zetasizer can be over plotted from the same elution point This value will be obtained from the external detec...

Страница 74: ...urement duration setting may affect the accuracy and repeatability of the results In Measurement duration input the total measurement time or volume amount required and adjust the units to suit Time o...

Страница 75: ...all other SOP windows refer to the size SOP section Settings Description Flow rate Input the flow rate of the sample through the instrument and connecting tubing This value is taken from the external...

Страница 76: ...he measurement progresses The result view will be updated after every run of the measurement The Result tab is named after the result view chosen the result view shown above is Flow trace vs Time Diff...

Страница 77: ...ement record and then select the appropriate report tab The report will show all appropriate measurement information for that record Standard report flow mode measurements The standard Flow mode repor...

Страница 78: ...e three main peaks in the measurement will also be shown displaying the sample intensity width molecular weight and start and end flow volumes Additionally a the flow trace result graph will be displa...

Страница 79: ...icrorheology as it is a cross over between DLS and rheology and allows rheological measurements of low viscosity and weakly structured samples to be made Advantages of DLS Microrheology are Rheologica...

Страница 80: ...raction between the tracer particles and measurement sample The tracer is initially measured in the sample buffer dispersant or solvent alone with no sample added sample is then added and a second mea...

Страница 81: ...ex viscosity Each tab page contains controls that allow different models to be fitted to the microrheology data graph It is important to note however that not all models will be applicable to all the...

Страница 82: ...t destination Enter the destination and alter the parameters and settings as required To export the data as a csv file select the Browse button and alter the file extension Note if Ok is pressed the d...

Страница 83: ...time is exported from the Zetasizer software in s and will be imported into the rSpace software in s Sample Name Date File Name Lag times s Times s Angular Frequency rad s Creep Compliance Plot again...

Страница 84: ...l open up the SOP Edi tor The SOP Editor consists of several dialogues that can be stepped through by using the Next arrow button To edit an existing SOP choose Open SOP instead Complete the SOP Edito...

Страница 85: ...Select or deselect the zeta potential and size tick boxes as required Refer to the schematic description below Load Load a saved SOP file The SOP loaded will be shown in the above entry box Edit Edit...

Страница 86: ...t Advanced except for the addition of the Acceptable zeta ratio setting Settings Description Select Highlight the tracer required and press OK The Tracer SOP will now be populated with the selected tr...

Страница 87: ...is a size measurement that the software uses to calculate the relaxation times and therefore the viscosity and moduli values However in order to get to this point and in order to make reliable measur...

Страница 88: ...rements For the initial tests of the zeta potential the following starting concentrations are suggested Tracer in dispersant buffer or solvent only 0 5 l tracer particles to 10ml sample 0 05 l ml Trac...

Страница 89: ...measurement will be difficult It is therefore important to use just enough tracer to mask the sample but not put in so much that the sample becomes turbid Note The measured size of the tracer may not...

Страница 90: ...and the sample tracer systems The tracer concentration is not high enough in the sample If the tracer concentration is too low the zeta potential result will be domi nated by the sample not the tracer...

Страница 91: ...dispersant buffer or solvent alone This is termed the tracer measurement Use a zeta potential cell A zeta potential cell is filled with the dispersant buffer that is to be used in the later microrheo...

Страница 92: ...ntration similar to that used in the previous step Ensure the tracer and measurement sample are mixed A measurement of the zeta potential of the tracer in the measurement sample is then performed Once...

Страница 93: ...y cell or disposable sizing cell Prepare a fresh measurement sample and perform a size measurement When finished a dialogue will appear indicating the next step to perform Measure size of measurement...

Страница 94: ...so much that the sample becomes turbid therefore making any subsequent measurement difficult When the software is satisfied with the comparison between the two size measurements the microrheology mea...

Страница 95: ...tracer size can be measured once and the same value can be set in the SOP by checking the edit box next to the nominal tracer size and changing the nominal tracer size to the size that has been measur...

Страница 96: ...g the Cox Merz rule This rule is generally only fully applicable for simple systems and that the differences between complex viscosity and shear viscosity increases as the sample structure becomes mor...

Страница 97: ...e Page 5 19 A standard report MSD The standard microrheology report MSD mean squared displacement M gives similar information as seen in a standard size and zeta potential report plus additional infor...

Страница 98: ...Chapter 5 Microrheology Page 5 20 MAN 0487...

Страница 99: ...iffusion barrier measurement technique a description of this follows A measurement process that reduces the risk of aggregation but also capable of identifying any aggregates that are formed and asses...

Страница 100: ...all recorded sub runs is reported into the record view During the measurement proper running a large number of sub runs sequentially will significantly increase the risk of Joule heating of the sample...

Страница 101: ...lectrodes The diffusion barrier technique protects the protein from damage by introducing a physical distance between the sample and the electrodes This is done by holding a plug of measurement sample...

Страница 102: ...ein mobility measurement being performed these are described below Also note that some of the other dialogue pages will alter slightly to accommodate extra parameters necessary to perform the microrhe...

Страница 103: ...epeatability of the measurement of particularly polydisperse samples All the individual runs are accumulated and then averaged to give a final zeta potential result Therefore the more runs performed t...

Страница 104: ...tion Perform a size measurement With the Perform a size measurement before and after the Protein mobility measurement check box selected a size measurement will also be performed as well as the standa...

Страница 105: ...mobility measurement displays are identical to those shown when performing a standard zeta potential measurement The measurement and a a description of the measurement tabs is explained in the Zetasi...

Страница 106: ...once aggregated groups have been removed The average over un aggregated groups will yield the mobility of only the protein itself and not its aggregates but the number of groups included in the measu...

Страница 107: ...surement information for that record Standard report protein mobility measurements Once a protein mobility measurement is completed there are a number of standard reports available for reviewing the m...

Страница 108: ...ollowing tab selections are available SLS Debye plot The protein utilities function enables a static light scattering Debye plot to be constructed from freely available information or from a record ge...

Страница 109: ...tion and molecular weight Also estimates the thickness of the electrostatic layer based on protein charge and ionic strength Mixture Viscosity A simple tool that calculates the overall viscosity of a...

Страница 110: ...s Any of the parameters in the window box can be changed the other parameters will be instantly recalculated This can be used to investigate the sensitivity of the result to changes in any parameter F...

Страница 111: ...e Table tab to begin entering data into the table To define a new concentration press the Add button The table Input values window will be displayed Specify the Concentration and Sample intensity valu...

Страница 112: ...s are described in the following section Measurement parameters table Once all the concentration values have been added into the table the measurement parameters table can be used to alter the result...

Страница 113: ...the residual count rate which is derived by subtracting the solvent count rate from the sample count rate Shape Model The shape model that is used to estimate the radius of gyration from the hydrodyna...

Страница 114: ...ength between the molecule and the solvent This is calculated from the slope of the plot K Mol cm2 g The instrument optical constant Molecular weight MW and shape estimates The hydrodynamic size measu...

Страница 115: ...sion coefficient D now known the Hydrodynamic diameter can be calculated by using a variation of the Stokes Einstein equation DH Hydrodynamic diameter k Boltzmann constant f Particle frictional coeffi...

Страница 116: ...r F plus the Prolate and Oblate axial ratio will be automatically calculated and displayed in the results area If required a solvent layer can be subtracted from the hydrodynamic radius when calculati...

Страница 117: ...nd the estimated molecular weight will automatically be calculated The molecular weight is displayed in four ways Hydrodynamic diameter estimate This works in the same way as above except the molecula...

Страница 118: ...value press the return key afterwards and the results table will be updated Minimum Concentration Calculator By entering only the molecular weight the Sample concentration mg ml values required for pe...

Страница 119: ...Protein charge Ka This tool is used to calculate Ka for the Henry equation using known size and ionic strength This tool uses the Ohshima equation for monovalent salts The second calculation calculate...

Страница 120: ...gadros number 6 022 10 23 mole K Boltzmann s constant 1 38065 10 23 m2kg s2K T temperature K I ionic strength moles L This calculator allows a more specific value other than the Smoluchowski or Huckel...

Страница 121: ...A dynamic Debye plot can be created by inputting the concentration points from an existing measurement then additional concentration points can be added Any of the parameters in the dialogue box can...

Страница 122: ...ed Specify the Concentration and Measured diffusion coefficient values either new values or ones taken from an existing measurement To modify a concentration select it from the list and press the Modi...

Страница 123: ...is completed the other will be updated Saving the dynamic Debye plot Click Save to save the parameters and other inputted data To reviewed the saved parameters at a later stage click the Load button...

Страница 124: ...ere o permittivity of free space 8 8542 10 12 C Vm inverse Debye length 1 nm NA Avogadros number 6 022 10 23 mole K Boltzmann s constant 1 38065 10 23 m2kg s2K T temperature K I ionic strength moles L...

Страница 125: ......

Страница 126: ...alvern Instruments Limited Enigma Business Park Grovewood Road Malvern Worcs WR14 1XZ U K Tel 44 0 1684 892456 Fax 44 0 1684 892789 www malvern com Quick start Self installation guide Zetasizer Malver...

Отзывы: