CWL-20E
|
11
|
en
Operation
8.4
Lift system initialization
1.
Make sure the master on/off switch (see the
“Component identification” section on page 8) on each
lift unit and the Touch Screen Controller
is set to the
OFF
position. Turn the master on/off switch of the
Touch Screen Controller
to the
ON
position. The
Touch Screen Controller will initialize and then the
screen shown below will appear on the touch screen.
(NOTE: All screens shown in this manual are
simplified versions of what is actually shown on the
display to help clarify button locations and functions.)
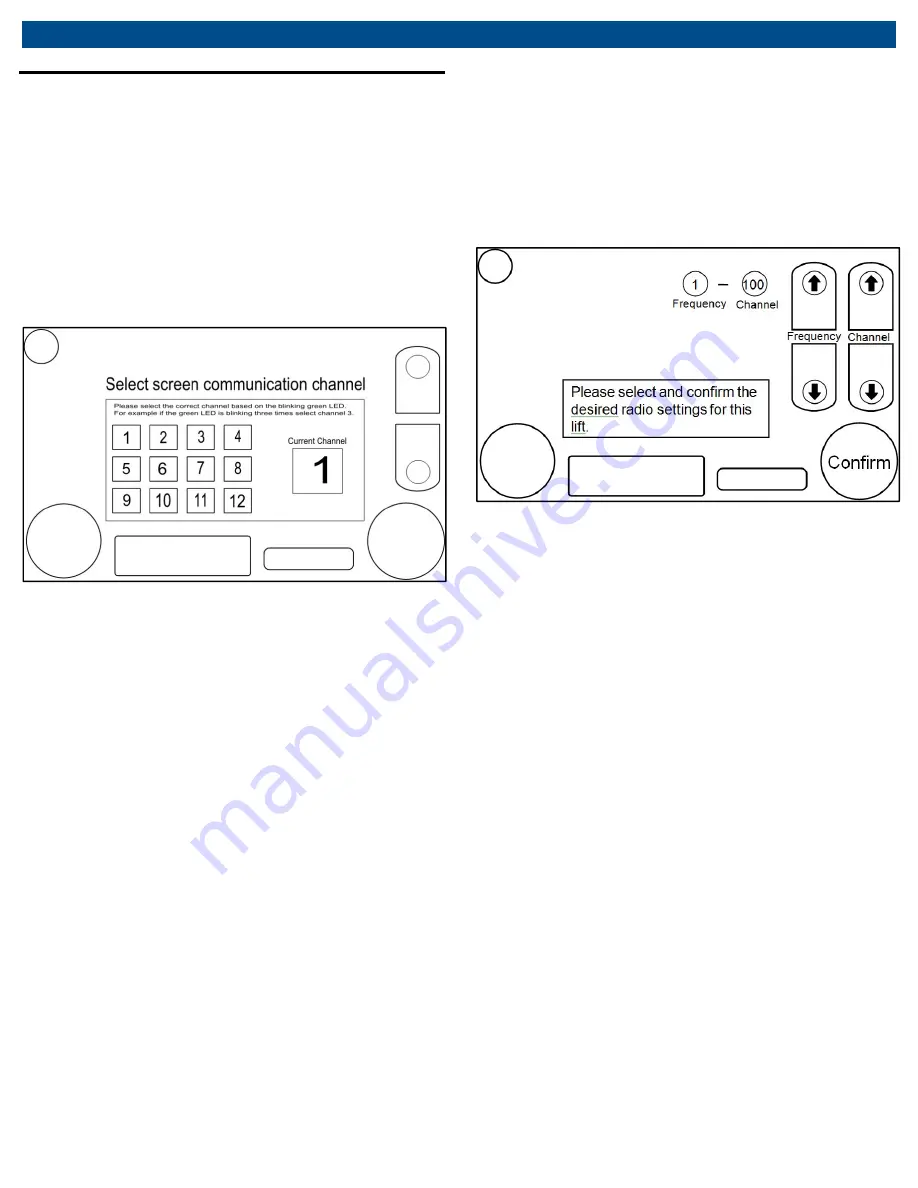
Fig. 6: Selecting screen communication channel
2.
Select the desired Touch Screen Controller radio
frequency. The most recently used frequency will
already be set. If the most recently used frequency is
acceptable, a frequency does not need to be chosen
and accepted. To choose a new frequency, push the
icon corresponding to the frequency desired. All units
that will be used together as a lift system to lift a
vehicle must be set to the same frequency as the
Touch Screen Controller. There are 12 radio
frequencies available for use. Refer to Section 11
“Using multiple lifts in the same work area” for more
information on selecting the radio settings. When the
desired radio frequency is shown, push the
ACCEPT
button to advance to the next screen.
3.
Turn the master on/off switch of any lift unit to the
ON
position and then push the Communication Button
(see the “Component identification” section on page
8). If the touch screen frequency was changed on the
Touch Screen Controller then the touch screen
frequency will need to be changed on the lift to match
that of the Touch Screen Controller. The lift unit’s
touch screen frequency will be indicated by the blink
pattern shown with the Status Indicators on top of the
Electronics
Enclosure
(see
the
“Component
identification” section on page 8). The number of
successive flashes between breaks will be the touch
screen frequency that is set on the lift unit. If changing
the touch screen frequency on the lift, see section
8.13. If the touch screen frequencies of the lift and the
Touch Screen Controller match, then the screen
shown below will appear on the touch screen. If
nothing happens, the frequencies do not match and
will need to be reset so that they do.
Fig. 7: Select radio settings for lift
4.
Select the desired radio settings. The default radio
settings will be the settings selected the last time the
unit was used. Push the up and down arrows on the
right side of the screen to change the radio frequency
and/or channel, if needed. All units that will be used
together as a lift system to lift a vehicle must be set to
the same frequency and channel. There are 12 radio
frequencies available for use and the channel can
range from 100-120 for each frequency. Refer to
Section 11 “Using multiple lifts in the same work area”
for more information on selecting the radio settings.
When the desired radio settings are shown, push the
CONFIRM
button to advance to the next screen.
5.
Read through the Notice that is displayed on the next
screen. If the operator agrees with and acknowledges
the statements made on the screen, push the
ACCEPT
button to continue setting up the lift system.
6.
The display then changes to ask how many lift units
will be part of the lift system. Push the button that
corresponds with the total number of lift units that will
be used in the current lifting system.
7.
The display will now appear as shown below with a
picture of a vehicle asking for the current lift unit’s
position relative to the vehicle. Select the round button
with a number inside it that matches the current lift unit’s
position. Once the position is selected the position button
will turn green to indicate the selection.


