


Chapter 8 Mobile Surveillance
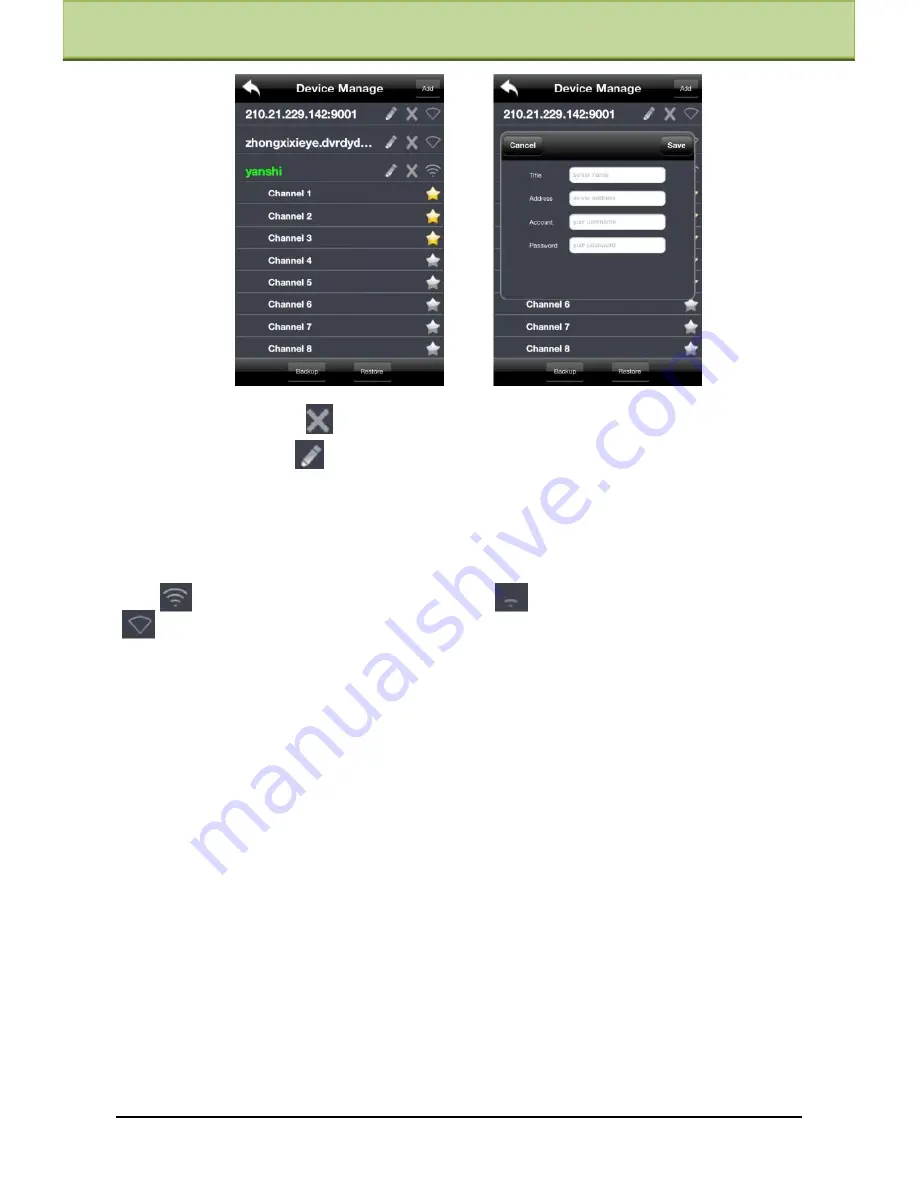
Delete device: Click
button behind the device name to delete this device.
Edit device: Click
button behind the device name to edit the information of this
device.
Backup & restore: It is recommended to click
【
Backup
】
button to reserve the information
of all devices. Then you can click
【
Restore
】
button to restore all device information after
you re-install the client or delete the device uncarefully.
indicates the device has been connected;
indicates the device is connecting;
indicates the device is not connected.
4.
Live Preview
Once you access the device, the system will automatically display the screen mode in
accordance with the channel number of the device
Note: The maximum number of channels which can be connected are nine after login.
Click ―Screen mode‖ button to select channel as shown in Fig 1.
When there is video playing in a screen, you can switch the channel by long pressing the screen as
shown in Fig 2.
When no video is playing in a screen, click this screen to choose channel as shown in Fig 3.
When the single channel is playing, you can zoom in/out the image by swiping you finger up
and down as shown in Fig 4.
When the single channel is playing, the channel can be switched by swiping your finger left or
right as shown in Fig 5.
When multi channels are playing, drag one channel screen to the other channel screen. This will
make these two channels change the position of each other.
IP-CAMERA User Manual -
50