


Chapter 6 Remote Configuration
If ―Show icons for networked UPnP devices‖ can‘t display in the ―Network Tasks‖ list
box, please follow the below operation:
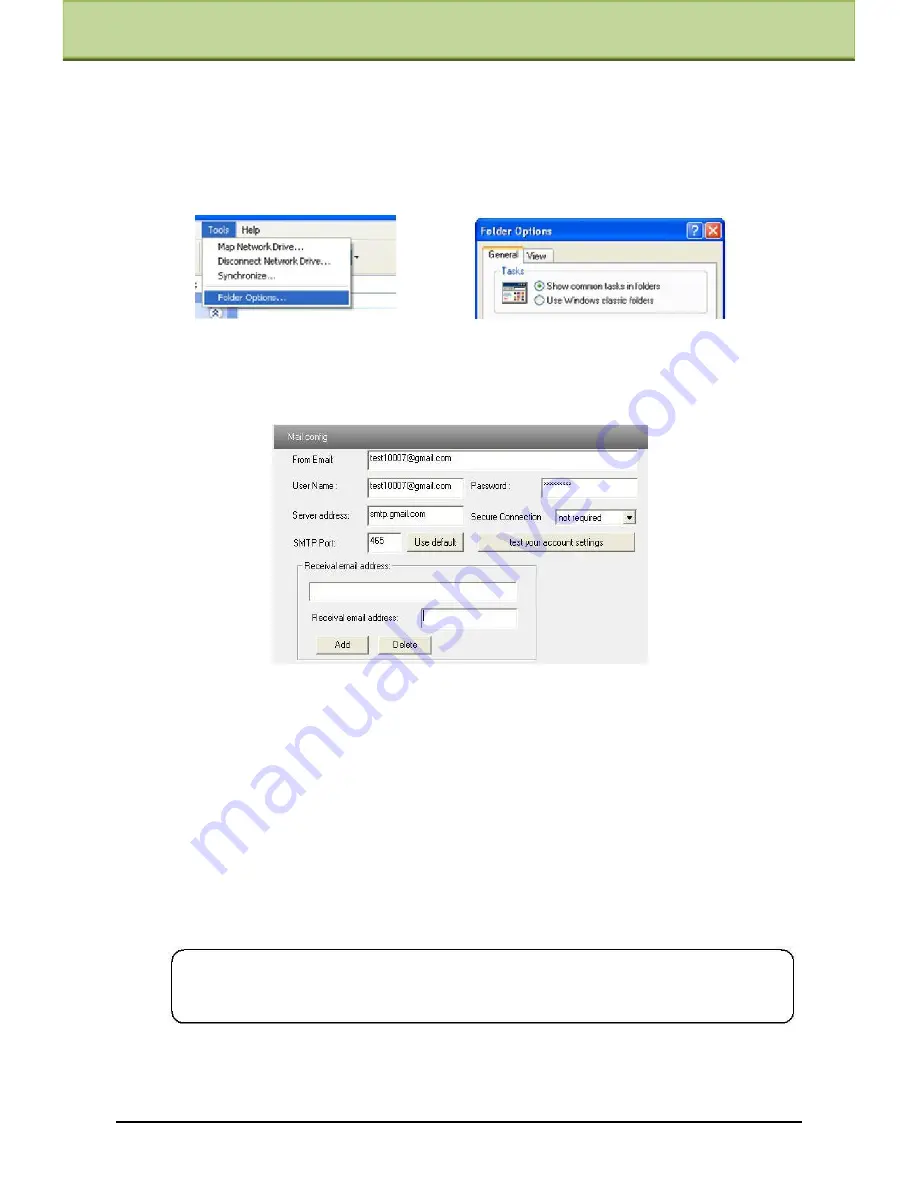
Click ―Tools‖-- ―Folder options‖
Check the ―Show common tasks in folders‖ in the ―Tasks‖ check box, UPnP icon will display.
6.5.8 Mail Setting
Enter into ―Network Configuration‖
―Mail Setting‖ interface. Please refer to below picture.
1.
From Email: sender‘s e-mail address
2.
User name and password: sender‘s user name and password
3.
Server address: SMTP name of sender
4.Select the secure connection type at the Secure Connection pull down list according to user‘
actual needs
5.
Receival email address list: add email address into the list
6.
Receival email address: receiver‘s e-mail address
7.
After all parameters setup, user can click ―Test your account settings‖. If email sent
successful, a ―Test Successful‖ window will pop up, if not, users can try other email
addresses or check the setting.
Note
: If you change the static IP into PPPoE and select mailbox, there will be an
e-mail sent to
users‘ mail box for notifying a new IP address.
6.5.9
FTP
Enter into Network Configuration
FTP interface; please refer to below picture.
IP-CAMERA User Manual -
36