


AERO.100 User Guide
©2016 TLS Corp. ALL RIGHTS RESERVED
Oct 2016
Page 29
hierarchy. The on-screen arrows can be clicked to navigate between the most recently visited
controls. The “ribbed” section of the display, to the far right of the arrows, allows the top and
bottom sections to be resized. Place your pointer in the ribbed area and left click and drag to
change the relative sizes of the meters and controls. Refer to Figure 5-5, above.
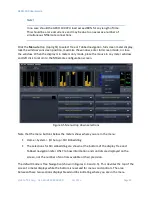
In the Tabbed mode, all menus and all controls are displayed on the screen simultaneously (see
Figure 4-6 below). This mode inherently makes menus, controls, and their labels smaller. This
mode works best when the remote software window can be made large enough so that all text
items can be easily read. In Tabbed mode you have direct access to all menus items and
associated controls without having to step through the menu structure in sequence.
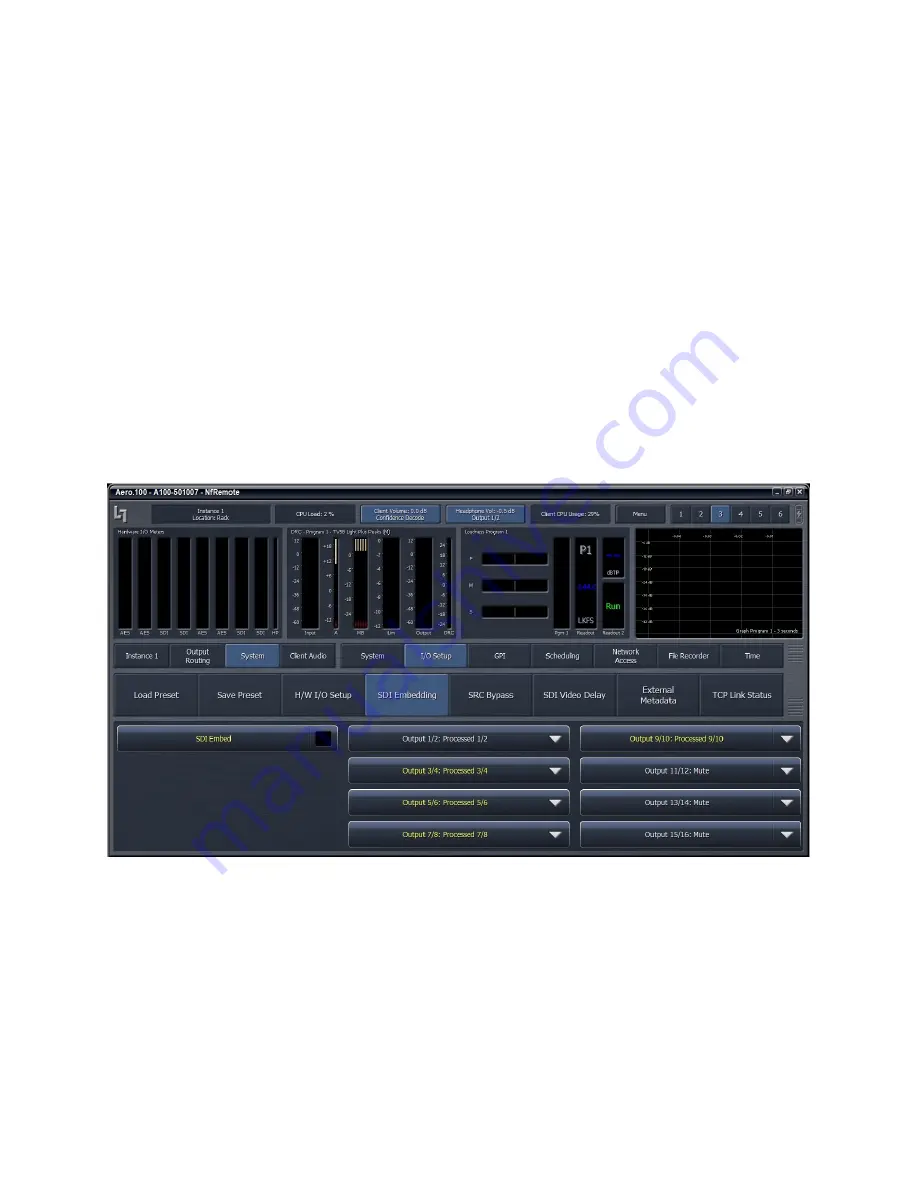
Figure 4-6 shows the same menu location as Figure 4-5 but in Tabbed view. Notice that you can
see all of the sub-menus of System (top row, right side), all of the sub-menus of I/O Setup in the
center section, and all of the available selections under SDI embedding in the bottom section.
There are two size adjustments in Tabbed view. One adjusts the meter vs menu item size and
the other the relative sizes of the center and lowest section of the menus.
Figure 4-6
NfRemoteTabbed mode
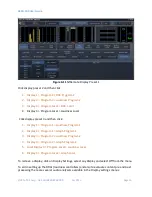
To the right of the
Menu
button, at the top of the NfRemote window, are
six Display Preset
buttons
that quickly recall display configurations. Simply select a display preset from 1 to 6 and
configure the display settings. (see Section 5.6) The AERO.100 remote software first appears
with display preset 1 active. Any changes made to the screen (i.e., selecting between navigation
modes, resizing window sections, or choosing the number and/or type of display windows
visible) are automatically saved in real time. Switching back to this preset, from any other


