7. Firmware Upgrade
HDMI20-OPTC series – User's Manual
60
Installation for macOS
Mount the DMG file with double clicking on it and drag the LDU2 icon over the Applications icon to copy the
program into the Applications folder. If you want to copy the LDU2 into another location just drag the icon
over the desired folder.
INFO: The Windows and the Mac application has the same look and functionality.
7.4. Firmware Upgrading Steps
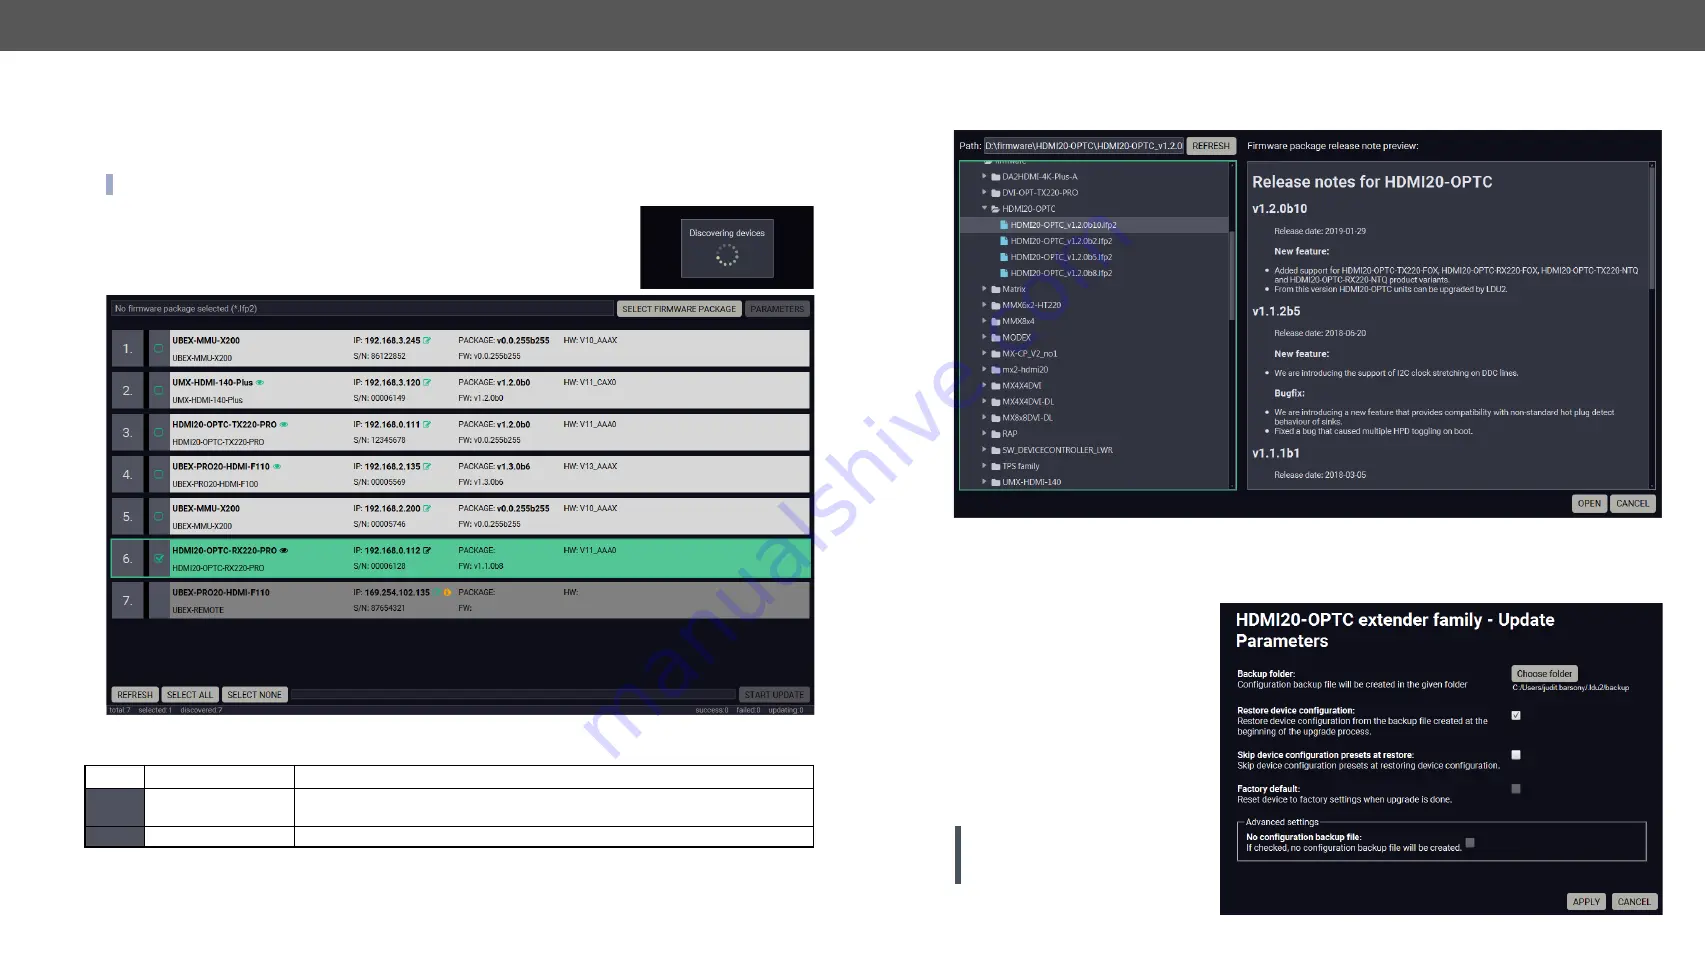
Step 1.
Connect the computer to the same network as the extenders switchers
are located. Run the LDU2 software. The discovered and known devices
are being loaded.
Legend of the Icons
Icon
Name
Description
Device identifier
Clicking on the icon results the LDC screen blink for 10 seconds. The feature
helps to identify the device itself in the rack shelf.
IP address editor
To modify the IP address settings just click on the pencil icon.
Step 2.
Select the firmware package file (*.lfp2). When the file is selected the release note is displayed in the
right window. Please read it carefully.
Step 3.
Select the desired device(s). The available and supported devices are searched and listed
automatically.
Step 4.
Press the
Open
button. The listed devices – which are compatible with the firmware pack – are filtered
automatically in the main screen.
Step 5. Parameters
button opens a
window, where the backup /
restore function can be set.
The location of the backup file
can be changed by clicking
on the
Choose folder
button.
Put a tick beside
Restore
device configuration
or
Factory
default
option, depending
on your needs. Restore the
configuration is the default
option.
ATTENTION!
Settings in the
parameters window related to all
the upgraded devices.
Step 6.
Click
Apply
to save the settings.


