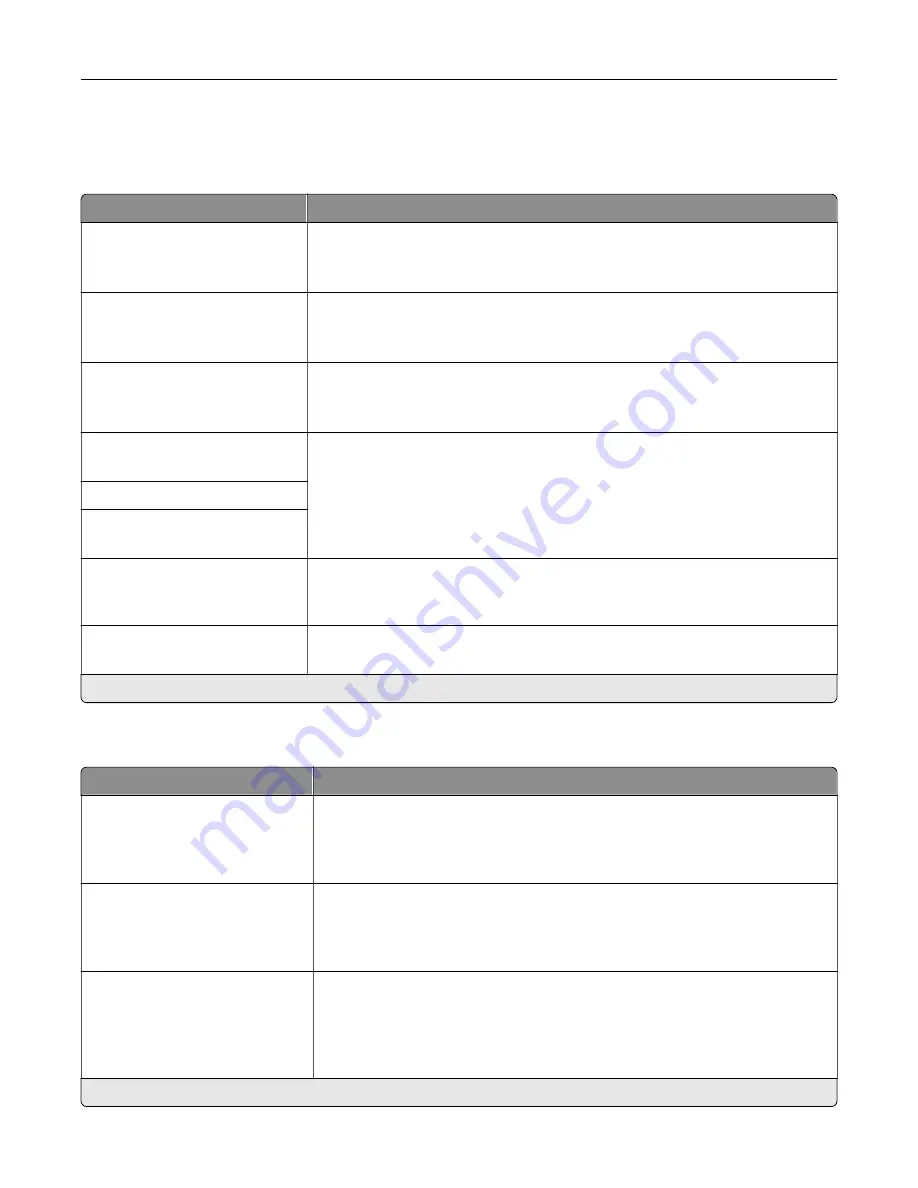
HTTP/FTP Settings
Note:
This menu appears only in network printers or printers attached to print servers.
Menu item
Description
Enable HTTP Server
Off
On*
Access the Embedded Web Server to monitor and manage the printer.
Enable HTTPS
Off
On*
Configure the HyperText Transfer Protocol Secure (HTTPS) settings.
Enable FTP/TFTP
Off
On*
Send files using FTP.
HTTP Default IP Port
1–65535 (80*)
Configure the HTTP and FTP server settings.
HTTPS Device Certificate
FTP Default IP Port
1–65535 (21*)
Timeout for HTTP/FTP
Requests
1–299 (30*)
Specify the time in seconds before the server connection stops.
Retries for HTTP/FTP Requests
1–299 (3*)
Set the number of retries to connect to the HTTP/FTP server.
Note:
An asterisk (*) next to a value indicates the factory default setting.
USB
Menu item
Description
PCL SmartSwitch
On*
Off
Set the printer to switch to PCL emulation when a print job received through a
USB port requires it, regardless of the default printer language.
Note:
If PCL SmartSwitch is off, then the printer does not examine incoming
data and uses the default printer language specified in the Setup menu.
PS SmartSwitch
On*
Off
Set the printer to switch to PS emulation when a print job received through a
USB port requires it, regardless of the default printer language.
Note:
If PS SmartSwitch is off, then the printer does not examine incoming
data and uses the default printer language specified in the Setup menu.
Mac Binary PS
Auto*
On
Off
Set the printer to process Macintosh binary PostScript print jobs.
Notes:
•
On processes raw binary PostScript print jobs.
•
Off filters print jobs using the standard protocol.
Note:
An asterisk (*) next to a value indicates the factory default setting.
Understanding the printer menus
49
Содержание M1242
Страница 4: ...Software 123 Firmware 124 Notices 126 Index 137 Contents 4 ...
Страница 65: ...4 Remove the used pick tires one after the other 5 Unpack the new pick tires Maintaining the printer 65 ...
Страница 67: ...4 Remove the tray insert and then flip the tray base Maintaining the printer 67 ...
Страница 68: ...5 Remove the used pick roller assembly 6 Unpack the new pick roller assembly Maintaining the printer 68 ...
Страница 76: ...Paper jam in door A 1 Remove the tray 2 Open door A 3 Remove the toner cartridge Clearing jams 76 ...


