


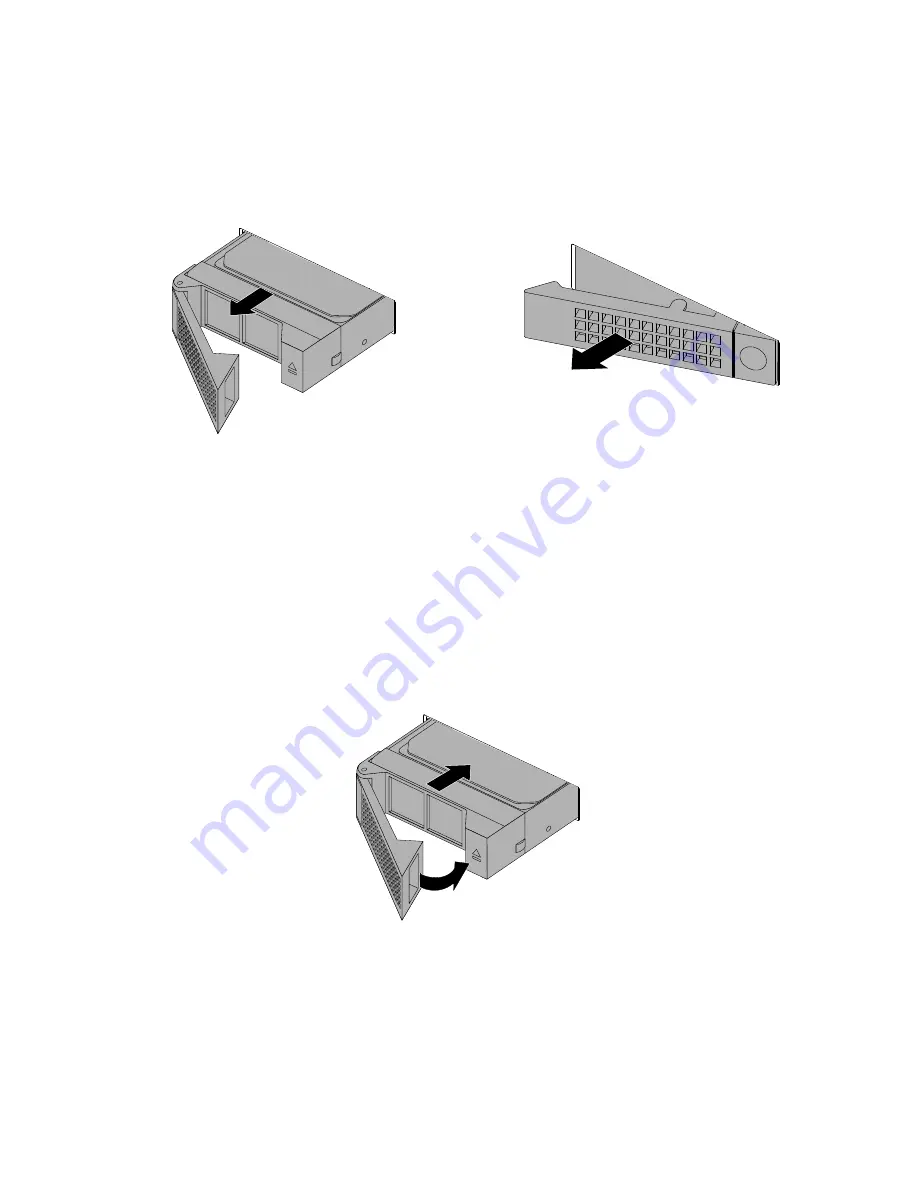
3. Pull the handle and carefully slide the hot-swap hard disk drive or the dummy tray out of the front of
the chassis.
Figure 74. Removing the hot-swap hard disk drive or the dummy tray
4. Touch the static-protective package that contains the new hot-swap hard disk drive to any unpainted
surface on the outside of the server. Then, take the new hot-swap hard disk drive out of the package.
Note:
Do not touch the circuit board on the hard disk drive.
5. Slide the new hot-swap hard disk drive into the drive bay from the front until it snaps into position
and then completely close the handle.
Figure 75. Installing the hot-swap hard disk drive
6. Check the hot-swap hard-disk-drive status LEDs to ensure that the hard disk drive is operating correctly.
You might have to restart the server for the newly installed hard disk drive to be recognized. See
“Hot-swap-drive status LEDs” on page 36. If the hard disk drive is faulty, you need to reinstall or
replace it until it is operating correctly.
7. Do one of the following:
106
ThinkServer RD350 User Guide and Hardware Maintenance Manual
Содержание ThinkServer RD350
Страница 1: ...ThinkServer RD350 User Guide and Hardware Maintenance Manual Machine Types 70D6 70D7 70D8 and 70D9 ...
Страница 14: ...xii ThinkServer RD350 User Guide and Hardware Maintenance Manual ...
Страница 18: ...4 ThinkServer RD350 User Guide and Hardware Maintenance Manual ...
Страница 20: ...6 ThinkServer RD350 User Guide and Hardware Maintenance Manual ...
Страница 52: ...38 ThinkServer RD350 User Guide and Hardware Maintenance Manual ...
Страница 66: ...52 ThinkServer RD350 User Guide and Hardware Maintenance Manual ...
Страница 148: ...134 ThinkServer RD350 User Guide and Hardware Maintenance Manual ...
Страница 158: ...144 ThinkServer RD350 User Guide and Hardware Maintenance Manual ...
Страница 169: ... Low power memory states Appendix A Notices 155 ...
Страница 170: ...156 ThinkServer RD350 User Guide and Hardware Maintenance Manual ...
Страница 175: ......
Страница 176: ......


