


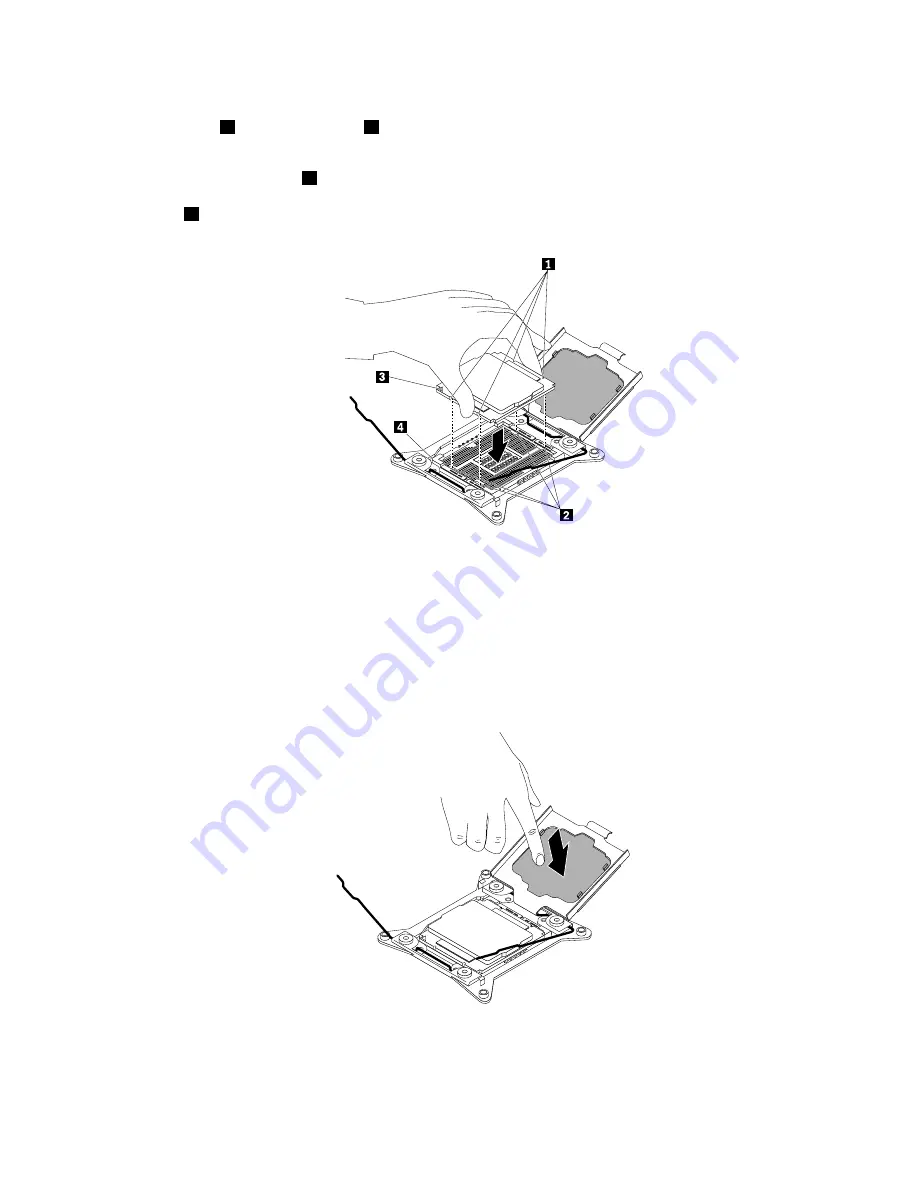
10. Note the orientation of the new microprocessor. Hold the new microprocessor by its edges and align
the notches
1
on it with the tabs
2
in the microprocessor socket. Then, carefully lower the new
microprocessor straight down into the microprocessor socket.
Note:
The small triangle
3
on one corner of the new microprocessor is the microprocessor orientation
indicator. The new microprocessor is in the correct orientation when this indicator faces the beveled
corner
4
of the microprocessor socket.
Figure 59. Installing the microprocessor
11. Remove the plastic microprocessor socket cover. Store the microprocessor socket cover in case that
you later remove the microprocessor and need the socket cover to protect the pins on the socket.
Note:
Do not remove the socket cover until you install a microprocessor into the socket. If you remove
the microprocessor, install the socket cover or a new microprocessor immediately.
Figure 60. Removing the microprocessor socket cover
Chapter 6
.
Replacing hardware
95
Содержание ThinkServer RD350
Страница 1: ...ThinkServer RD350 User Guide and Hardware Maintenance Manual Machine Types 70D6 70D7 70D8 and 70D9 ...
Страница 14: ...xii ThinkServer RD350 User Guide and Hardware Maintenance Manual ...
Страница 18: ...4 ThinkServer RD350 User Guide and Hardware Maintenance Manual ...
Страница 20: ...6 ThinkServer RD350 User Guide and Hardware Maintenance Manual ...
Страница 52: ...38 ThinkServer RD350 User Guide and Hardware Maintenance Manual ...
Страница 66: ...52 ThinkServer RD350 User Guide and Hardware Maintenance Manual ...
Страница 148: ...134 ThinkServer RD350 User Guide and Hardware Maintenance Manual ...
Страница 158: ...144 ThinkServer RD350 User Guide and Hardware Maintenance Manual ...
Страница 169: ... Low power memory states Appendix A Notices 155 ...
Страница 170: ...156 ThinkServer RD350 User Guide and Hardware Maintenance Manual ...
Страница 175: ......
Страница 176: ......


