8.1 Selection Mode
This icon activates the selection mode. When you click a data set in the 3D viewer, it is
displayed in the assigned selection color and shown in red in the data explorer (see chapter
5.4).
8.2 Interactive Clipping
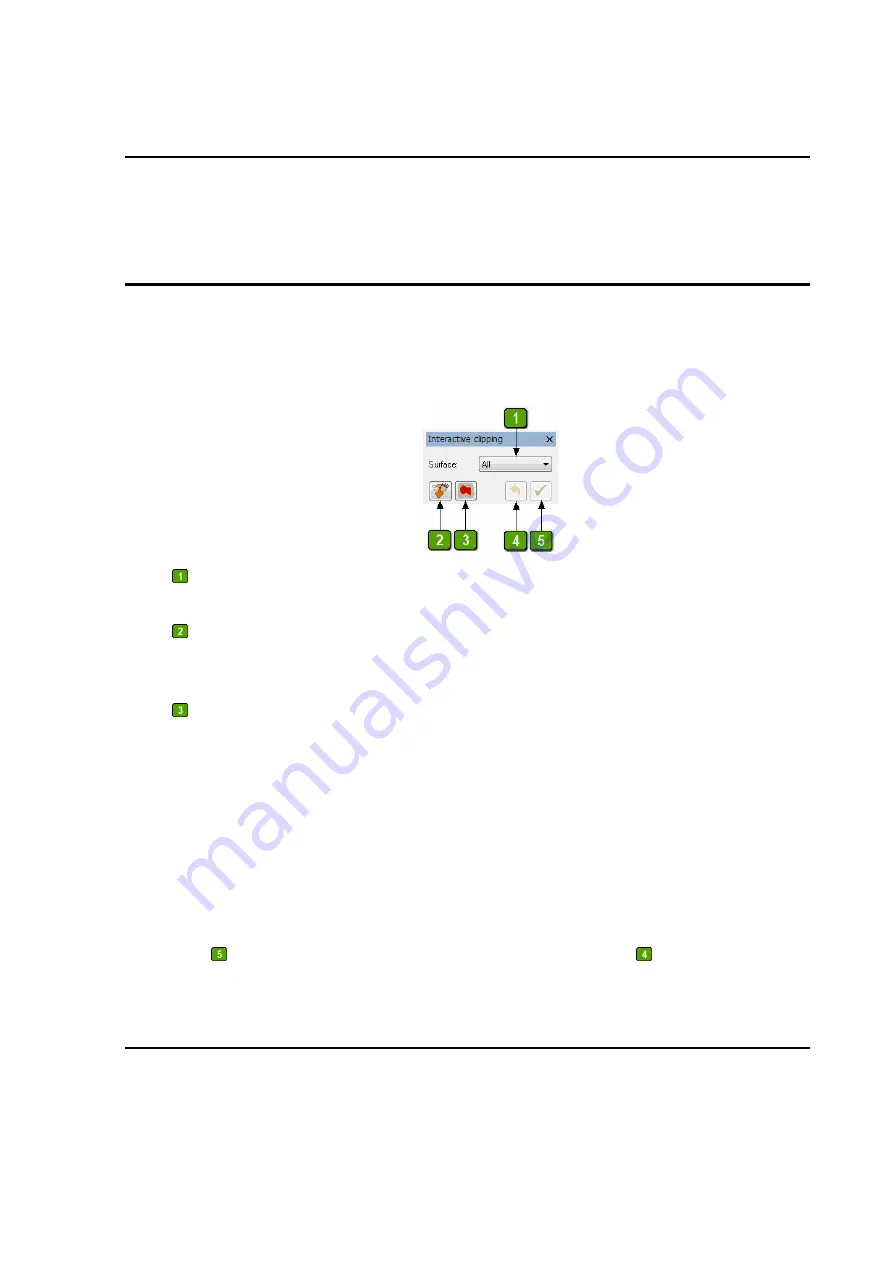
This tool allows you to clip data of any type. If all data of an object or entire objects are
clipped, the corresponding entry is removed from the data explorer.
The toolbox offers the following options:
Choose whether the clipping action will apply to
All
faces, only
Front
faces or only
Back
faces. This option is only effective for objects that have back and front faces.
If this option is enabled (symbolized by a “normal” eye), no data will be deleted that is
currently invisible, e.g. because it lies outside the 3D viewer or is hidden by other data. If the
option is disabled (“X-ray eye”), all the data within the selection will be deleted.
If this option is enabled, data within the selected area will be retained and all data outside
the selection will be deleted. The selected area will then be shown in green instead of red.
Move the mouse cursor over the area containing the data you want to edit. If view mode is
currently active, change to tool mode by pressing <Space Bar> in the 3D viewer.
Define the area to clip with the left mouse button. By left-clicking, you can define a straight
line. If you keep the left mouse button pressed, you can draw a continuous line. Close the area
by double clicking with the left mouse button or pressing the right mouse button. You can also
select multiple areas in this way.
Press
or the <Enter> or <Del> key to clip the selected areas. Press
to undo the last action
or actions you made.
8.3 Check Accuracy
With this tool, you can check the measurement accuracy of the
T-SCAN
system.


