Installing Options
24
2
Note
❒
Be sure to return the screwdriv-
er to the paper tray after using it.
❒
Print a configuration page to
confirm that the unit is properly
installed. See
"Printing a Config-
uration Page"
in the Printer Ref-
erence, on the CD-ROM labeled
"Operating Instructions".
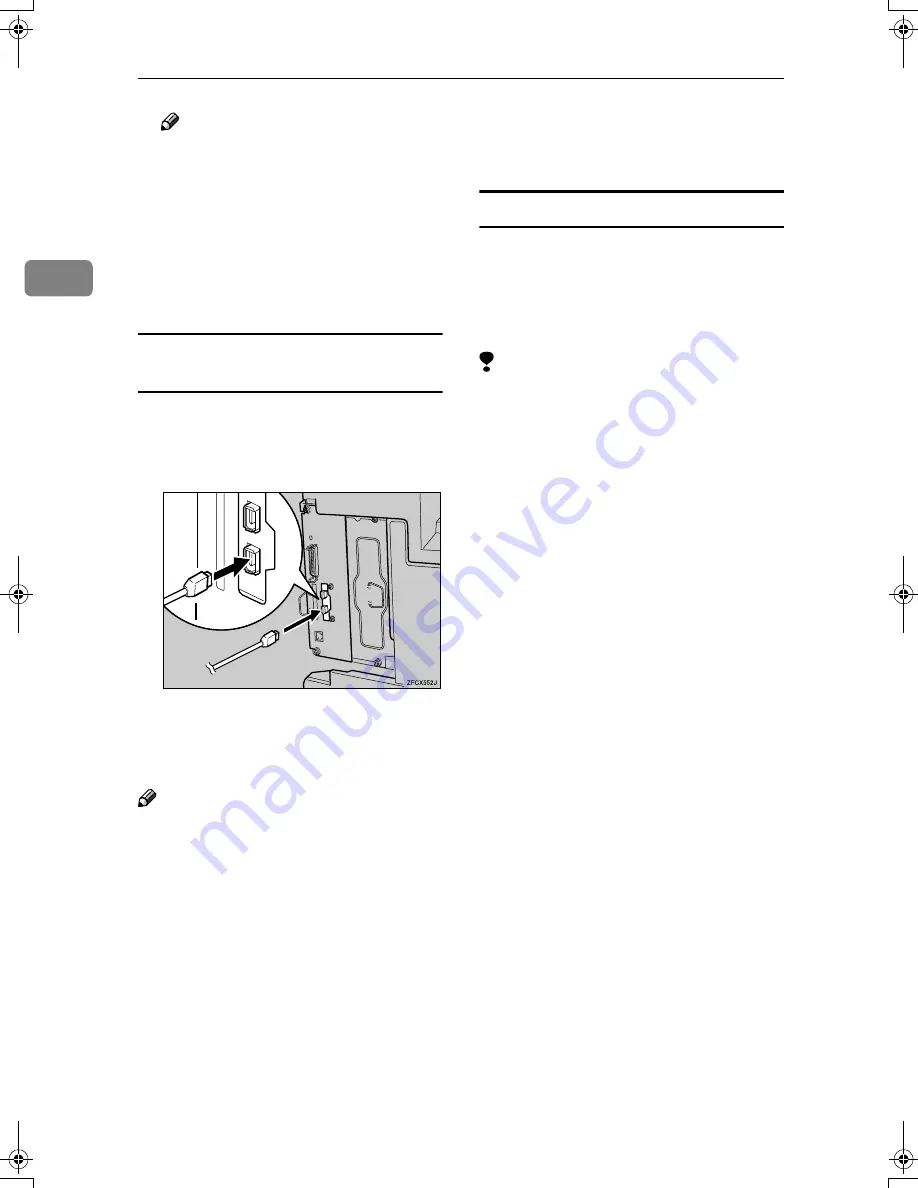
Connecting the 1394 interface cable to
the printer
AAAA
Attach the 1394 interface cable to
the jack on the board.
Both jacks are available.
BBBB
Connect the other end of the 1394
interface cable to the computer or
the other IEEE 1394 node.
Note
❒
The 1394 Interface Unit could not
receive data from more than one
PC at the same time. In this case, an
error message appears. The printer
can accept data sent from other
computers, after the first print job
has finished.
❒
The bidirectional transmissions
are not supported by the 1394 In-
terface Unit.
❒
When the 1394 Interface Unit is in-
stalled successfully, the printer icon
automatically changes from "Use
Printer Offline" to "Ready", accord-
ing to the 1394 interface cable plug.
❒
To use the 1394 Interface Unit, con-
figure the unit from the control
panel of the printer.
Printing with SCSI Print
You can print by directly connecting
the computer to the printer via the
1394 Interface cable and using the
SCSI print client function provided
with Windows 2000.
Limitation
❒
This function is available under
Windows 2000 only. It is not avail-
able under Windows 95/98/Me or
Windows NT 4.0.
❖
❖
❖
❖
Installing the Printer Driver
• “SCSI print” must be set active
from the control panel. For
more information, see p.34
“IEEE 1394 Configuration”.
• If the connected printer's driver
is not installed, follow the pro-
cedures below.
A
Connect this machine to your
computer with the 1394 in-
terface cable.
B
Press
[
Cancel
]
when "Detect
New Hardware Wizard" ap-
pears. If the same wizard re-
appears, press
[
Cancel
]
again.
C
Insert the printer driver CD-
ROM into the computer.
• For the port selection, select the
IEEE 1394 port.
• For more information about the
installation of the printer driv-
er,see p.37 “Installing the Print-
er Driver and Software”.
AP3ENSetup-F-ricoh_FM.book Page 24 Friday, October 5, 2001 2:43 PM
Содержание AP4510
Страница 1: ...Setup Guide...
Страница 10: ...viii...
Страница 40: ...Installing Options 30 2...
Страница 46: ...Configuring the Printer for the Network 36 3...
Страница 66: ...56 UE USA G065 MEMO...
Страница 92: ...Setting Up the Printer Driver and Canceling a Print Job 18 1...
Страница 118: ...Paper and Other Media 44 3...
Страница 128: ...Sample Print Locked Print 54 4...
Страница 170: ...Troubleshooting 96 5 G G G G Slide the stack unit into the Fin isher SR730 A A A A and close the cover B B B B 1 2...
Страница 206: ...Making Printer Settings with the Control Panel 132 6...
Страница 225: ......
Страница 226: ...UE USA G065 8667...
Страница 236: ...viii UNIX Concerning UNIX printing information please visit our Web site or consult your authorized reseller TCP IP UNIX...
Страница 240: ...xii...
Страница 252: ...Windows 95 98 Me Configuration 12 1...
Страница 278: ...Windows NT 4 0 Configuration 38 3...
Страница 338: ...98 UE USA EE GB G065...
Страница 339: ...Copyright 2001...
Страница 340: ...Network Printing Guide UE USA EE GB G065 8605...
Страница 344: ...ii...
Страница 370: ...26 UE USA EE GB G065...
Страница 371: ...Copyright 2001...
Страница 372: ...PostScript 3 Operating Instructions Supplement UE USA EE GB G065 8615...
Страница 373: ...UNIX Supplement...
Страница 408: ...32 EE GB G065...
Страница 409: ...Copyright 2001...
Страница 410: ...UNIX Supplement EE GB...
Страница 418: ...8 Copyright 2001 G065 8537 Printed in Japan UE USA EE GB...


