


LAGUNATOOLS.COM
29
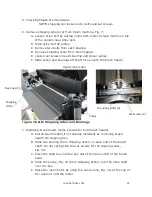
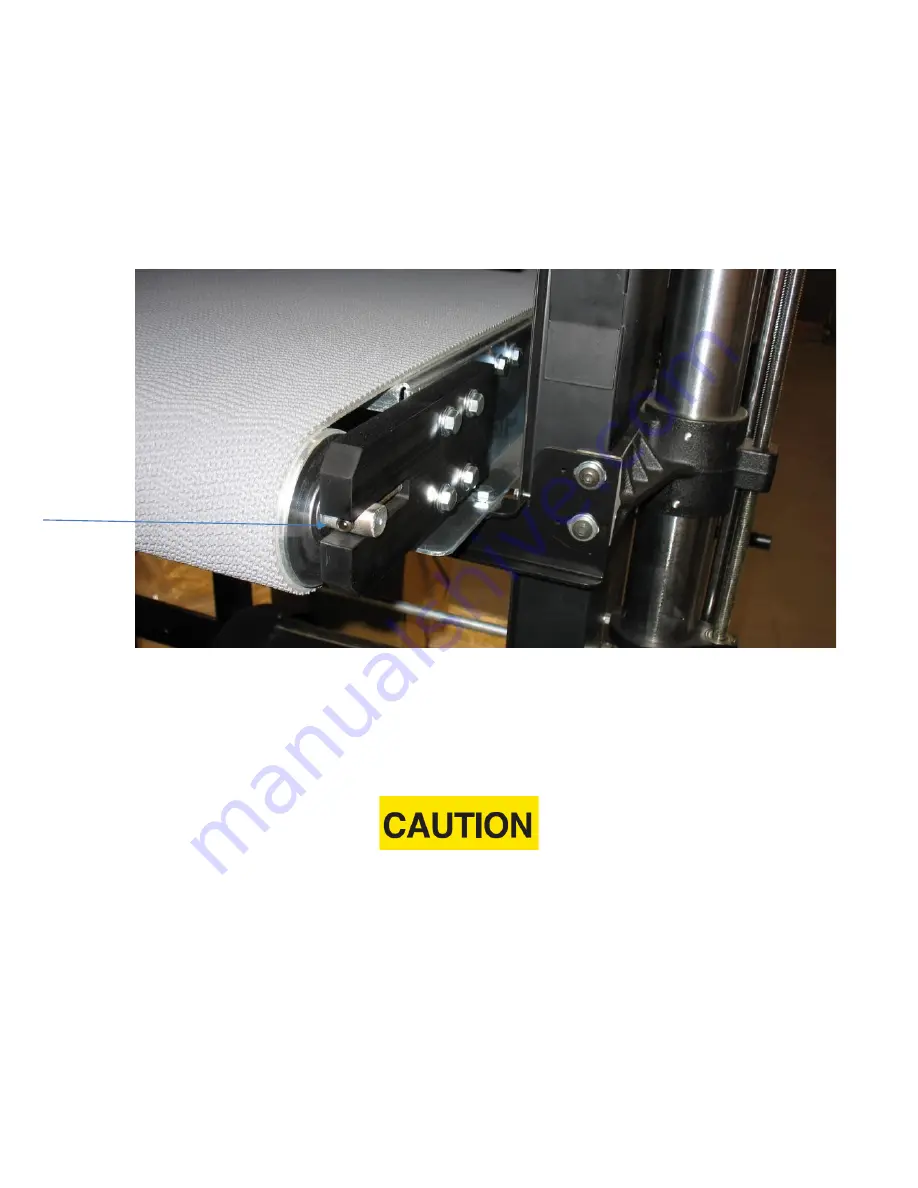
NOTE:
Conveyor belt will require (periodic) adjustment to maintain proper
tacking on conveyor bed. Adjust by tightening the adjustment stud, Fig. 21,
with a
5mm Hex Wrench
) on the side the belt is drifting toward and loosen
the opposite side an equal rotation.
NOTE:
Make tracking adjustments before conveyor belt rubs on side of
conveyor bed.
Figure 21: Conveyor Tracking
9. Each brush head has independent RPM Adjustment, (Fig. 10). While the
brush is running, rotate the handle above each motor to adjust RPM. Confirm
correct RPM setting with sample testing information or your salesperson. RPM
reads out on yellow indicator near motor along column.
Excessive RPM will prematurely shorten brush life!
10. Start dust collector (open blast gates if so equipped).
11. Place material on conveyor and maintain control of stock until the
tension roller is holding stock properly.
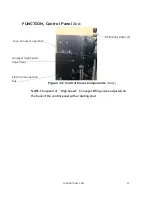
12. To stop, press the
“
OFF
”
buttons for the brush and conveyor, Fig. 20.
Press the “E
-
STOP”
button if there is an Emergency, Fig. 20! To reset the E-
STOP button, twist and pull back on the button.
Tracking Stud
(2)
Содержание SuperMax SuperBrush 24 x 2
Страница 1: ...OWNERS S MANUAL SuperBrush 24 x 2 SuperBrush 36 x 2 Lagunatools com...
Страница 25: ...LAGUNATOOLS COM 25 INTERNAL WIRING Figure 15 Internal Wiring...
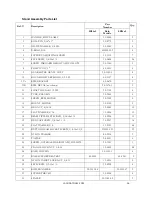
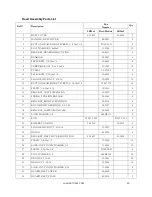
Страница 34: ...LAGUNATOOLS COM 34 Exploded Views STAND ASSEMBLY 1of 2 Figure 22 Stand Assembly...
Страница 35: ...LAGUNATOOLS COM 35 STAND ASSEMBLY 2 of 2 elec hgt adj Figure 23 Stand Assembly electric height adj...
Страница 39: ...LAGUNATOOLS COM 39 HEAD ASSEMBLY Front 1 2 Figure 24 Head Assembly Front 1 2 without brush...
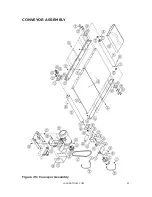
Страница 42: ...LAGUNATOOLS COM 42 CONVEYOR ASSEMBLY Figure 25 Conveyor Assembly...