


5
Applications
5-42
Di5510/Di7210
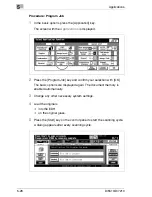
5.13
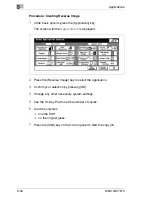
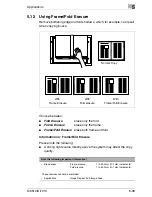
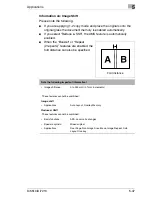
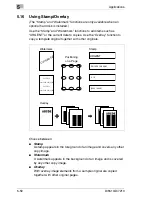
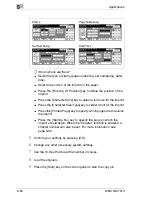
Using Auto Layout
Automatically copy and center the print area of an original onto the paper.
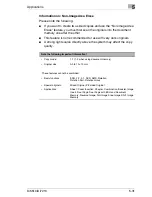
Information on: Auto Layout
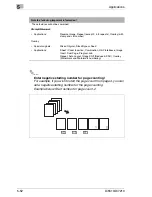
Please note the following:
G
APS and AMS are disabled automatically. You can manually set a
zoom ratio.
G
Frame/fold erasure is enabled automatically. You can disable this
feature manually if you like.
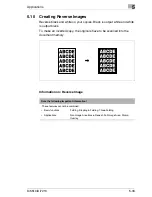
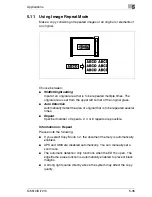
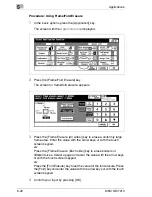
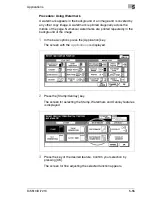
Note the following important information!
• Copy mode:
1-1, 1-2 (only when using document memory)
These features cannot be combined:
• Basic functions:
2-2, 2-1, APS, AMS, Rotation,
Rotation Sort, Rotation Group
• Special originals:
Mixed Original, Z-Folded Original
• Applications:
Sheet / Cover Insertion, Chapter (available if non-image Area
erase is disabled), Combination, Booklet, Image Insert,
Reverse Image, Repeat, Full-Image Area, Image Shift, Overlay,
Overlay Memory
Содержание Di5510
Страница 1: ...Di5510 Di7210 Advanced Information...
Страница 2: ......
Страница 28: ...1 Introduction 1 16 Di5510 Di7210...
Страница 90: ...2 Getting to Know Your System 2 62 Di5510 Di7210 9 Close the finisher door...
Страница 96: ...2 Getting to Know Your System 2 68 Di5510 Di7210...
Страница 148: ...3 Initial Steps 3 52 Di5510 Di7210...
Страница 236: ...4 Basic Functions 4 88 Di5510 Di7210...
Страница 346: ...6 Network functions 6 48 Di5510 Di7210 4 Click Back to return to the Scan Transmission Setting window...
Страница 352: ...6 Network functions 6 54 Di5510 Di7210 3 Configure settings as required...
Страница 387: ...Settings in Key Operator Mode 7 Di5510 Di7210 7 17 7 Press the Return key The key operator mode menu is displayed again...
Страница 427: ...Settings in Key Operator Mode 7 Di5510 Di7210 7 57 7 Press the Return key The key operator mode menu is displayed again...
Страница 434: ...7 Settings in Key Operator Mode 7 64 Di5510 Di7210 8 Press the Return key The key operator mode menu is displayed again...
Страница 455: ...Troubleshooting 8 Di5510 Di7210 8 13 5 Close the finisher door...
Страница 457: ...Troubleshooting 8 Di5510 Di7210 8 15 5 Close the finisher door...
Страница 458: ...8 Troubleshooting 8 16 Di5510 Di7210...


