


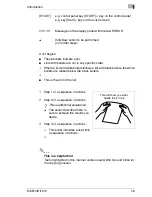

Introduction
1
Di5510/Di7210
1-7
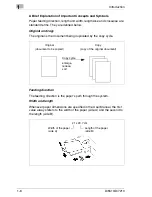
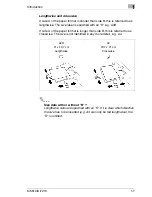
Lengthwise and crosswise
If side A of the paper format is shorter than side B, this is referred to as
lengthwise. The size label is specified with an “R” e.g. A4R.
If side A of the paper format is longer than side B, this is referred to as
crosswise. The size is not identified in any more detail, e.g. A4.
Size data with or without “R”?
Lengthwise sizes are specified with an “R”. If it is clear which direction
the size has to be inserted (e.g. A3 can only be fed lengthwise), the
“R” is omitted.
Lengthwise
Crosswise
21 x 29.7 cm
29.7 x 21 cm
A4R
A4
Содержание Di5510
Страница 1: ...Di5510 Di7210 Advanced Information...
Страница 2: ......
Страница 28: ...1 Introduction 1 16 Di5510 Di7210...
Страница 90: ...2 Getting to Know Your System 2 62 Di5510 Di7210 9 Close the finisher door...
Страница 96: ...2 Getting to Know Your System 2 68 Di5510 Di7210...
Страница 148: ...3 Initial Steps 3 52 Di5510 Di7210...
Страница 236: ...4 Basic Functions 4 88 Di5510 Di7210...
Страница 346: ...6 Network functions 6 48 Di5510 Di7210 4 Click Back to return to the Scan Transmission Setting window...
Страница 352: ...6 Network functions 6 54 Di5510 Di7210 3 Configure settings as required...
Страница 387: ...Settings in Key Operator Mode 7 Di5510 Di7210 7 17 7 Press the Return key The key operator mode menu is displayed again...
Страница 427: ...Settings in Key Operator Mode 7 Di5510 Di7210 7 57 7 Press the Return key The key operator mode menu is displayed again...
Страница 434: ...7 Settings in Key Operator Mode 7 64 Di5510 Di7210 8 Press the Return key The key operator mode menu is displayed again...
Страница 455: ...Troubleshooting 8 Di5510 Di7210 8 13 5 Close the finisher door...
Страница 457: ...Troubleshooting 8 Di5510 Di7210 8 15 5 Close the finisher door...
Страница 458: ...8 Troubleshooting 8 16 Di5510 Di7210...


