

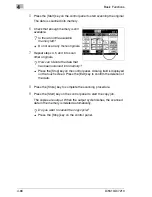
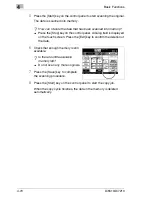


Basic Functions
4
Di5510/Di7210
4-75
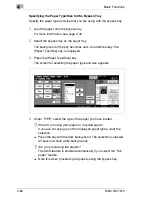
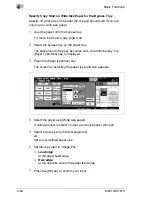
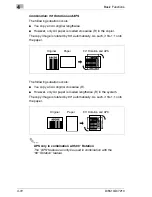
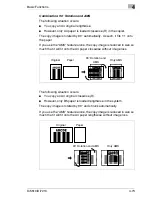
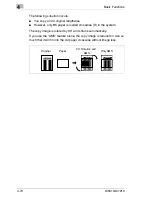
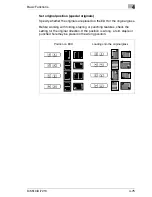
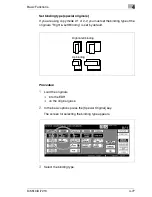
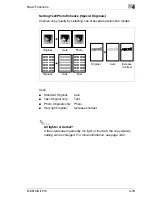
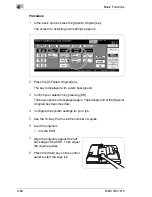
Set original position (special originals)
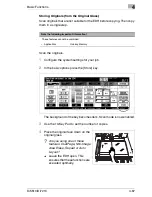
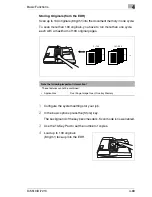
Specify whether the originals are placed on the EDH or the original glass.
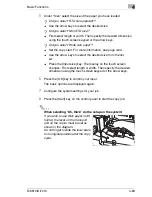
Before working with folding, stapling or punching features, check the
setting for the original direction. If the position is wrong, a fold, staple or
punched hole may be placed in the wrong position.
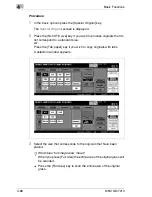
A
Z
A
Z
A
Z
A
Z
A
Z
A
Z
A
Z
A
Z
Position on EDH
Loading onto the original glass
Содержание Di5510
Страница 1: ...Di5510 Di7210 Advanced Information...
Страница 2: ......
Страница 28: ...1 Introduction 1 16 Di5510 Di7210...
Страница 90: ...2 Getting to Know Your System 2 62 Di5510 Di7210 9 Close the finisher door...
Страница 96: ...2 Getting to Know Your System 2 68 Di5510 Di7210...
Страница 148: ...3 Initial Steps 3 52 Di5510 Di7210...
Страница 236: ...4 Basic Functions 4 88 Di5510 Di7210...
Страница 346: ...6 Network functions 6 48 Di5510 Di7210 4 Click Back to return to the Scan Transmission Setting window...
Страница 352: ...6 Network functions 6 54 Di5510 Di7210 3 Configure settings as required...
Страница 387: ...Settings in Key Operator Mode 7 Di5510 Di7210 7 17 7 Press the Return key The key operator mode menu is displayed again...
Страница 427: ...Settings in Key Operator Mode 7 Di5510 Di7210 7 57 7 Press the Return key The key operator mode menu is displayed again...
Страница 434: ...7 Settings in Key Operator Mode 7 64 Di5510 Di7210 8 Press the Return key The key operator mode menu is displayed again...
Страница 455: ...Troubleshooting 8 Di5510 Di7210 8 13 5 Close the finisher door...
Страница 457: ...Troubleshooting 8 Di5510 Di7210 8 15 5 Close the finisher door...
Страница 458: ...8 Troubleshooting 8 16 Di5510 Di7210...


