


4
Basic Functions
4-52
Di5510/Di7210
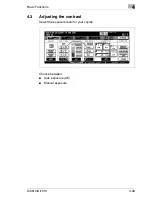
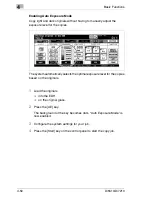
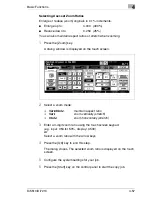
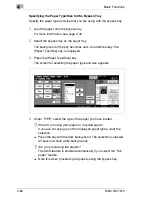
Adjusting the Image Density
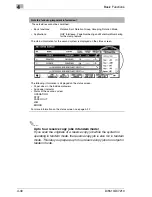
Adapt exposure ranges to suit your copy needs. Select among six
different ranges (0 to 5).
If the copies generally appear too pale, shift the contrast to a darker range
or vice versa. You can adjust the copy density for the features “Auto”,
“Text”, “Photo” and “Increase Contrast”.
1
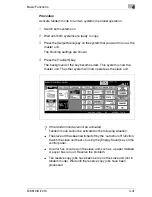
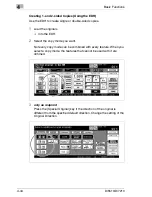
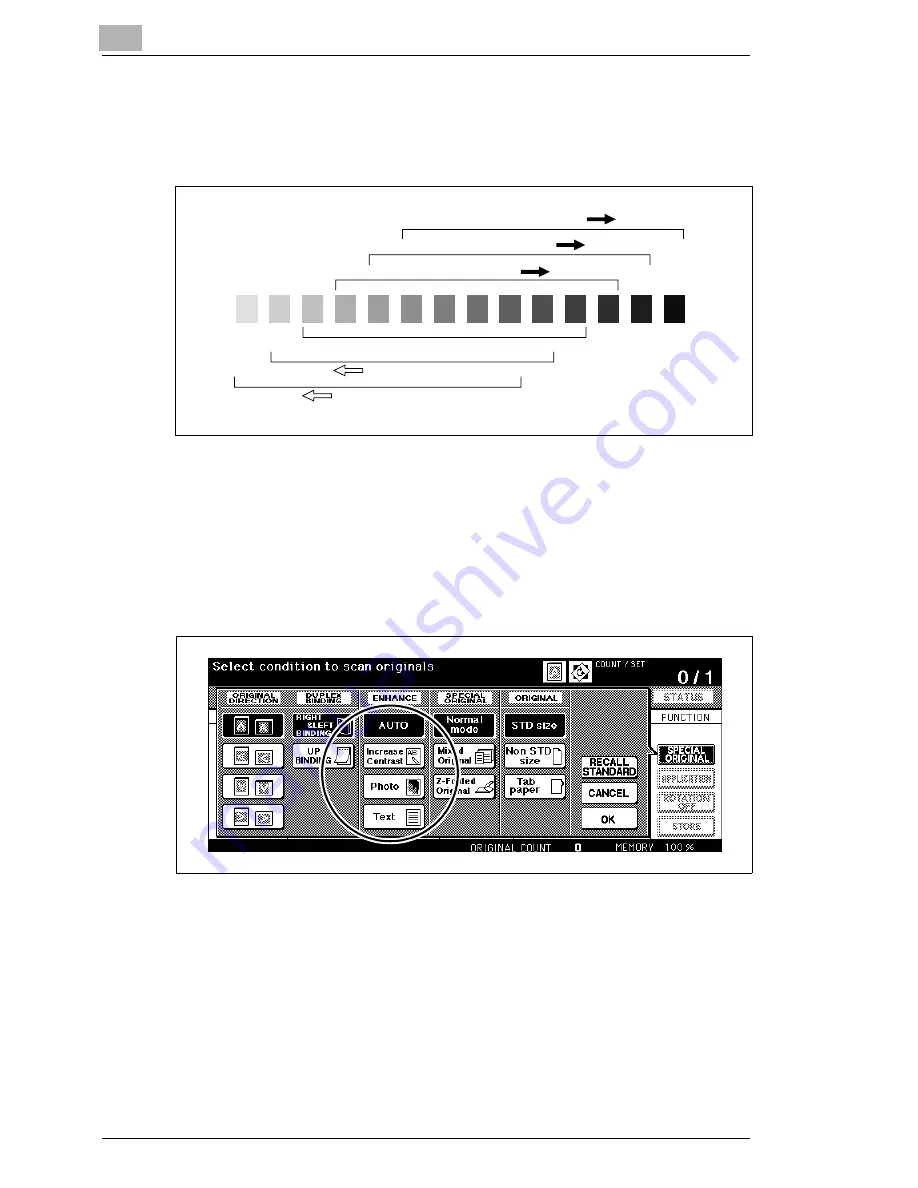
In the basic options press the [Special Original] key.
The
Special Originals
screen is displayed.
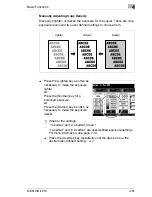
2
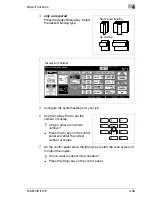
Press the key of the function for which you want to define the exposure
range.
H
Auto
H
Increase Contrast
H
Photo
H
Text
The background of the selected function turns dark.
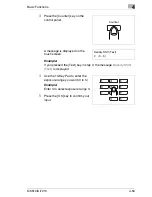
3
2
1
0
4
5
Содержание Di5510
Страница 1: ...Di5510 Di7210 Advanced Information...
Страница 2: ......
Страница 28: ...1 Introduction 1 16 Di5510 Di7210...
Страница 90: ...2 Getting to Know Your System 2 62 Di5510 Di7210 9 Close the finisher door...
Страница 96: ...2 Getting to Know Your System 2 68 Di5510 Di7210...
Страница 148: ...3 Initial Steps 3 52 Di5510 Di7210...
Страница 236: ...4 Basic Functions 4 88 Di5510 Di7210...
Страница 346: ...6 Network functions 6 48 Di5510 Di7210 4 Click Back to return to the Scan Transmission Setting window...
Страница 352: ...6 Network functions 6 54 Di5510 Di7210 3 Configure settings as required...
Страница 387: ...Settings in Key Operator Mode 7 Di5510 Di7210 7 17 7 Press the Return key The key operator mode menu is displayed again...
Страница 427: ...Settings in Key Operator Mode 7 Di5510 Di7210 7 57 7 Press the Return key The key operator mode menu is displayed again...
Страница 434: ...7 Settings in Key Operator Mode 7 64 Di5510 Di7210 8 Press the Return key The key operator mode menu is displayed again...
Страница 455: ...Troubleshooting 8 Di5510 Di7210 8 13 5 Close the finisher door...
Страница 457: ...Troubleshooting 8 Di5510 Di7210 8 15 5 Close the finisher door...
Страница 458: ...8 Troubleshooting 8 16 Di5510 Di7210...


