8. Aligning the unit
ORTHOPANTOMOGAPH OP 2D
109
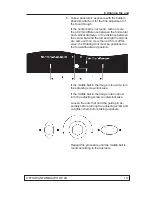
1. Loosen the four locking nuts.
2. To move the beam downwards, turn the height
adjustment screw clockwise.
To move the beam upwards, turn the height
adjustment screw counter clockwise.
3. Tighten the four locking nuts.
4.
PC
: Enable image capture on still mode im-
age.
Still mode can be selected using the s2termi-
nal or through the GUI of the unit.
Содержание ORTHOPANTOMOGAPH OP 2D
Страница 1: ...ORTHOPANTOMOGAPH OP 2D Digital Panoramic X ray Unit Service Manual ENGLISH 216143 rev 1 0 805 5058...
Страница 2: ......
Страница 4: ...IV ORTHOPANTOMOGAPH OP 2D Contents...
Страница 24: ...14 ORTHOPANTOMOGAPH OP 2D 2 Unit Description 2 3 Unit dimensions...
Страница 32: ...22 ORTHOPANTOMOGAPH OP 2D 2 Unit Description...
Страница 33: ...2 Unit Description ORTHOPANTOMOGAPH OP 2D 23 2 6 Block diagram...
Страница 34: ...24 ORTHOPANTOMOGAPH OP 2D 2 Unit Description 2 7 Fuse diagram...
Страница 38: ...28 ORTHOPANTOMOGAPH OP 2D 2 Unit Description...
Страница 43: ...3 Circuit Boards L1200 ORTHOPANTOMOGAPH OP 2D 33 L1200 Block Diagram...
Страница 46: ...36 ORTHOPANTOMOGAPH OP 2D 3 Circuit Boards L1500 L1500 Block diagram...
Страница 50: ...40 ORTHOPANTOMOGAPH OP 2D 3 Circuit Board L1600 L1600 Block diagram...
Страница 54: ...44 ORTHOPANTOMOGAPH OP 2D 3 Circuit Boards L1700 L1700 Block Diagram...
Страница 57: ...3 Circuit Boards L1800 ORTHOPANTOMOGAPH OP 2D 47 L1800 Block diagram...
Страница 61: ...3 Circuit Boards P1910 ORTHOPANTOMOGAPH OP 2D 51 P1910 Block diagram...
Страница 64: ...54 ORTHOPANTOMOGAPH OP 2D 3 Circuit Boards L2000 L2000 Indicator LEDs None L2000 Test Points None...
Страница 66: ...56 ORTHOPANTOMOGAPH OP 2D 3 Circuit Boards L2100 L2100 Indicator LEDs None L2100 Test Points None...


