background image

KARL STORZ AIDA

®


2-7

Description of the program functions

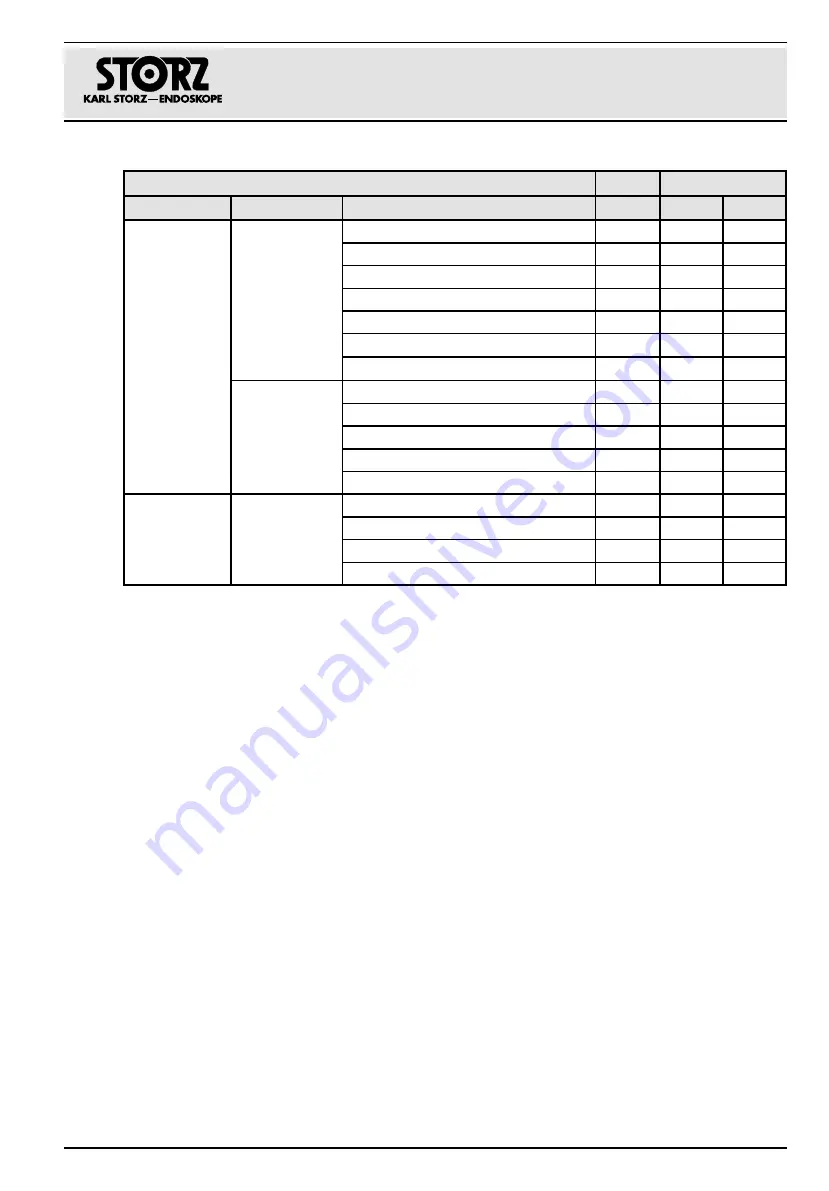
Settings

Access rights

Level 1

Level 2

Level 3

Role 1

Role 2

Role 3

User  
administration

Role 
administration

System Administrator

X

Application Administrator

X

Settings User

X

Super User

X

User

X

Auditor

X

Activate group profiles

X

Authentication Auto login

X

Application

X

Windows

X

Auto logout

X

Timeout

X

Remote  
service

HTTP proxy  
settings

Host

X

Port

X

User name

X

Password

X

Содержание AIDA WD 300

Страница 1: ...KARL STORZ AIDA Rel 1 4...

Страница 2: ...96296084D Register Index Registro System description KARL STORZ AIDA Release 1 4 Software description KARL STORZ AIDA Release 1 4 Instructrion manual KARL STORZ AIDA WD300 WD3504...

Страница 3: ...System description KARL STORZ AIDA Release 1 4...

Страница 4: ...rom KARL STORZ Copyright KARL STORZ 02 2018 It is not permitted to forward or reproduce this document nor to use or disclose the contents thereof unless express consent is given Violators will be liab...

Страница 5: ...ternal Smartscreen and Dual IMAGE1 S withSurgical Screens 2 5 2 2 5 KARL STORZ AIDA WD350 Full HD with external Smartscreen and SCB Devices 2 6 2 2 6 KARL STORZ AIDA WD350 with external Smartscreen un...

Страница 6: ...1 Filing cabinet 4 32 4 6 Communication application area 4 36 4 6 1 StreamConnect 4 36 4 7 Open tasks 4 37 5 Maintenance 5 1 5 1 Safety instructions 5 1 5 2 Reprocessing 5 1 5 2 1 Legal requirements...

Страница 7: ...e identified as such in the respective instruction manuals or if the intended use and interface specifications of the products used in combination permit this 3 3 WARNING The various components of the...

Страница 8: ...laced on the floor 1 4 Safety precautions during operation 3 3 WARNING It is the user s responsibility to make sure all devices connected to the system and the complete system are safe and operate pro...

Страница 9: ...ch the device output sockets and the patient 3 3 WARNING The device is not suitable for operation in potentially explosive atmospheres and oxygenated areas This means for example that when using easil...

Страница 10: ...Safety instructions 1 4 96296083EN BA...

Страница 11: ...21 5 20 0905 24 24 Supported display types 2D 3D 4K 9524NB 9526NBL 9826NB 3D TM 341 9726NB 9619NB 9832NB 3D TM 340 9626NB 9626NB 2 9627NB 9826NB Supported camera types 2D 3D 4K IMAGE1 S IMAGE1 S Ultr...

Страница 12: ...MI Out In ACC Serial 1 Serial 2 LAN2 LAN1 Serial 3 S mart Screen On Air S witch LE D R emoteOn Off DVI FS Line In Line Out 1 4 4 3 3 2 2 1 1 2 3 4 DP2 K bd K bd Kbd Kbd TM340 TM341 Ultra HD 4K Screen...

Страница 13: ...ut to KS 9627NB KS 27 DVI In 1 2 KS 9826NB DVI In KS 9826 32NB 3D DVI In 1 2 Full HD Camera Signal Full HD Backup line DVI D AIDA Control Screen AIDA WD350 TC009 ACC1 ACC1 ACC2 ACC2 USB Printer Full H...

Страница 14: ...d DP Out to KS 9627NB KS 27 DVI In 1 2 KS 9826NB DVI In KS 9826 32NB 3D DVI In 1 2 Full HD Camera Signal Full HD Backup line DVI D AIDA WD300 TC009 ACC3 ACC1 ACC2 ACC4 USB Printer Full HD Backup line...

Страница 15: ...ignal Full HD Backup line DVI D AIDA WD350 TC009 ACC3 ACC1 ACC2 ACC4 USB Printer Full HD Backup line DVI D 32 3D Panel 9832NB 3D 9627NB 9627NB 2 Full HD Screen RS232 TC009 ACC1 ACC1 ACC2 ACC2 Full HD...

Страница 16: ...System description 2 6 96296083EN BB 2 2 5 KARL STORZ AIDA WD350 Full HD with external Smartscreen and SCB Devices...

Страница 17: ...0 ACC3 ACC1 ACC2 ACC4 USB Printer Full HD Backup line DVI D 32 3D Panel 9832NB 3D 9627NB 9627NB 2 Full HD Screen RS232 TC009 ACC1 ACC1 ACC2 ACC2 Full HD DVI D RS232 AIDA Control Screen WM200 Full HD C...

Страница 18: ...ff DVI FS Line In Line Out 1 4 4 3 3 2 2 1 1 2 3 4 DP2 K bd K bd Kbd Kbd TM340 TM341 Ultra HD 4K Screen Ultra HD 4K USB Keyboard Touchpad Ultra HD 4K Camera Signal Backup line DVI D RS232 Touch Contro...

Страница 19: ...41 Ultra HD 4K Screen Ultra HD 4K Camera Signal Backup line DVI D AIDA WD350 TC ACC1 ACC1 ACC2 ACC2 DC 12V Displayport 1 2a USB Printer TM341 Panel TM340 Panel Ultra HD 4K Camera Signal Loop Through F...

Страница 20: ...1 Ultra HD 4K Screen USB Keyboard Touchpad Full HD Camera Signal Loop Through FG card HDMI Out to KS TM340 HDMI In KS TM341 DVI In 1 2 KS 9627NB KS 27 DVI In 1 2 KS 9826NB DVI In KS 9826 32NB 3D DVI I...

Страница 21: ...System description KARL STORZ AIDA 2 11 2 2 10KARL STORZ AIDA WD350 Ultra HD 4K with external Smartscreen and SCB Devices...

Страница 22: ...System description 2 12 96296083EN BB...

Страница 23: ...r by an authorized contractual partner 3 3 WARNING Combinations of medical devices are only assured to be safe if they are identified as such in the respective instruction manuals or if the intended u...

Страница 24: ...3 2 96296083EN BA 3 3 Installing printer 1 Log on to the PC as an administrator 2 Click on Start Nexus SE46 Agent Local Whitelist Manager The following window opens 3 Click on Next The following input...

Страница 25: ...on Next The following window opens The system is now in Service Mode and the printer driver can be installed 1 1 Note Please do not close the window above as additional input is required at a later p...

Страница 26: ...the printer driver has been successfully installed either the system switches to the following screen automatically or it can be reached under Start Device and Printers 1 Click on Add a Printer The f...

Страница 27: ...ut window opens 5 Enter the IP address of the printer in the Hostname or IP address field see note on page 3 3 and click on Next 1 1 NOTE The address in the Port name field is automatically copied fro...

Страница 28: ...the printer driver and click on Next The following window opens The Printer name field shows the printer driver with which the selected printer should be installed The printer is automatically named...

Страница 29: ...ORZ AIDA 3 7 8 Click on Next The following window opens 9 Select Do not share this printer 10 Click on Next The following window opens This window shows that the printer has been successfully installe...

Страница 30: ...083EN BA 12 Now restart the system by clicking Restart 13 Following the restart log on as an administrator The following window opens 14 Select I ve finished updating the system and click on Next The...

Страница 31: ...3 9 15 Click on Next The following window opens 16 Enter additional information on the modifications and then click on Next The following window opens neXus SE46 now generates a new system certificat...

Страница 32: ...Installation 3 10 96296083EN BA 17 Click on Finish and restart the system 18 Log on as an administrator...

Страница 33: ...er as the default printer 3 3 1 Checking the printer installation 1 Start the KARL STORZ AIDA assuming this has not already been done 2 Open the configuration area You can access it at any time by cli...

Страница 34: ...If you have entered the password via the on screen keyboard confirm this entry by pressing the Enter button The configuration area opens 3 In the configuration window click in the left hand column on...

Страница 35: ...ORZ AIDA 3 13 4 Click on the Reporting tab The Reporting selection menu opens 5 Click in the bar next to Printer A list opens listing all the available printers Check whether the installed printer is...

Страница 36: ...Installation 3 14 96296083EN BA 3 4 Configuration Complete configuration of KARL STORZ AIDA is described in the separate software description for the device 96296082EN...

Страница 37: ...entry of the patient data and for the subsequent data storage Whenever possible compile the patient data prior to the procedure and specify whether you wish to work with one or two sources 4 1 2 Warni...

Страница 38: ...considerably a restart is forced once the operation is complete see chapter 4 3 7 4 2 Start screen and navigation 4 2 1 Information bar The information bar is functionally divided into a left and rig...

Страница 39: ...ume settings Microphone settings Configuration Product information System shutdown User currently logged in The user currently logged in is shown at the right hand side next to the user icon Clicking...

Страница 40: ...te Depending on the setting tapping on this pictogram either shuts KARL STORZ AIDA down or logs the user out 4 2 2 Main menu In the main menu you have access to all the modules that belong to the func...

Страница 41: ...or ongoing procedures Previous procedure application area The Previous procedure application area offers you the possibility of displaying previously created patient documentation and completing the d...

Страница 42: ...data for procedure Capture Capturing of still images and video sequences as well as flagging of images Checklist Safety checklist for procedure preparation Edit Checking selecting and editing images a...

Страница 43: ...rd layout will change accordingly 1 1 NOTE The connected keyboard and selected language settings must be compatible Please set the languages accordingly see software description chapter 5 3 General mo...

Страница 44: ...ary also add the preceding zeros when entering the date so that the entry always comprises 8 digits e g 05 05 2012 Simple entry 1 Tap on Patient in the main menu The Patient module is displayed 2 Ente...

Страница 45: ...letely or check and complete the data Tap on Team The Team submenu is displayed 2 Enter all the members of the surgical team completely 3 To enter a team member from a list tap on the symbol to the ri...

Страница 46: ...s The Instruments submenu is displayed 8 Enter the identification number of the instrument tray and the serial number of the endoscope used 1 1 Note After capturing the audio and or video recordings t...

Страница 47: ...the DICOM Worklist must be enabled in the menu General DICOM in the configuration mode 1 1 NOTE The loaded data set is write protected as standard and cannot be changed If you want to clear the loaded...

Страница 48: ...s symbol The list of results is displayed 5 Select the data set you require and tap on Select patient The selected data set is loaded and displayed in the Patient module Loading outline data from the...

Страница 49: ...the loaded data set from the system because of an emergency please read the following section 1 Tap on Patient in the main menu The Patient module is displayed Tap on the Import DICOM Worklist button...

Страница 50: ...dings before switching back to manual data compilation they will be assigned to the new patient 1 Tap on Patient in the main menu The Patient module is displayed 2 Tap on the Modify button at the bott...

Страница 51: ...checklist Finishing the checklist Selecting and starting a checklist 1 Tap on Checklist in the main menu The Select Checklist start screen opens 1 1 NOTE The selection of a checklist cannot be cancele...

Страница 52: ...it the checkpoints of the step a Confirm that the tasks have been completed and all open questions have been answered by placing the required checkmark b Answer closed questions by selecting one of th...

Страница 53: ...re with camera 1 g Preview for capture with camera 2 h Button for image capture i Button for video capture 1 1 NOTE Remote capturing with the foot pedal or the camera head is possible at all times eve...

Страница 54: ...ur own term 1 Open the patient screen 2 In the list of Procedure names select the entry for which you have created the keyword 3 Then go to the Capture module 4 Click on the photo icon a to capture an...

Страница 55: ...rted in the still image and cannot be changed Therefore in this case before capturing the first still image it must be ensured that all relevant patient data ID surname first name date of birth is ent...

Страница 56: ...ing see next chapter 1 1 NOTE The last recording is shown at the top of the list alongside the preview window Pay attention to the time specified for the recording 1 Start a video by clicking button a...

Страница 57: ...ng 1 Tap on the microphone icon a The Microphone operation field opens 2 Place a check mark next to Mute The microphone icon turns orange 3 Tap on the operation field again to close it The microphone...

Страница 58: ...onfusions between the live image from the endoscopic camera and a video recording videos are labeled VIDEO REVIEW when in full screen mode Failure to note the labeling can result in treatment errors 1...

Страница 59: ...on is not saved together with the other data and instead is deleted permanently Forwarding a recording 1 Click on an image or video 2 Select View from the window that appears 3 3 WARNING By routing to...

Страница 60: ...Operation 4 24 96296083EN BA Use the arrow keys a and b to scroll through the captured image and video recordings 1 1 Note The recordings appear in chronological order a b...

Страница 61: ...ng options Setting flags Select all recordings which you wish to label with flags and then tap on Flag Together with Select flags help you to select recordings which you wish to display print or delet...

Страница 62: ...fter the other Printing recordings 3 3 WARNING Print outs may contain errors and must therefore not be used for diagnostics and therapy purposes 3 3 Warning If an anonymous report is printed out there...

Страница 63: ...rs you the following options Editing a still image Select a still image and change the brightness and contrast 1 1 NOTE Changes which you make in the Still editing tab are saved as additional images t...

Страница 64: ...ata storage 1 Tap on Finish 1 1 NOTE If necessary you are requested to complete all data entries The module does not open until all the mandatory fields have been completed Editing of the safety check...

Страница 65: ...ical data carrier 3 3 WARNING The user is responsible for the management of removable data carriers 4 Tap on Save Data storage starts The dialog window Export running opens If you tap on Work list in...

Страница 66: ...the system will carry out a forced restart Please regularly make sure that there are no old images or videos still in the system that are impacting upon the system If the limit for memory usage is co...

Страница 67: ...can be found in the separate instruction manual for the KARL STORZ SCB control NEO system Operating medical devices 1 Tap on Home in the navigation bar 2 Tap on Medical Device Control The SCB screen o...

Страница 68: ...e a self made optical data carrier or a USB stick Data such as images and videos can also be copied from the system to other destinations USB CD DVD and networks such as PACS HIS and AAR Displaying a...

Страница 69: ...arch field or via preselection by pressing the button 3 Select the treatment you wish to copy A window with the still images and videos created in this treatment opens 1 1 Note You can view the data a...

Страница 70: ...nd tap OK Data transfer begins During the copying process the message Preparing procedure data to copy to USB appears The copying process is carried out If the process is not carried out it will be te...

Страница 71: ...A progress bar shows that copying is still running and how much time is remaining The user can choose between Shutdown and Cancel By tapping on Shutdown copying is stopped and the system is shut down...

Страница 72: ...not be available 4 6 1 StreamConnect In the StreamConnect module you operate the StreamConnect server in the client s role StreamConnect enables you to transmit and receive surgical procedures via li...

Страница 73: ...data carrier Saving data 1 Tap on Open tasks The patient data which still needs to be saved is displayed 2 Check the data set a If necessary change the destination directory b If saving data to a CD D...

Страница 74: ...you do not wish to save the data set tap on Remove The data set is permanently deleted 1 1 Note If a task is completed the number of unfinished open tasks in the information bar will decrease or the m...

Страница 75: ...rganizations striving to ensure personal safety must be observed 2 2 CAUTION National laws and regulations must be observed 5 2 2 Safety instructions 3 3 WARNING Risk of infection Incorrectly reproces...

Страница 76: ...urfaces with a dry low lint cloth 5 After using the cloth dispose of this in accordance with the disposal regulations 5 3 Maintenance and repair 5 3 1 Maintenance plan Interval Action Responsibility A...

Страница 77: ...following conditions all assembly operations system expansions readjustments modifications or repairs have been performed by a person or persons duly authorized by KARL STORZ all electrical installati...

Страница 78: ...Maintenance 5 4 96296083EN BA...

Страница 79: ...iene karlstorz com KARL STORZ Endoskopi Danmark A S Skovlytoften 33 2840 Holte Denmark Phone 45 45162600 Fax 45 45162609 E Mail marketing karlstorz dk KARL STORZ Endoscopy UK Ltd 415 Perth Avenue Slou...

Страница 80: ...Branch Room 1805 1807 Building B 18F Beijing IFC No 8 Jianguomenwai Street Chaoyang District Beijing 100022 People s Republic of China Phone 86 10 5638188 Fax 86 10 5638199 E Mail info karlstorz com...

Страница 81: ......

Страница 82: ...KARL STORZ SE Co KG Dr Karl Storz Stra e 34 78532 Tuttlingen Postfach 230 78503 Tuttlingen Germany Telefon 49 0 7461 708 0 Telefax 49 0 7461 708 105 E Mail info karlstorz com www karlstorz com...

Страница 83: ...Software description KARL STORZ AIDA Release 1 4...

Страница 84: ...rom KARL STORZ Copyright KARL STORZ 02 2018 It is not permitted to forward or reproduce this document nor to use or disclose the contents thereof unless express consent is given Violators will be liab...

Страница 85: ...area 2 8 2 6 Configuration for Configuration User 2 9 2 7 Configuration for Application Administrator 2 9 2 7 1 General module 2 9 2 7 2 Capture module 2 18 2 7 3 Checklist module 2 26 2 7 4 Finish mo...

Страница 86: ...Contents II 96296082EN BA 5 Support from the program supplier manufacturer 5 1 5 1 Contact address for the user 5 1 5 2 Service hotline 5 1 5 3 Education training internet etc 5 1...

Страница 87: ...f your network 1 1 Note We recommend that either you or your IT department create a new user account with administrator rights and deactivate the standard administrator account If you do so you must n...

Страница 88: ...the following window then appears 7 Enter the following service key Service MLAACDET ACAA HHTPZATZ Please pay attention to the use of uppercase and lowercase Now enter the reason for your changes and...

Страница 89: ...restart in Service Mode if necessary The system is then restarted in Service Mode and you can continue with the installation 9 Once the installation is completed mark I ve finished updating the syste...

Страница 90: ...6296082EN BA 11 Select Automatically approve all changes and then click on Next the following window then appears 12 Now enter additional information on your changes and click on Next the following wi...

Страница 91: ...o the network or reconnect any data carriers Now perform a system test to verify that the system is working perfectly 1 1 Note The addition of new software or hardware can under certain circumstances...

Страница 92: ...ications Within the scope of available configuration options 2 7 Configuration for Application Administrator on page 2 9 and 2 8 Configuration for System Administrator on page 2 48 a wide range of app...

Страница 93: ...ion to be recorded and described for documentation purposes The audiovisual data which is recorded and forwarded using the KARL STORZ AIDA is for examination and information purposes and not primarily...

Страница 94: ...ng personal user profile Application Administrator Application Administrators Responsible for the configuration of an application Adjusting settings at application level System Administrator Administr...

Страница 95: ...hts Level 1 Level 2 Level 3 Role 1 Role 2 Role 3 General User interface Country X Culture X Keyboard X Startup module X Enable onscreen keyboard X Enter facility name X Operating room name X Activate...

Страница 96: ...l X Enable Worklist X Server AET X Server IP X Port X Date filter X Flat file X Enable MPPS X Server AET X Server IP X Port X Open Commits ID X Time X Status X HL7 General X Query patient data from HL...

Страница 97: ...e format X X Video format X X Video quality X X Video resolution X X Video chaptering X X Maximum size for each video X X Watermark Enable watermark logo X Select watermark logo X Watermark logo scali...

Страница 98: ...X X Data entry User interface Visible sections X Procedure identifier shown in simp le treatment screen X Specify mandatory fields X Team 1 Put together a clinical team X Enter referring physicians X...

Страница 99: ...Role 3 User administration Role administration System Administrator X Application Administrator X Settings User X Super User X User X Auditor X Activate group profiles X Authentication Auto login X Ap...

Страница 100: ...Tap on the tool symbol The login window opens 2 Enter the user details and password and press OK or Enter on your keyboard to confirm User Password OR1User xxxxx OR1Admin xxxxx 1 1 NOTE The password...

Страница 101: ...1 Under Country specify the location 2 Under Culture specify the language variety 3 Under Keyboard specify the keyboard assignment on your keyboard 4 Under Startup module specify which module is to be...

Страница 102: ...nu Activate or deactivate modules depending on whether they should be available to the user or not Display menu In this menu select the screen type 1 Tap the screen type button and choose a model 1 1...

Страница 103: ...yption button will take you to a selection screen where you can choose between two encryption protocols for data transfer ISCL Internet Security Consulting Language or TLS Transport Layer Security If...

Страница 104: ...rver 4 Under Port enter the port for the DICOM Worklist server 1 1 Note With MPPS the option to select different date display options is not available 5 Under Date filter limit the date range which is...

Страница 105: ...ent status of the request List of expected messages Status Description Actions Unknown Unknown error error in retrieving the methods no return value for the status Please re send the Commit request Er...

Страница 106: ...complete At least one object was not stored Normal status Please observe the timeout period and then re send the Commit request StorageNotDone Error when storing the objects on the store server no Com...

Страница 107: ...hospital information system 2 Under Modality name select the name for the AIDA system allocated to you by the IT department 3 Under PID field select the position you would like the patient ID to appe...

Страница 108: ...P enter the IP address of the HL7 server 2 Under Port enter the port for the HL7 server 3 Set the Max send time Send time 60 seconds 4 Under Send HL7 message in type select the message type you are us...

Страница 109: ...KARL STORZ AIDA 2 17 Description of the program functions System menu The system information can be found in the System menu...

Страница 110: ...esolution Video chapter Maximum size for each video Place a check mark next to the relevant check box to activate the appropriate source If the source supports 3D format place a check mark next to 3D...

Страница 111: ...TE Compressed files can contain artifacts and thus must not be used for diagnosis and therapy purposes Video format 1 Select the video format in line with the technical conditions in your facility 1 1...

Страница 112: ...torage space WMV high SD 6 Mbit sec 45 MB min normal SD 3 Mbit sec 23 MB min MPEG2 high 1080p 35 Mbit sec 263 MB min 720p 18 Mbit sec 135 MB min SD 6 Mbit sec 45 MB min normal 1080p 8 75 Mbit sec 65 6...

Страница 113: ...ength of the sections depending on the storage capacity of the intended storage medium 1 1 NOTE When selecting the section length ensure that the file size shown is not greater than the storage space...

Страница 114: ...also specify the data for labeling the recordings Setting up the watermark 1 Place a check mark next to Enable watermark logo 2 Tap the button next to Watermark logo and navigate to where the image fi...

Страница 115: ...the right hand side 5 Set the size of the logo under Watermark logo scaling Check the result in the preview on the right hand side Setting up image labeling 1 Place a check mark next to Enable waterma...

Страница 116: ...or whether to activate the surgical overlay on the surgical screen where the still images are shown Capture feedback position In this section you can set the corner of the screen where the still imag...

Страница 117: ...urce 1 and source 2 at the same time when the footswitch is operated accordingly Select Video start stop Channel 1 if video recording from source 1 is to be started stopped when the footswitch is oper...

Страница 118: ...e preset to match the storage location on the computer s hard disk 1 If necessary specify the storage location for the checklist templates and enter the path under Checklist storage path 2 If necessar...

Страница 119: ...KARL STORZ AIDA 2 27 Description of the program functions 2 Under Vertical alignment of logo specify the vertical alignment of the logo...

Страница 120: ...ap on Remove 3 Repeat the first two steps for all targets which are to be included in data saving 4 For each target specify which data you wish to have saved For this if necessary place or remove the...

Страница 121: ...ith your facility s IT department as regards connection problems Set the Timeout time If only still images are to be saved Timeout 30 seconds If still images and video recordings are to be saved Timeo...

Страница 122: ...interface a single input mask is set up for input of the procedure data Select Image if you want an anonymous report only with the images created and the header Select Image No header if you want an a...

Страница 123: ...enter a designation for the target Under Path enter the path or tap on Browse in order to select the target directory for saving data Place or remove the check mark next to Remove old exports as nece...

Страница 124: ...of the report which is to be added to data saving For each template type select how many columns the report is to be divided into Select Procedure if in the configuration for the user interface sever...

Страница 125: ...ect select Printer and tap on Add Your selection is included in the list of targets 1 1 NOTE If you wish to delete a target from the list highlight it and tap on Remove 2 Specify which data you wish t...

Страница 126: ...Select Simple if in the configuration for the user interface a single input mask is set up for input of the procedure data Select Image if you want an anonymous report only with the images created an...

Страница 127: ...ch you wish to use for automatic printing Reports menu Setting up the surgical report Set up the surgical report in the Reports menu 1 Under Header 1 select a standard title for the surgical report 2...

Страница 128: ...ified number of images for printing has been reached in the Auto print menu 1 Place or remove the check mark next to Enable auto print in order to activate or deactivate automatic printing 2 Under Nam...

Страница 129: ...r extended patient entry Define the scope of documentation which is to be available for each procedure Place a check mark next to Team related data if the surgical team is to be documented in full Pla...

Страница 130: ...are to be included for data entry here Team 1 and Team 2 menu Creating changing and removing resources In the input masks Team 1 and Team 2 enter the existing personnel resources so as to make these...

Страница 131: ...pment In this input mask enter the available IDs of trays instrument trays and the serial numbers of endoscopes so as to make these available to the user in the selection lists on the user interface 1...

Страница 132: ...ng ones Creating a new entry 1 1 NOTE The procedure list is pre set as per the DICOM standard Consult with the PACS archive management before making any changes 1 Tap on Add 2 Enter the medical specia...

Страница 133: ...41 Description of the program functions Creating keywords 1 Mark an entry in the Procedure name column 2 Then click on Add a in the Keywords column 3 Enter a keyword in the orange field 4 Press OK to...

Страница 134: ...f Application Administrator Once logged in the Manage profile dialog window will appear 2 Click on the selection list and select the entry Default Profile 3 Then click on Edit Once the configuration s...

Страница 135: ...the Manage profile dialog window will appear 2 Enter the desired group name in the text field e g Gynecology 3 Then click on Create 1 1 Note Once the configuration screen has opened you will be able...

Страница 136: ...should only be created if an Attending Physician wishes to make settings that deviate from his or her assigned standard or group profile In order to set up a user profile the user account will need to...

Страница 137: ...default or group profile loaded for the procedure including the import and export destinations for example and the configuration of the Capture module If the procedure is concluded via the Exit module...

Страница 138: ...xit the configuration in order to save it 4 Please open the configuration again and go to the Data entry Team 1 screen The imported entries are displayed under Physicians 1 1 Note In order to be able...

Страница 139: ...Web based KARL STORZ third party products may only be used if they have been verified and approved by KARL STORZ Additional system information can be found in the KARL STORZ AIDA white paper For furt...

Страница 140: ...tem menu In the System menu you can manage various system settings such as network or WLAN settings Security menu In the Security menu you can increase the system security Activate access control You...

Страница 141: ...ation message that will be displayed to all users once they have logged in This message is stored in the Microsoft Active Directory as standard If this message is not pre stored you can create the tit...

Страница 142: ...stem Administrator Administrators IT department Adjusting settings at operating system level Application Administrator Application Administrators Responsible for the configuration of an application Ad...

Страница 143: ...OR1Admin X To use your own groups e g when using the Microsoft Active Directory you can replace the pre defined data with your own group names in the relevant text fields As access rights for the appl...

Страница 144: ...Enter the user to be notified automatically after start up 1 1 Note If Application is not activated no user will be notified after start up Auto login Windows only accessible for System Admin 1 Place...

Страница 145: ...tivated a user will need to log in to Windows manually in the Microsoft Windows Active Directory each time the system is started up Auto logout after completion of the procedure 1 Place a check mark n...

Страница 146: ...A Description of the program functions Auto logout after timeout 1 Place a check mark next to Automatic switch off after timeout If no action is performed within the specified time the current user wi...

Страница 147: ...chnician with direct VNC access to the KARL STORZ AIDA via a secure connection Depending on the hospital network configuration it may be necessary to enter details of an HTTP proxy host in order to es...

Страница 148: ...ng Remote Service Windows services 1 If possible start the services by tapping on Service or entering Service in the search field Deactivating Axeda Desktop Server service 1 Right click on Axeda Deskt...

Страница 149: ...tions 2 Set startup type to Disable 3 Stop the service by clicking on Stop 4 Click on Apply 5 Close the window by clicking on OK Deactivating the RDM Connector 1 Right click on RDMConnector and select...

Страница 150: ...2 58 96296082EN BA Description of the program functions 2 Set startup type to Disable 3 Stop the service by clicking on Stop 4 Click on Apply 5 Close the window by clicking on OK...

Страница 151: ...Remote Service 1 Log on to the system as the Administrator 2 Restart the Computer Management console 3 Open Computer Management local Service and Applications Services 4 Select the Axeda Desktop Serve...

Страница 152: ...A Description of the program functions 6 Set start type to Automatic 7 Activate the RDM Connector service 8 Open Properties The RDM Connector Properties window opens 9 Set start type to Automatic 10 R...

Страница 153: ...3 1 Requirements The AIDA recovery USB stick is inserted 3 2 KARL STORZ AIDA recovery 1 Start the WD300 2 To access the drive selection window press the F12 key as soon as the KARL STORZ window opens...

Страница 154: ...the above window this is SanDisk This is normally the third entry in the list 5 Select the USB drive as the boot device and confirm the selection by pressing the Enter button The following screen appe...

Страница 155: ...Data backup and reorganization KARL STORZ AIDA 3 3 6 Click on Troubleshoot in the next window 7 Select System Image Recovery in the Advanced options window...

Страница 156: ...when the C drive is open 9 Click on Windows 10 1 1 Note If you have installed a new SSD drive this window may not appear The following window opens 10 Select the operating system a If the latest back...

Страница 157: ...reorganization KARL STORZ AIDA 3 5 b If no backup is found or if you wish to select a particular backup click on Select a system image followed by Next The following window opens 11 Select a backup an...

Страница 158: ...Data backup and reorganization 3 6 96296082EN BA 12 Select a backup in the following window and click on Next The following window opens in both cases 13 Click on Next...

Страница 159: ...Data backup and reorganization KARL STORZ AIDA 3 7 14 Confirm the settings for the backup by clicking on Finish 15 Confirm the warning by clicking on Yes 16 Wait until re imaging is complete...

Страница 160: ...ce re imaging is complete the WD300 starts automatically after 60 seconds 17 You can skip the waiting time by clicking on Restart now The WD300 normally starts up in Windows 10 Drive C now has the sam...

Страница 161: ...ows Explorer in the task bar The Windows Explorer window opens 2 Select the DATA D drive 3 Select all the folders and data in this drive 4 Click on the right mouse button The selection menu opens 5 Cl...

Страница 162: ...Data backup and reorganization 3 10 96296082EN BA 8 Click on Paste The data are saved on the removable media e g USB DISK Copying progress is displayed...

Страница 163: ...reorganization KARL STORZ AIDA 3 11 3 4 Deleting data on the D hard disk drive 1 Select the DATA D drive 2 Click on the right mouse button The selection menu opens 3 Click on Format 4 The Format DATA...

Страница 164: ...Data backup and reorganization 3 12 96296082EN BA 5 Click on Start The data are deleted from the drive...

Страница 165: ...n exceptional situations 4 1 Hard shutdown If you want to perform a hard shutdown proceed as follows 1 Press the power button for 5 seconds The system is switched off 4 2 Reboot cold warm start 1 1 No...

Страница 166: ...Behavior in exceptional situations 4 2 96296082EN BA...

Страница 167: ...r KARL STORZ SE Co KG Abt Reparaturservice Take off Gewerbepark 83 78579 NEUHAUSEN Germany 5 2 Service hotline Tel 49 0 7461 708 980 E mail technicalsupport karlstorz com 5 3 Education training intern...

Страница 168: ...Support from the program supplier manufacturer 5 2 96296082EN BA...

Страница 169: ......

Страница 170: ...KARL STORZ SE Co KG Dr Karl Storz Stra e 34 78532 Tuttlingen Postfach 230 78503 Tuttlingen Germany Telefon 49 0 7461 708 0 Telefax 49 0 7461 708 105 E Mail info karlstorz com www karlstorz com...

Страница 171: ...Instruction manual KARL STORZ AIDA WD 300...

Страница 172: ...rom KARL STORZ Copyright KARL STORZ 02 2018 It is not permitted to forward or reproduce this document nor to use or disclose the contents thereof unless express consent is given Violators will be sued...

Страница 173: ...o check and inform 1 3 1 6 Intended use of the device 1 3 1 6 1 Labeling 1 3 1 6 2 Standards and dirctives 1 3 1 6 3 Intended use 1 4 1 6 4 Contraindication 1 4 1 6 5 Warnings and cautions 1 4 1 7 Amb...

Страница 174: ...processing 5 1 5 2 1 Legal requirements 5 1 5 2 2 Safety instructions 5 1 5 2 3 Required reprocessing agents 5 1 5 2 4 Required reprocessing materials 5 2 5 2 5 Wipe down disinfection 5 2 5 3 Maintena...

Страница 175: ...exercise actual physical authority over the device during operation It is incumbent upon the operator to provide a safe device and properly instruct the user in the operation and intended use of the d...

Страница 176: ...l commissioning procedure which has been properly carried out The device must be thoroughly cleaned and disinfected before initial use 1 4 2 Availability of the instruction manual The instruction manu...

Страница 177: ...anual please consult your supplier for your own safety 1 6 Intended use of the device 1 6 1 Labeling CE conformity marking With this marking the manufacturer declares the compliance of the product wit...

Страница 178: ...able display devices The display of image signals which do not originate from a KARL STORZ device may only be used for information purposes The data recorded with the system may only be used for docum...

Страница 179: ...s before use 1 7 Ambient conditions for operation and storage Different ambient conditions apply for the operation and intermediate storage of the device 1 7 1 Ambient conditions for storage and trans...

Страница 180: ...o KG a KARL STORZ subsidiary or your specialist dealer for information on your local collection point if you permanently decommission the device with the aim of disposal 3 3 Warning The device must be...

Страница 181: ...putting your patients personnel or yourself at risk 3 3 WARNING Installation and commissioning of the device must only be performed by authorized qualified technicians from KARL STORZ SE Co KG who hav...

Страница 182: ...of patients 3 3 WARNING The device is only voltage free when the power plug has been disconnected 3 3 WARNING The device must be positioned so as to ensure that the power connection can simply be disc...

Страница 183: ...pheres and oxygenated areas This means for example that when using easily combustible and explosive inhalation anesthetics or mixtures thereof the device must not be operated in demarcated hazard zone...

Страница 184: ...Safety instructions 2 4 96296081EN BA...

Страница 185: ...ferring and displaying video and audio signals from the integrated signal sources to the integrated peripheral devices Recording saving editing forwarding and printing medical examinations and interve...

Страница 186: ...itation CE Konformit tskennzeichnung With this marking the manufacturer declares the compliance of the product with the appli cable standards and directives 3 2 2 Front of device Follow instructions f...

Страница 187: ...ternal live parts during use 3 3 WARNing A regulated voltage of 12 V is connected to Pin 4 7 The corresponding ground is provided via Shield and Pin 5 Danger of electric shock Do not touch during oper...

Страница 188: ...for the USA and Canada With this marking the manufacturer declares compliance with the certification requirements Alternating voltage Date of manufacture CE conformity marking With this marking the m...

Страница 189: ...Power consumption max 5 2 A Dimensions mm 305 x 74 5 x 355 W x H x D Max weight 6 0 kg Degree of protection against elektric shock I Degree of protection against humidity IPX0 Hard disk capacity 2 TB...

Страница 190: ...B 3 0 j Mini jack audio OUT k Mini jack audio IN l DE 9 serial interface 12 VDC 2 A Pin 4 7 m Phoenix 2 pole On Air Lamp for future use n Phoenix 4 pole Remote acti vation of KARL STORZ OR1 FUSION o 2...

Страница 191: ...nnected using the power cord supplied by KARL STORZ or a comparable power cord with a national test seal 3 3 WARNING The use of freely accessible multiple socket outlets is not permitted 3 3 WARNING M...

Страница 192: ...or operation as described in section 1 7 Consideration of the technical data as described in section 3 3 Consideration of the free area dimensions based on the graphic below to guarantee that the devi...

Страница 193: ...medical devices the guidelines of the Employer s Liability Insurance Association and equivalent organizations striving to ensure personal safety must be observed 2 2 CAUTION National laws and regulat...

Страница 194: ...he medical device 3 Allow the disinfectant to take effect observing the instructions of the disinfectant manufacturer 4 At the end of the necessary exposure time wipe the surfaces with a dry low lint...

Страница 195: ...ersons duly authorized by KARL STORZ all electrical installations in the room in which the system is installed and operated meet the applicable laws and standards and the devices have been used in acc...

Страница 196: ...Maintenance 5 4 96296081EN BA...

Страница 197: ...h 2 m 1 1460795 AIDA Recovery USB Stick 1 WA1000C DP 1 2 4K 60Hz DeLock connecting cable length 1 8 m 1 20040086 DVI connecting cable for WD300 length 2 m 2 4800288 HDMI to DVI cable length 2 m 2 2022...

Страница 198: ...Accessories 6 2 96296019EN BA Article Article no Designation Quantity 96296081EN User Manual Contained in Folder 96296084D 1 Instruction manual KARL STORZ AIDA WD 300...

Страница 199: ...u have any further questions please contact your local representative or our service department 3 3 Warning The use of portable and mobile RF equipment may have an impact on this or other pieces of me...

Страница 200: ...tons Line In Out 1 8 3 x Audio In Out Lemo 5 pole 3 0 5 x Footswitch RS232 1 3 0 9 x Control cable RS232 2 3 0 9 x Bar code scanner RS232 3 12 VDC 3 0 9 x SmartScreen Power supply DVI 3 0 9 x Monitor...

Страница 201: ...emissions acc to CISPR 11 Complies with Group 1 The device uses RF energy only for its internal function Therefore its RF emissions are very low and are not likely to cause interference in nearby elec...

Страница 202: ...nt Surges acc to IEC 61000 4 5 1 kV push pull voltage 2 kV common mode voltage Complies 1 kV push pull voltage 2 kV common mode voltage The quality of the supply voltage should correspond to that of a...

Страница 203: ...470 GMRS 460 FRS 460 FM 5kHz Hub 1 kHz Sinus 2 0 3 28 710 704 bis 787 LTE Band 13 17 Puls modulatio 217 Hz 0 2 0 3 9 745 780 810 800 bis 960 GSM 800 900 TETRA 800 iDEN 820 CDMA 850 LTE Band 5 Puls mod...

Страница 204: ...information provided by the manufacturer of the transmitter and d is the recommended separation distance in meters m The field strength of stationary transmitters at all frequencies on sitea should be...

Страница 205: ...elow Nominal power of transmitter W Separation distance d m according to frequency of transmitter 150 kHz to 80 MHz P d 3 5 3 80 MHz to 800 MHz P d 3 5 3 800 MHz to 2 5 GHz P d 3 7 0 01 0 12 0 12 0 23...

Страница 206: ...ed including interference that may cause undesi red operation Contains FCC ID PD98265NG 7 2 2 Canada This device complies with Industry Canada s licence exempt RSSs Operation is subject to the follo w...

Страница 207: ...storz fi KARL STORZ GmbH Co KG Representation Office Kestucio g 59 08124 Vilnius Lithuania Phone 370 68567000 E Mail ausra kukeniene karlstorz com KARL STORZ Endoskopi Danmark A S Skovlytoften 33 2840...

Страница 208: ...Street Kwun Tong Kowloon Hong Kong People s Republic of China Phone 852 28 65 2411 Fax 852 28 65 4114 E Mail inquiry karlstorz com hk KARL STORZ Endoscopy Shanghai Ltd Beijing Branch Room 1805 1807 Bu...

Страница 209: ......

Страница 210: ...KARL STORZ SE Co KG Dr Karl Storz Stra e 34 78532 Tuttlingen Postfach 230 78503 Tuttlingen Germany Telephone 49 0 7461 708 0 Fax 49 0 7461 708 105 Email info karlstorz com www karlstorz com...

Отзывы: