Installation
KARL STORZ AIDA
®
3-11
19.
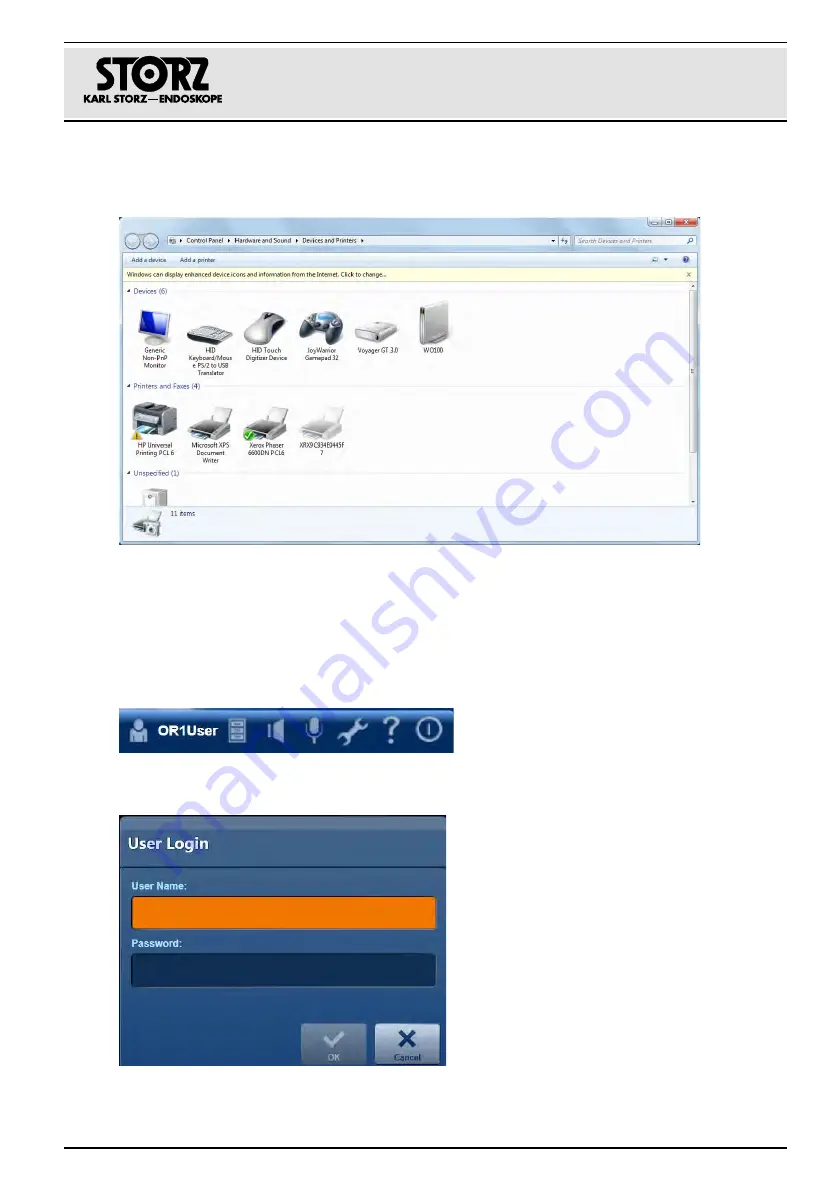
Click on
Start\Devices and Printers
.
$
The following window opens:
$
The selected printer has now been installed successfully.
20.
Select this printer as the default printer.
3. 3. 1 Checking the printer installation
1. Start the KARL STORZ AIDA
®
, assuming this has not already been done.
2. Open the configuration area.
You can access it at any time by clicking on the tool symbol in the header.
1. Tap on the tool symbol.
$
The login window opens.
2. Enter the user details and password and tap
OK
or
Enter
on your keyboard to confirm.
1
Содержание AIDA WD 300
Страница 1: ...KARL STORZ AIDA Rel 1 4...
Страница 3: ...System description KARL STORZ AIDA Release 1 4...
Страница 10: ...Safety instructions 1 4 96296083EN BA...
Страница 22: ...System description 2 12 96296083EN BB...
Страница 32: ...Installation 3 10 96296083EN BA 17 Click on Finish and restart the system 18 Log on as an administrator...
Страница 78: ...Maintenance 5 4 96296083EN BA...
Страница 81: ......
Страница 83: ...Software description KARL STORZ AIDA Release 1 4...
Страница 164: ...Data backup and reorganization 3 12 96296082EN BA 5 Click on Start The data are deleted from the drive...
Страница 166: ...Behavior in exceptional situations 4 2 96296082EN BA...
Страница 168: ...Support from the program supplier manufacturer 5 2 96296082EN BA...
Страница 169: ......
Страница 171: ...Instruction manual KARL STORZ AIDA WD 300...
Страница 184: ...Safety instructions 2 4 96296081EN BA...
Страница 196: ...Maintenance 5 4 96296081EN BA...
Страница 209: ......


