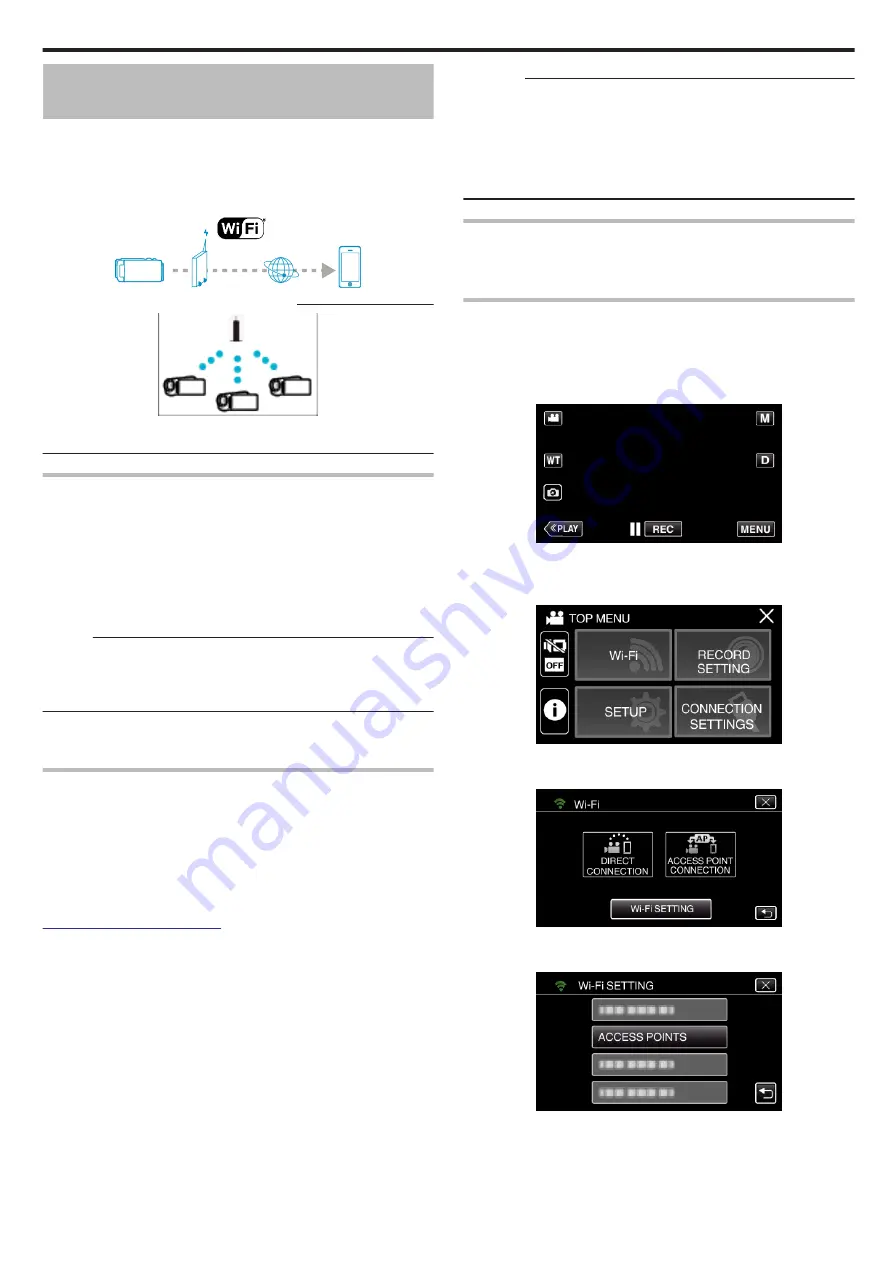
Image Monitoring via the Internet
(OUTDOOR MONITORING)
You can check the image on the camera via internet connection with a
smartphone (or computer).
* To use this function, it is necessary to prepare for an UPnP (Universal Plug
and Play) compatible wireless LAN router, and an internet connection from
which the global IP address can be obtained.
0
Recording of videos and still images may be performed while monitoring.
.
Setting Multiple Cameras in the Same Network
:
.
0
To set up multiple cameras, you need to fix the HTTP ports for each of the
cameras.
What You Need
0
Smartphone or Windows computer
0
Wireless LAN router that supports UPnP (use a product that has a Wi-Fi
certification logo)
To check whether UPnP is supported, please refer to the instruction manual
of the wireless LAN router in use.
0
Internet connection with an obtainable global IP address
* Global IP address is an IP address that is specific in all over the internet.
For more information, contact your internet service provider.
Memo :
0
Depending on the wireless LAN router in use and signal strength, you may
experience connection problems or slow connections.
0
When zooming is operated by using the smartphone or computer, it may
take longer for responses as compared to the manual operations.
o
Setting (Once setting is done, start from the “Operation
Method” below)
Obtaining a Dynamic DNS (DDNS) Account
By obtaining a dynamic DNS account, this unit may be used on the web as
usual even if the IP address changes when making an access to this unit via
internet.
0
Only the JVC dynamic DNS service can be set on this camera.
To obtain (register) an account, perform the following steps.
1
Access the following URL from a browser and register for an account.
(Operation on a computer or smartphone)
https://dd3.jvckenwood.com/user/
Set your e-mail address as the username.
2
Check that you have received a confirmation e-mail to the address used
in registration, and access the URL stated in the e-mail.
(Operation on a computer or smartphone)
3
Set the username and password used in registration on the camera.
(Operation on this camera)
Generate the QR code, and register the username and password to the
camera.
4
Execute OUTDOOR MONITORING.
(Operation on this camera)
If “OUTDOOR MONITORING” is executed while dynamic DNS settings
are enabled, the camera will access the dynamic DNS server.
5
Tap “CAMERA NETWORK INFO.” to check that the URL (WAN) is
displayed.
(Registration complete)
Caution :
0
Registration will be canceled if you do not access the dynamic DNS server
from the camera within 3 days.
Perform the registration again in this case.
0
Registration will not be complete if the username and password set on this
camera are incorrect. Be sure to check that they are correct.
0
Successful registration will be canceled too if you do not access the
dynamic DNS server for 1 year.
Creating a QR Code
o
Enter values in the required items for outdoor monitoring.
For details, refer to “OUTDOOR MONITORING” (
Registering the access points (wireless LAN router) to this
unit
o
Wi-Fi Protected Setup (WPS) Registration
1
Tap “MENU”.
(Operation on this camera)
.
0
The top menu appears.
2
Tap the “Wi-Fi” (
Q
) icon.
(Operation on this camera)
.
3
Tap “Wi-Fi SETTING”.
(Operation on this camera)
.
4
Tap “ACCESS POINTS”.
(Operation on this camera)
.
Using Wi-Fi
105
Содержание Everio GZ-RX610
Страница 1: ...CAMCORDER C6B7_RX615_EU_EN Detailed User Guide GZ RX615 GZ RX610 ...
Страница 80: ...Windows 7 1 Click the start button 2 Right click Computer 3 Click Properties Copying 80 ...
Страница 108: ...6 Operate from a smartphone 0 How to operate from a smartphone Using Smartphone Applications A p 114 Using Wi Fi 108 ...
Страница 179: ......


