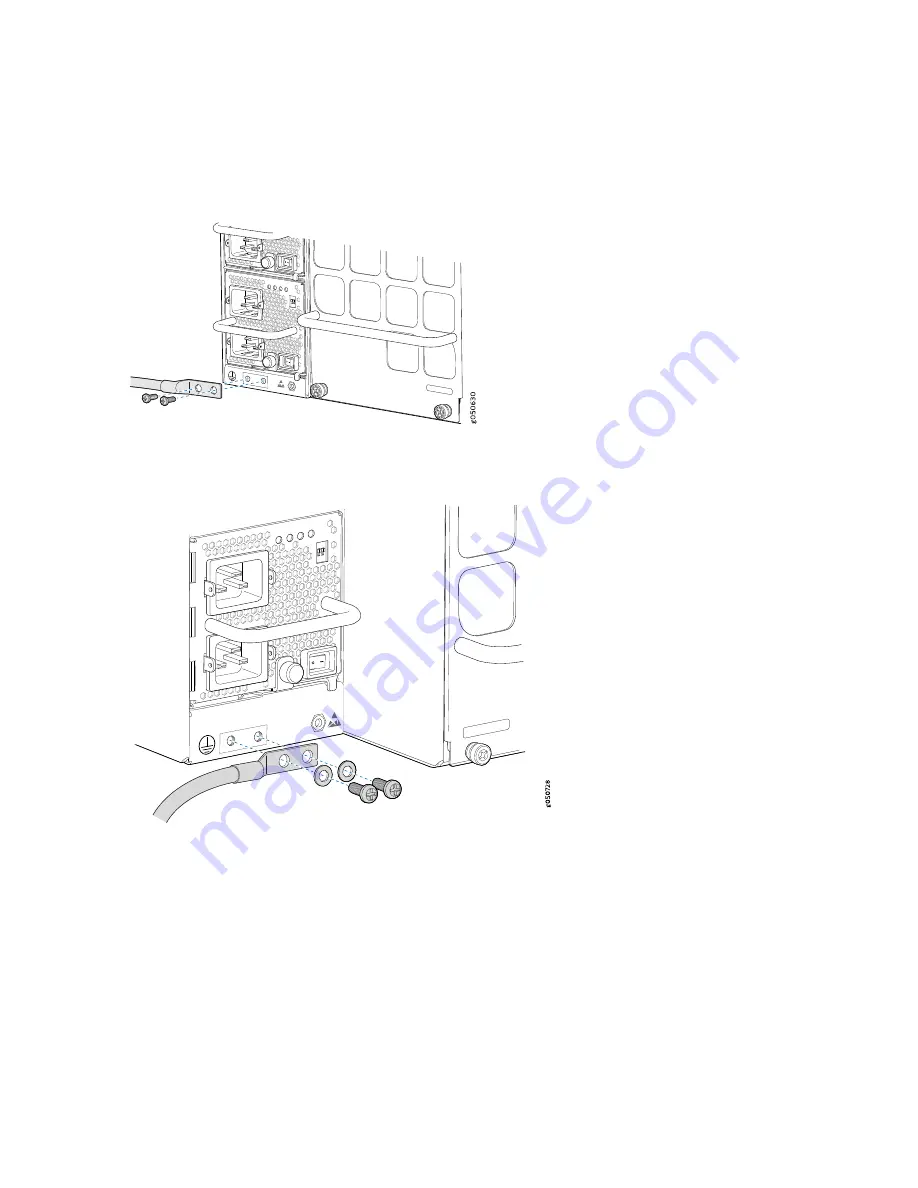
5. Place the chassis grounding lug and cable over the PEM nuts with the cable connection pointing to the
left. See
and
.
Figure 65: Connecting a Grounding Cable to the MX10008
Figure 66: Connecting a Grounding Cable to the MX10016
6. Place the two screws over the grounding lug and grounding cable.
7. Tighten the two 10-32 screws using a Phillips screwdriver applying torque between of 30.1 in.-lb (3.4
N-m) and 42.04 in.-lb (4.75 N-m).
8. Dress the grounding cable and ensure that it does not touch or block access to other device components
and that it does not drape where people could trip over it.
162
Содержание MX10008
Страница 1: ...MX10008 Universal Routing Platform Hardware Guide Published 2019 11 11 ...
Страница 19: ......
Страница 89: ......
Страница 129: ......
Страница 170: ......
Страница 179: ...Figure 76 Removing Fan Tray JNP10008 FAN from an MX10008 FAN FTC SIB STATUS FAN FTC SIB STATUS 181 ...
Страница 183: ...Figure 79 Installing Fan Tray JNP10008 FAN in an MX10008 FAN FTC SIB STATUS FAN FTC SIB STATUS 185 ...
Страница 278: ...5 CHAPTER Troubleshooting Hardware Restoring Junos OS 283 Alarm Messages 287 ...
Страница 279: ......
Страница 287: ......
Страница 318: ...Restricted Access Warning 321 ...
Страница 333: ...Jewelry Removal Warning 336 ...
Страница 336: ...Operating Temperature Warning 339 ...
Страница 345: ...DC Power Disconnection Warning 348 ...
Страница 349: ...DC Power Wiring Sequence Warning 352 ...
Страница 352: ...DC Power Wiring Terminations Warning 355 ...
Страница 361: ...Translation The emitted sound pressure is below 92 dB A per GR63 CORE 364 ...


