Maestro Software
14
12.
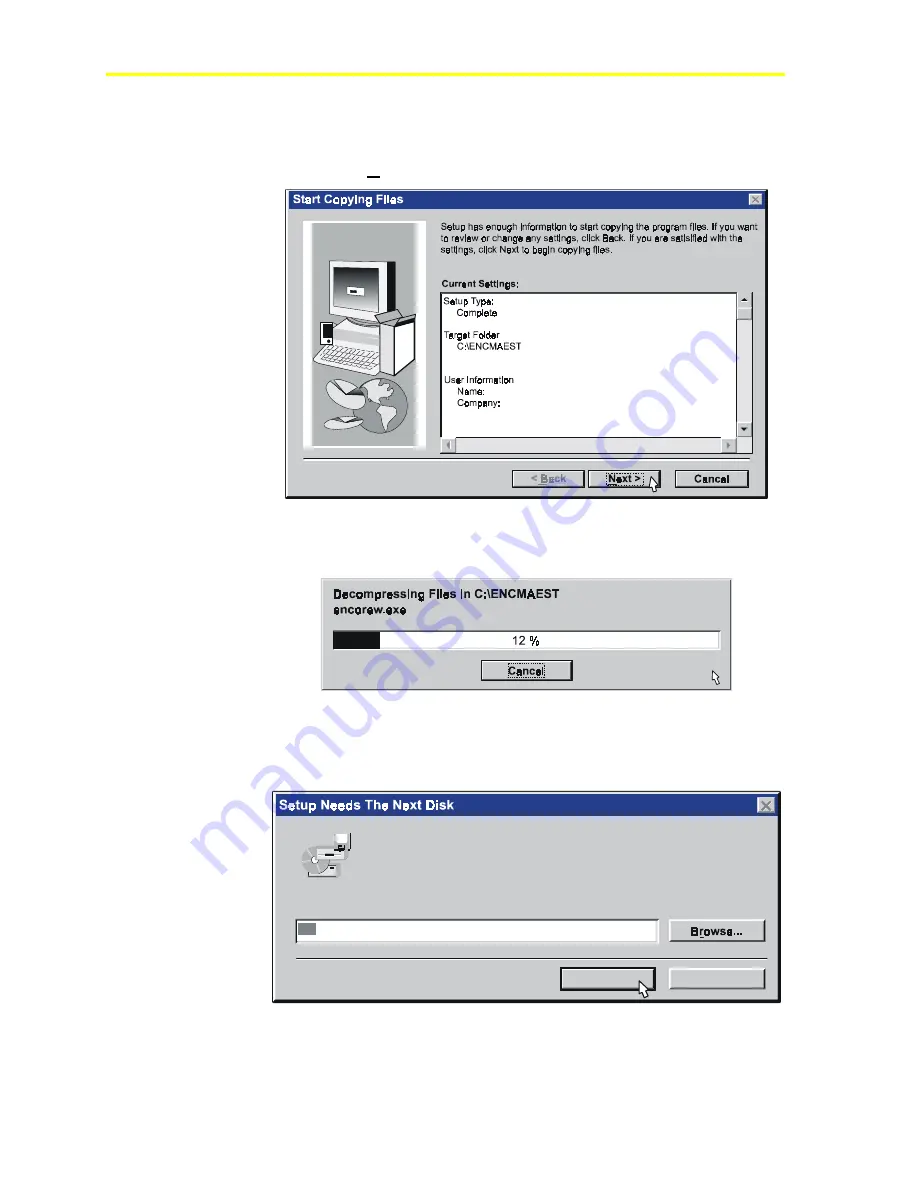
Review the program settings—Click the Back button to change
settings.
13.
Click the
Next
button to continue.
Figure 11: Installation Settings Screen
Result: The files begin to install.
Figure 12: Installation Status Screen
14.
At the following prompt, remove Disk 1 from the drive, and insert
Disk 2 into the drive.
Cancel
OK
Path:
A:\
Please insert the next disk, Disk 2. If the files on this disk can be found
in another location, for example, in another drive, enter its full path or
click the Browse button to select its path.
Figure 13: Next Disk Dialog
15.
Click the
OK
button to continue.
Содержание PENN ACT2
Страница 16: ...Maestro Software 16 ...
Страница 30: ...Maestro Software 30 ...
Страница 38: ...Maestro Software 38 3 Click the unit you wish to view Figure 32 Select Unit Dialog 4 Click the OK button ...
Страница 90: ...Maestro Software 90 ...
Страница 102: ...Maestro Software 102 ...
Страница 104: ...Maestro Software 104 ...


