26
COVERING AND FINISHING THE MODEL
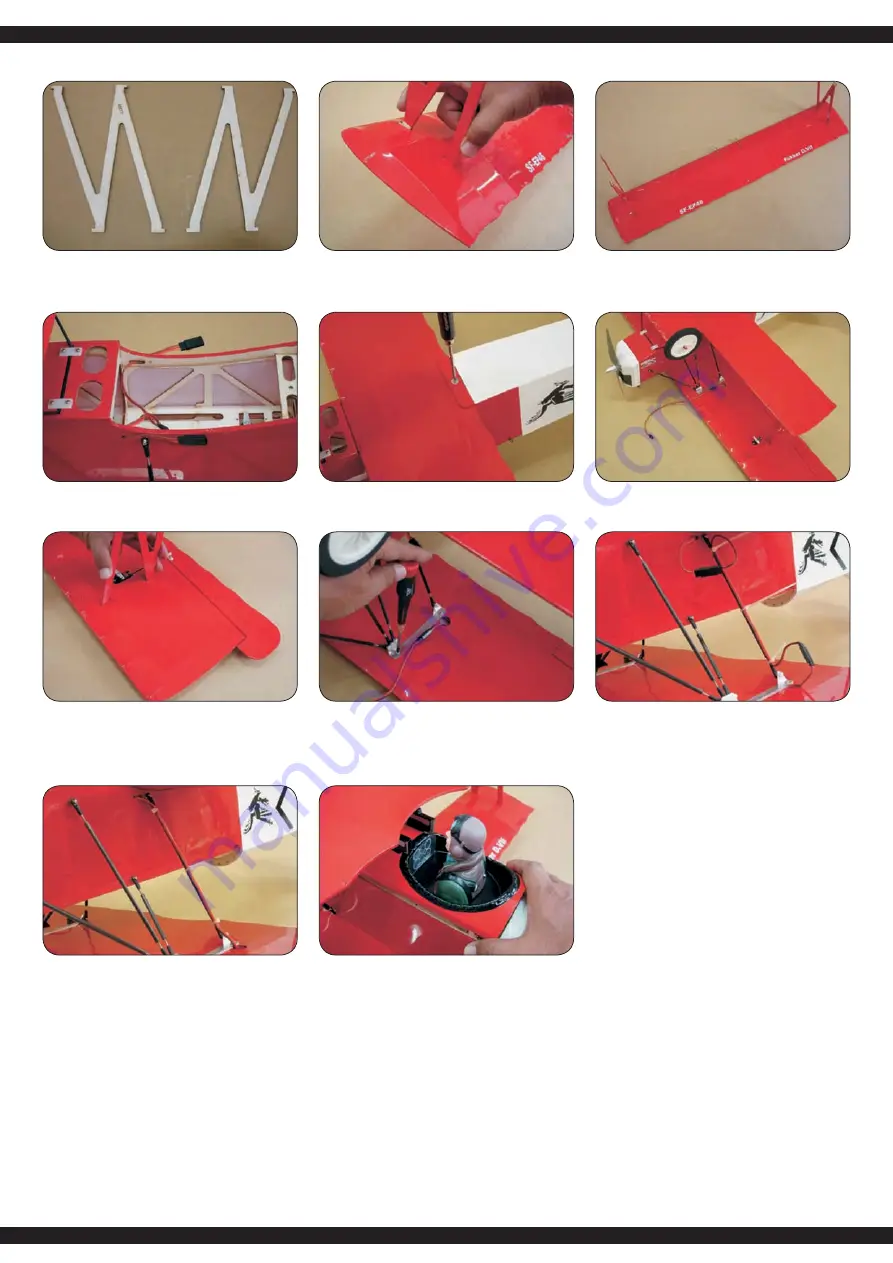
Connect the extension with Y-harness. Leave some cables on
both ends and secure the cable on the CF tubes with cable-tie.
Use side-cutter to remove the excess cable-tie. The length of the
servo cable must be enough to the exit hole; if too short, please
attach a extension.
The cable and plug outside the fuselage can be put into the exit
holes on the fuselage and the top wing for neat looking. (When
disassemble the main wing set: 1) Get the plug out the exit hole
on the top wing. 2) Release the tapping screws on the CF tubes
aluminum mount; remove the aluminum mount and thread the
screws back to the top wing for avoiding missing. 3) Release the
screws on the bottom wing. 4) Press the ends of the
struts and remove the strut out of the slots.
When install the canopy into fuselage; make sure its front can
be fitted into the latch on the fuselage; press the canopy into its
location, the locking spring will get stuck and won‘t lose off easily.
Move the locking spring backward can remove the canopy for
changing battery very easy.
The completion of installing right and left wood struts into the
bottom wing.
Pull the two ends of the Y-harness out of the holes on the sides
of front fuselage.
Secure the bottom wing onto the fuselage.
Install the wood struts (MW17) into the long slot on the top wing.
Use the same way to make the struts get stuck inside the slot.
Place the CF tubes aluminum mount align the holes on the top
wing and secure it in place with 2.6x8mm tapping screws. Re
-
lease the screws and drop instant glue into the screw holes. Let
dry and secure the screws back again for reinforcement the se-
curing ability.
Install the wood strut into the bottom main wing. Before inserting
into the slots; please use fingers to press both sides of strut near,
then into the slots and release fingers. The whole wood strut will
be stuck inside the slot.
2 pieces of MW17 are for the strut. Use sanding paper to trim
the surface and round edge (1R). The tips on the top and bottom
don‘t need the round edge.Wait for applying film.
Содержание Fokker DVII
Страница 16: ...16...
Страница 17: ...17...
Страница 27: ...27 Ailerons Elevator Rudder Installation of Electrical...


